Weapon Modeling Tutorial Shock Rifle
Weapon Modeling Tutorial - Shock Rifle
Contents
Introduction
This tutorial covers the high level concepts involved in modeling a weapon for Unreal Tournament. It is not a detailed 3d modeling tutorial. There are many application specific 3d tutorials on the web and game art specific forums like www.polycount.com that cover game modeling in further detail. 3d modeling (as with any art form) is a very personal process and your detailed approach will vary greatly depending on the modeling packages you use and your skill level. Hopefully this gives you a big picture view and some insight to my approach to weapon modeling.
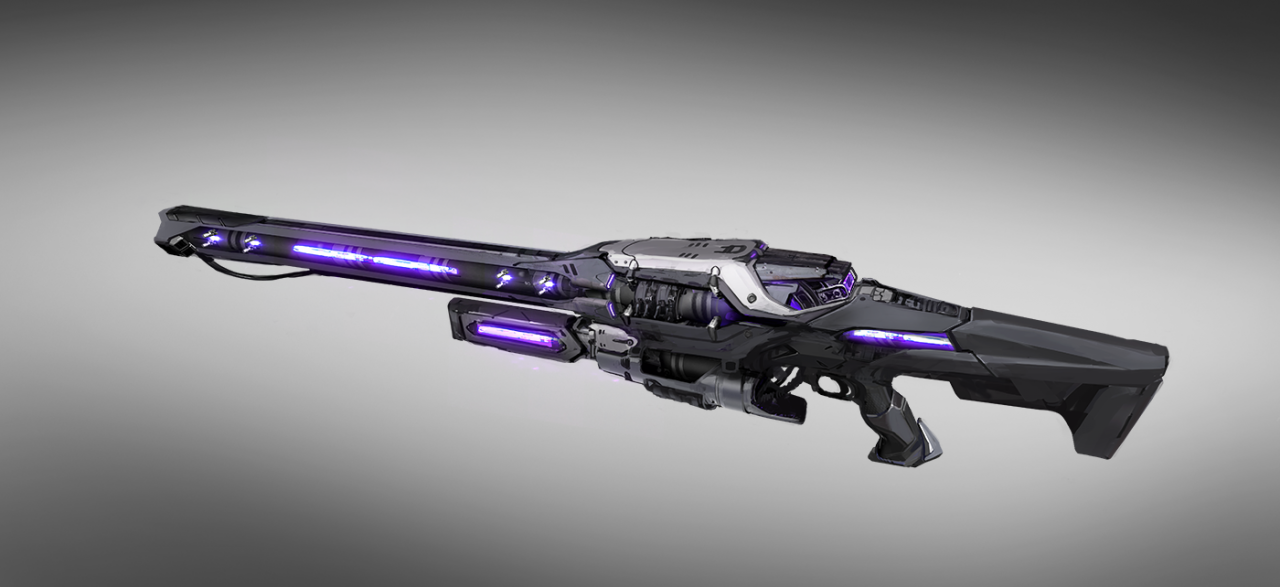
Concept
Chris Perna worked with community member Gooba to come up with the concept.
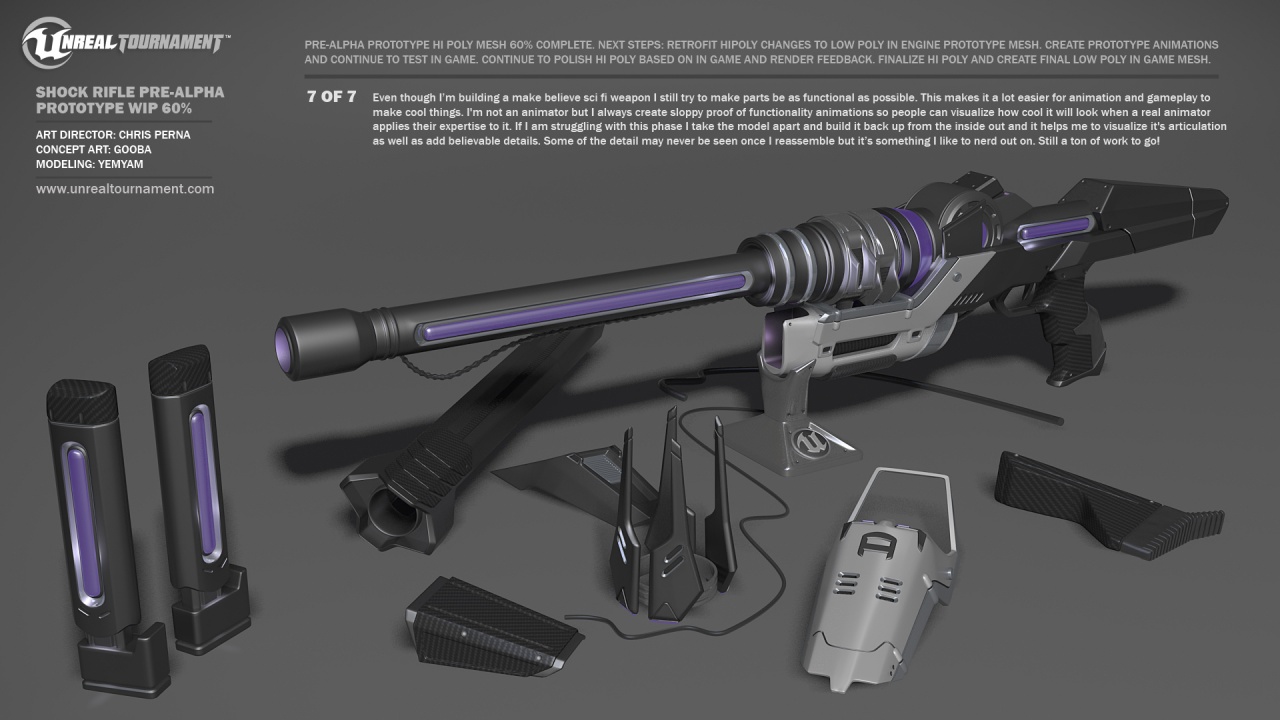
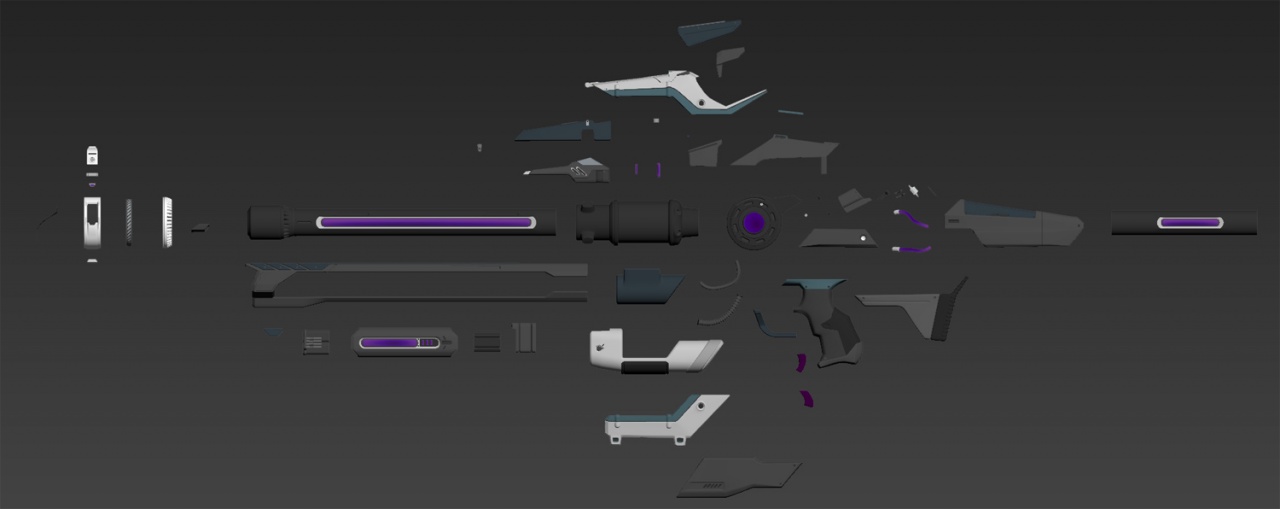
Rough Geometry Modeling
For the first phase my primary goal is to get all of the base shapes roughed in. I'm not worried about size/proportion accuracy as much as I am getting all of the parts created. The sooner you get all the parts in some form the sooner you can start refining the shapes. Everybody is different but I find I am much faster at the start if I just focus on creating geometry versus creating perfect geometry.
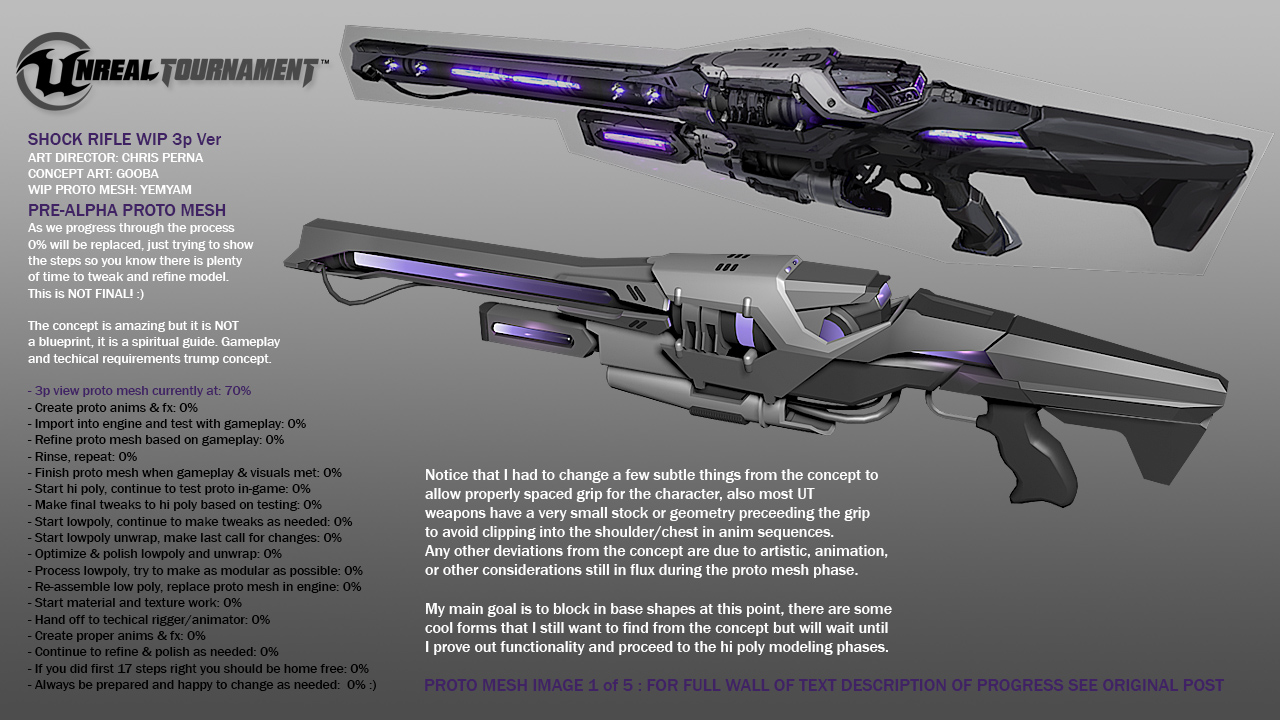
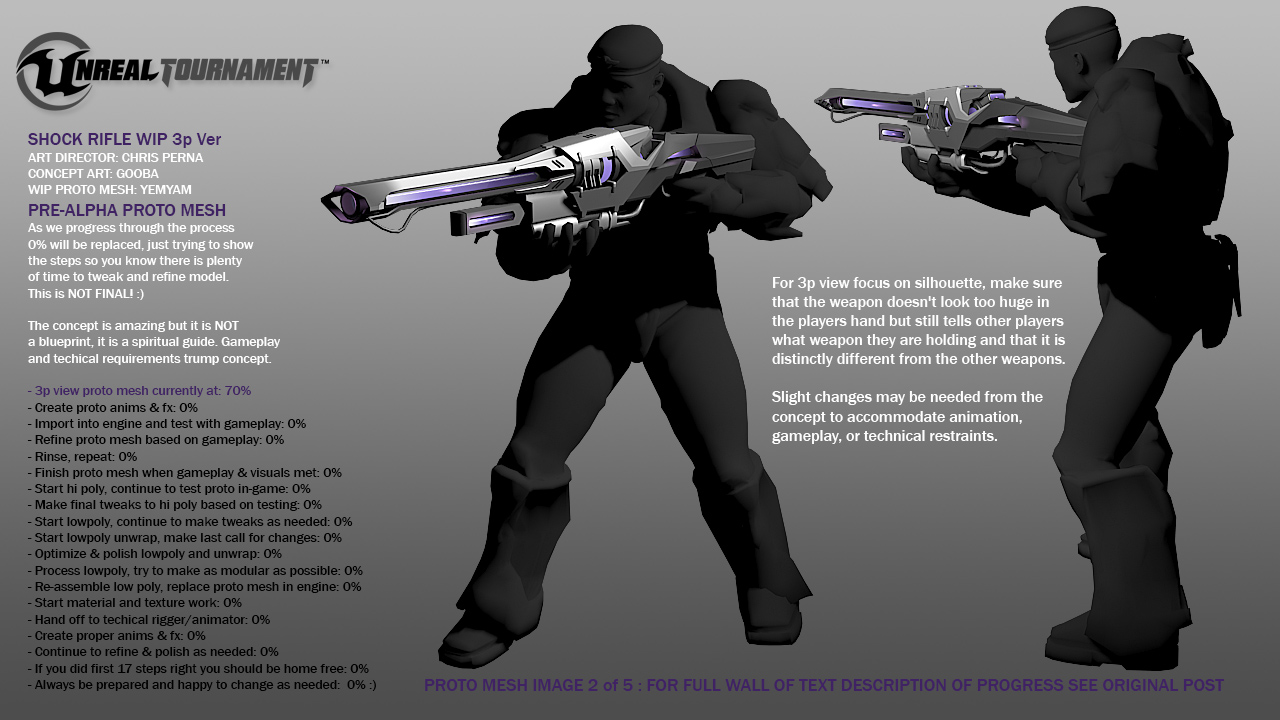
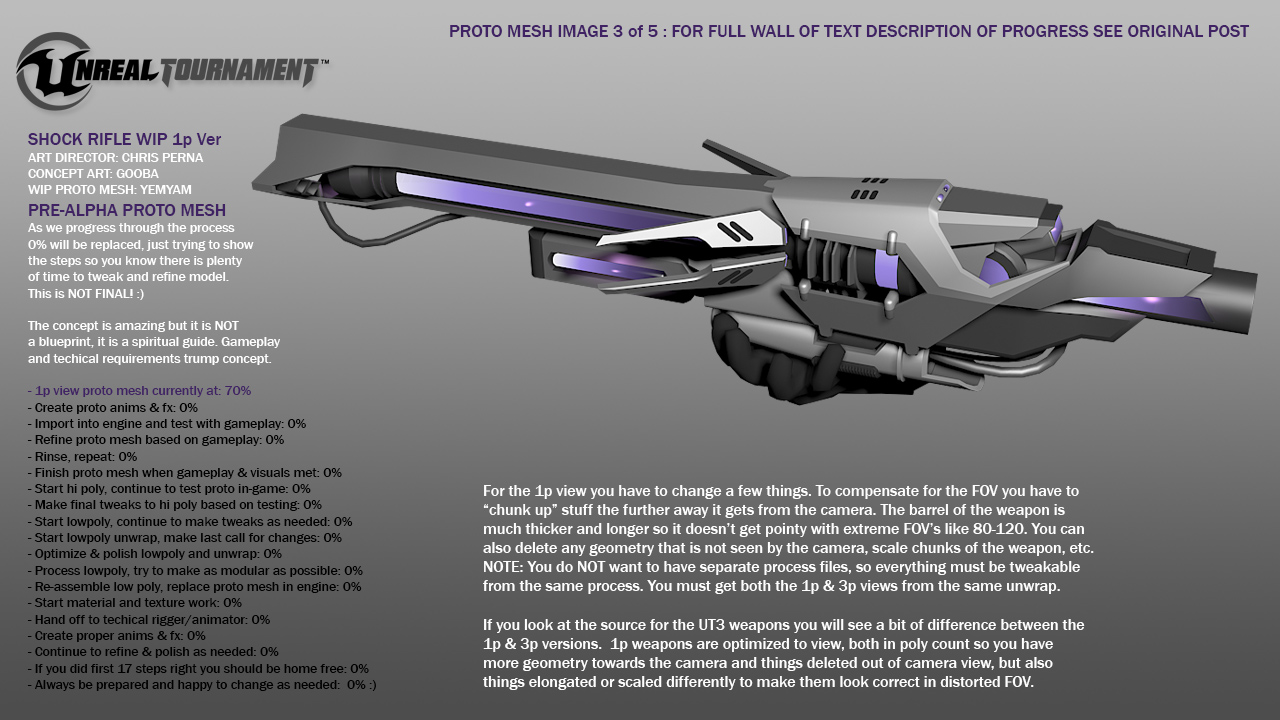
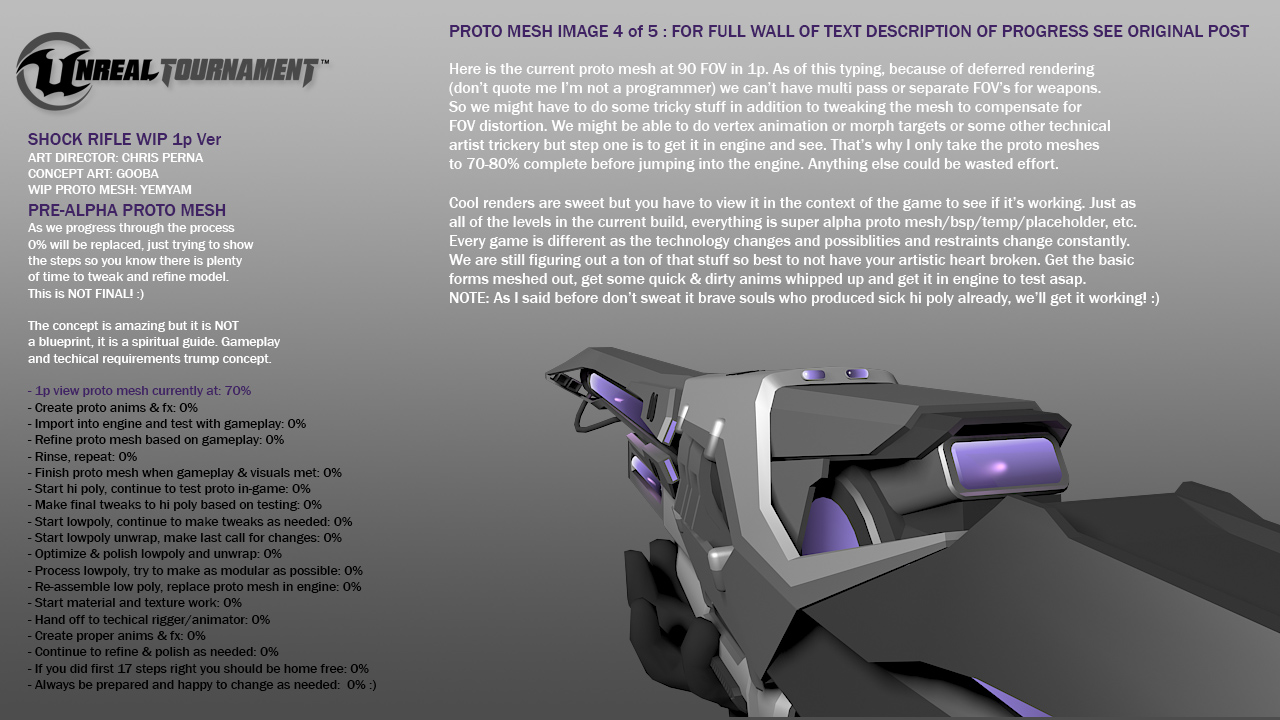
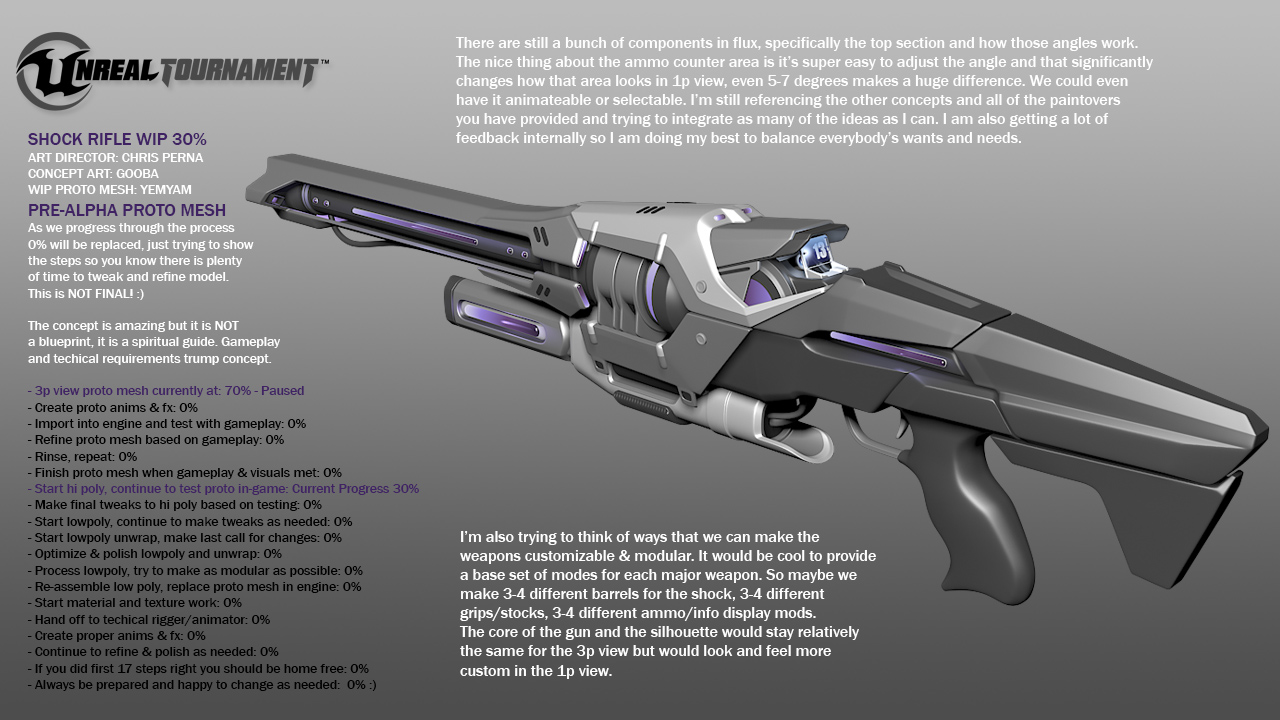
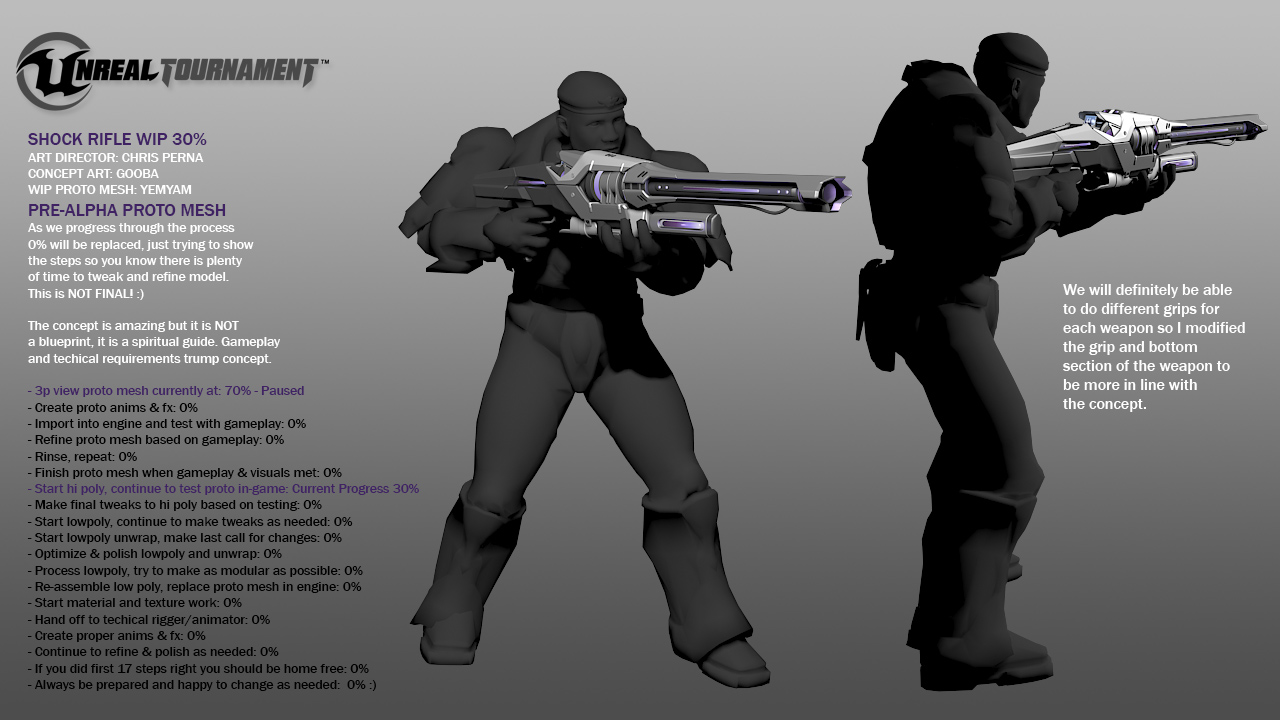
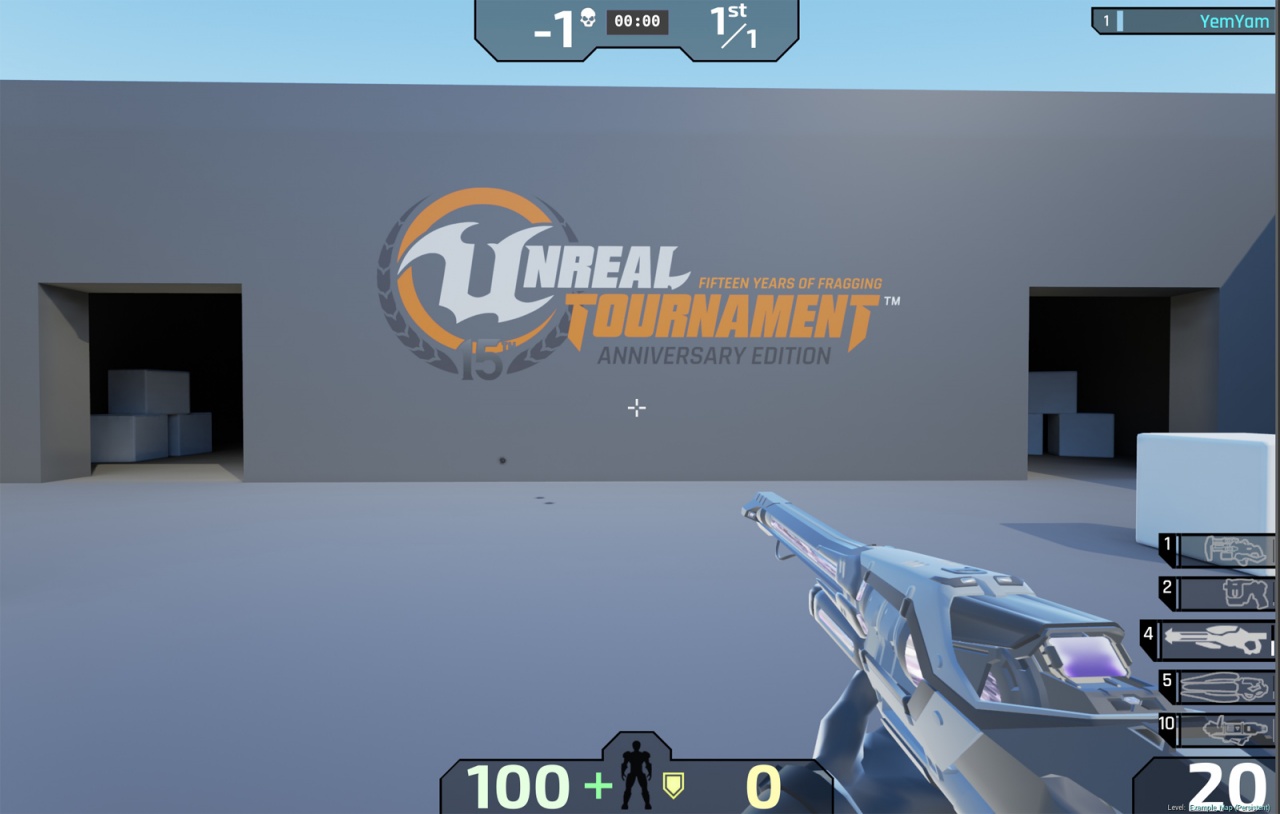
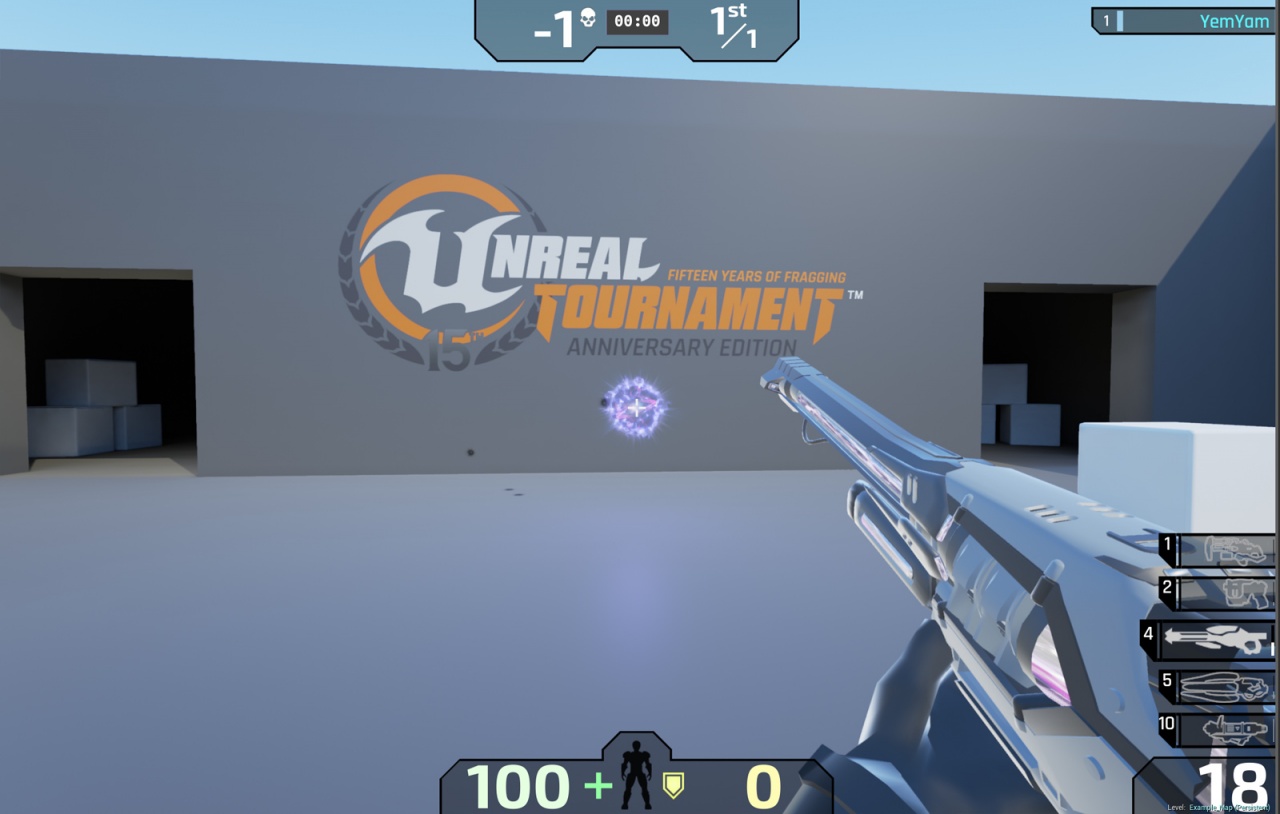
Prototype Mesh v1
I want to get prototype weapon meshes, animations, and fx in the game asap. As long as the concept provides the right foundation then it's time to build a proto mesh, proto anims and get it in game. Once in the game I will iterate the nuances of the design with the design team and the concept artist Gooba. I typically don't dive into hi poly modeling until we are sure the design works and we work out any functionality issues before investing the heavy hi poly modeling task. If you want to replace an existing weapon in the game it is fairly ease to build on the foundation that is already there.
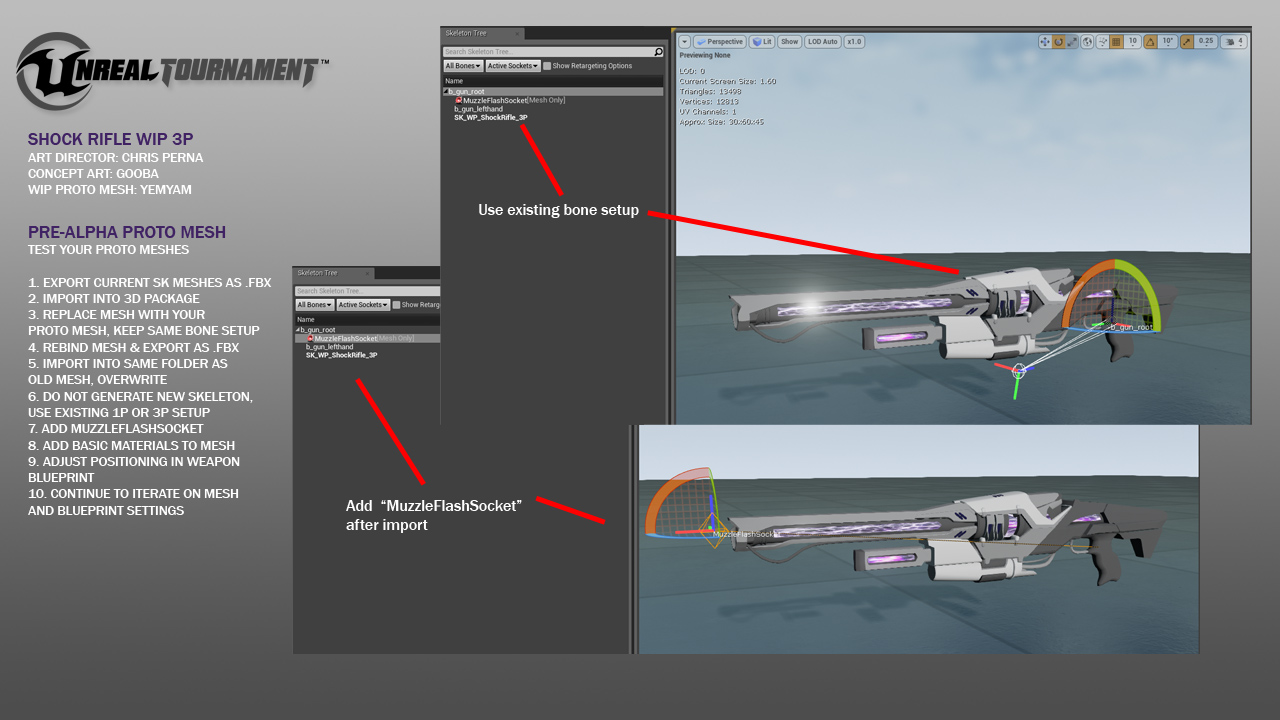
1. Export the existing SK mesh from the editor that you want to replace with your proto weapon. Export both the 1p & 3p version. Be sure to save an original copy of these in case you break something and need to reverse your steps.
2. Open your weapon file with your proto mesh. Create a separate file for each 1p & 3p view. Collapse all separate parts of your proto mesh and attach into a single mesh. Assign multi-mat id's if you want to assign base material breakouts in the editor. You don't need to do a proper unwrap, but at least put a planar UV map on the final collapsed proto mesh.
3. Make sure that nothing else is in your file, either hidden, grouped, or on another layer.
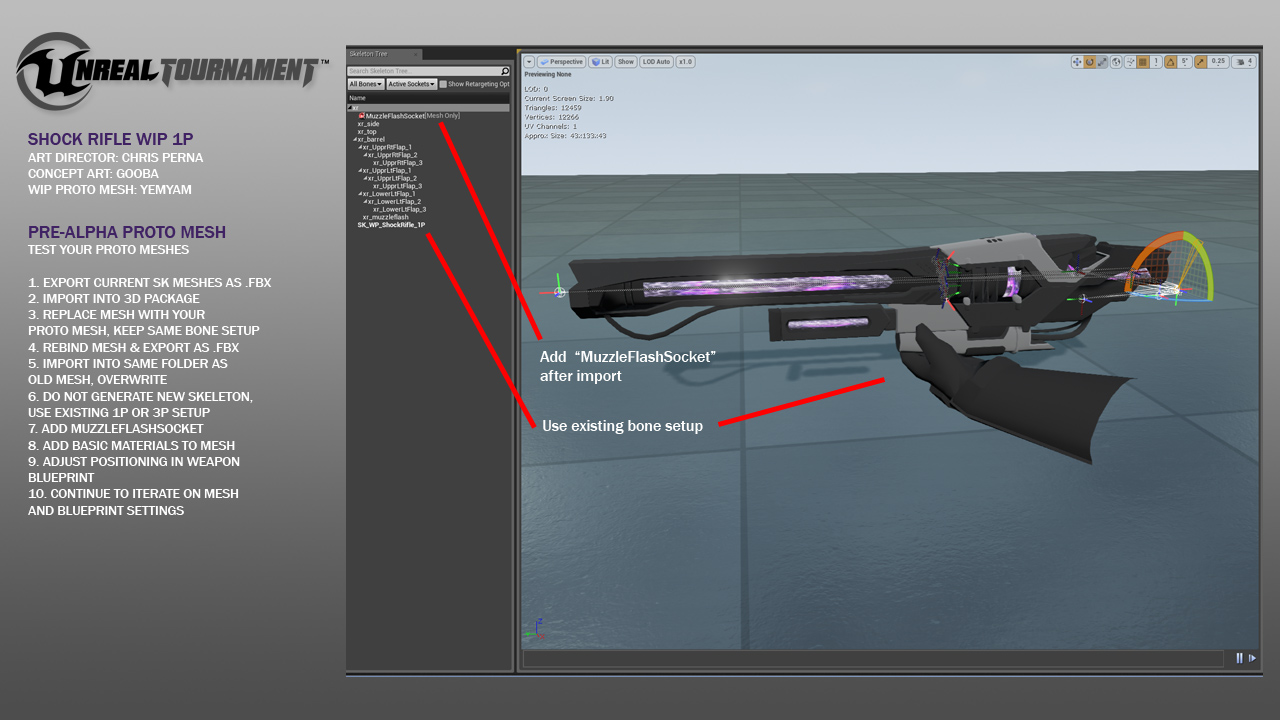
4. Import the editor SK .fbx into your your file. I use 3ds Max 2014. The .fbx will import the bone structure of the existing weapon and the rigged mesh.
5. The imported mesh will have a skin modifier on it. Edit the envelopes and look at how the weapon is bound. The 3p ver will be much simpler than the 1p. I was getting a dummy object imported that was named the same as the mesh, delete the dummy object as the double names will confuse export.
6. Position your new weapon as closely as possible to the old weapon. Name it the same as the old weapon. Delete the old weapon, add a skin modifier to your mesh.
7. Bind your weapon to the bone setup. Don't worry if the bones don't line up or if you don't have/need the same bones. For a quick & simple test just bind the entire mesh to the root bone.
8. Select the mesh and the bone setup and export selected as .fbx. Import into same folder and say yes to overwrite. Check import as skeletal mesh and don't generate new skeleton, use the existing one (it will be named similar to the sk mesh).
9. Sometimes I got an error saying the bone chain was wrong and if I wanted to rebuild it (but warned it might bork animations). Since we aren't dealing with animations just rebuild.
10. Sometimes when re-importing it borked the phys asset and the linked bounding volume and that caused display issues. I don't know how/why it happened but I had to try the process multiple times to get it to work.
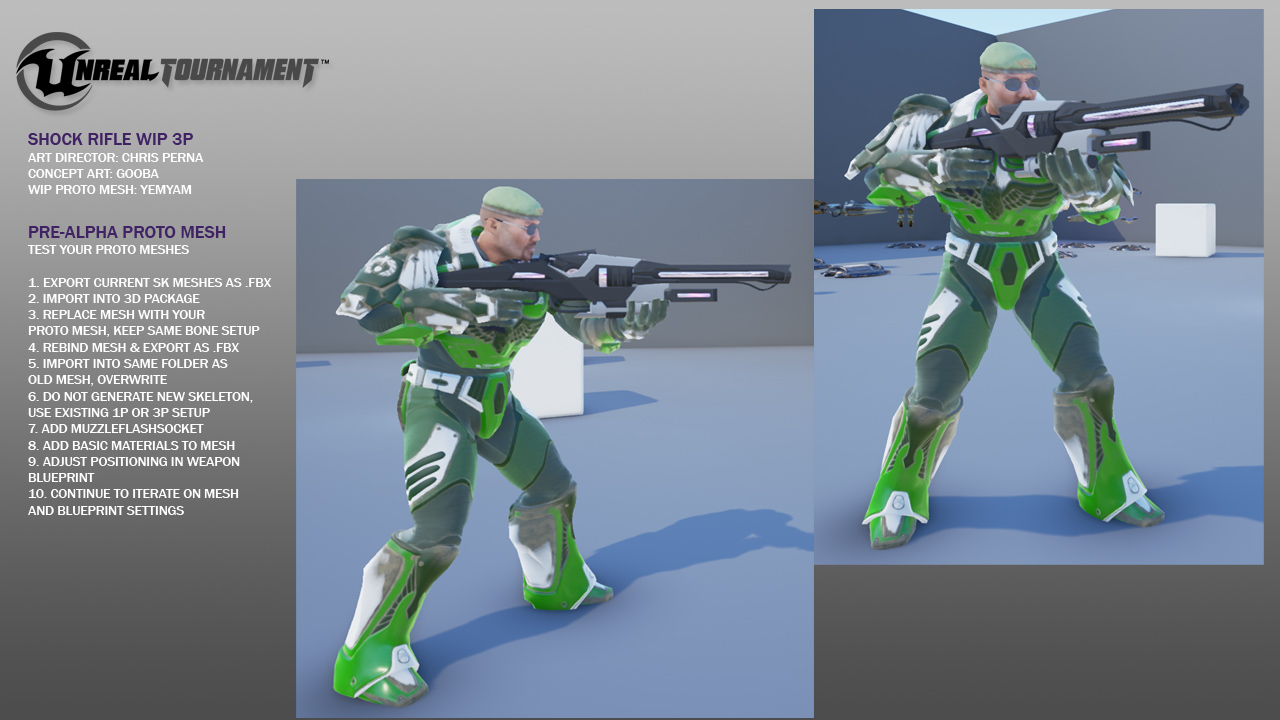
11. 3p view is easiest to fine tune the placement in your max source file. Just nudge/scale it around until it fits in the player hands.
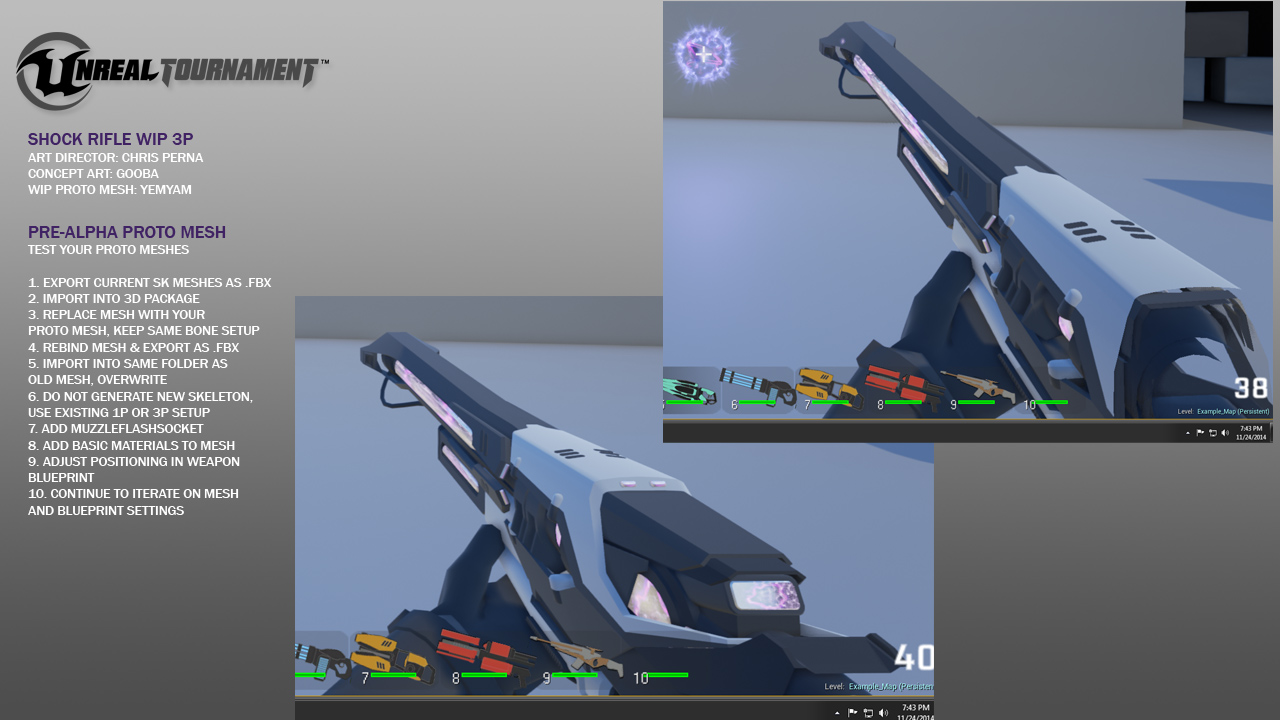
12. 1p view is easiest to fine tune in the master blueprint for the weapon.
13. Add the MuzzleFlashSocket to the skeleton.
14. Add basic materials to your mesh.
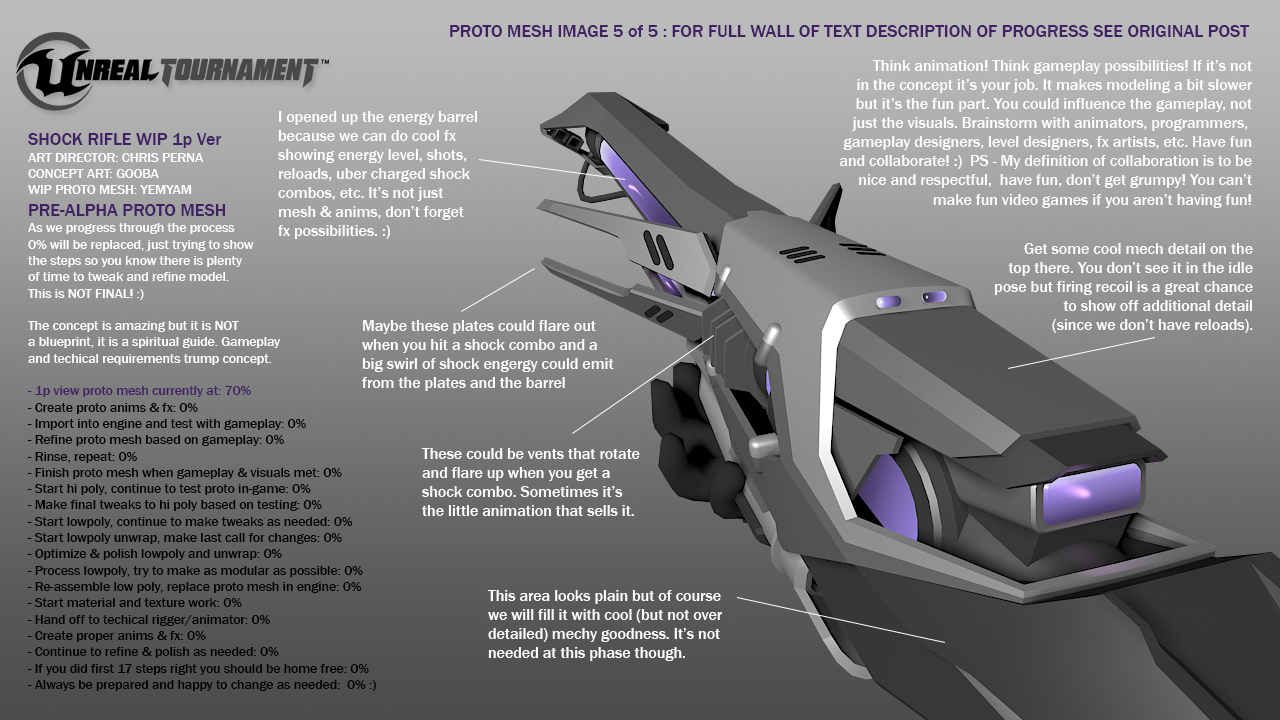
15. Rinse and repeat until you get it right! Run around the game and see how it looks & feels in action. Start to generate animation ideas, we will tackle that next.
16. The blueprint is awesome, you can also change every other attribute for the weapon. Change firing rate, fx beam, damage, ammo count, etc. Dig around and have fun tinkering!
17. When all else fails and your stuff is broken find a weapon that works and reverse engineer it. Keep digging around the SK meshes, the animation blueprints, the master weapon blueprints, etc. Keep reading tutorials and watching how to videos. You will get the hang of it!
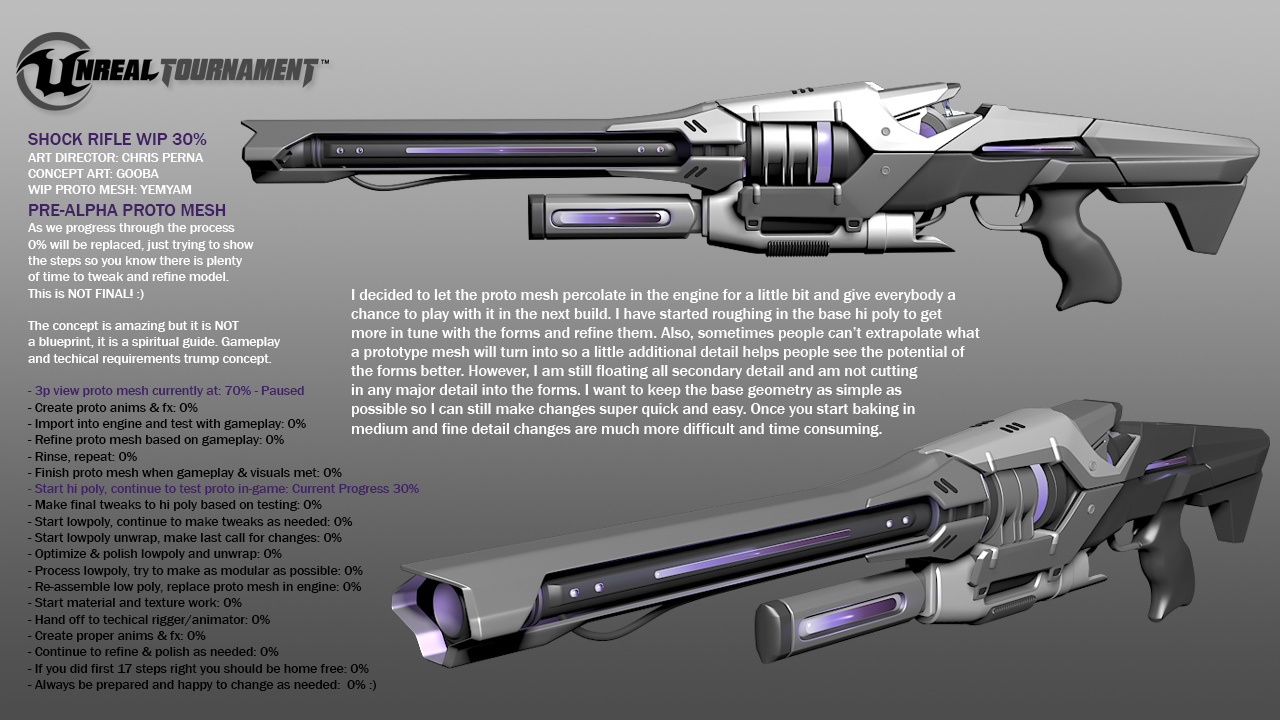
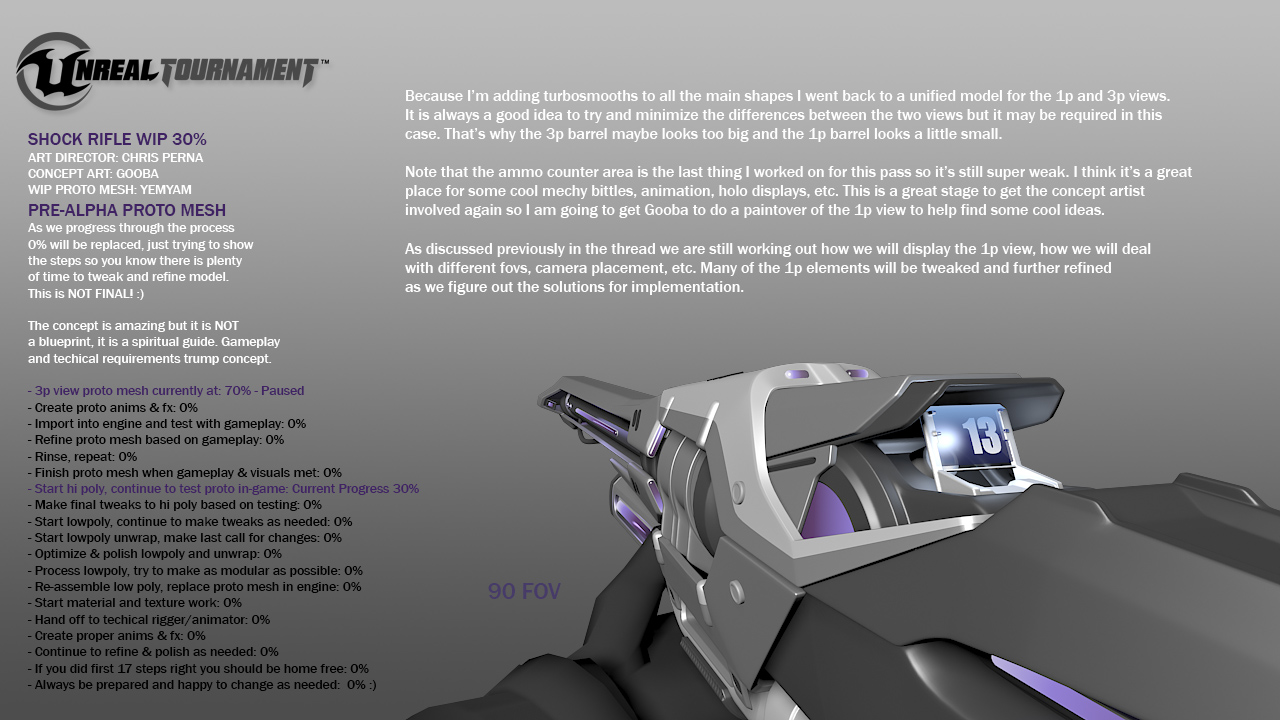
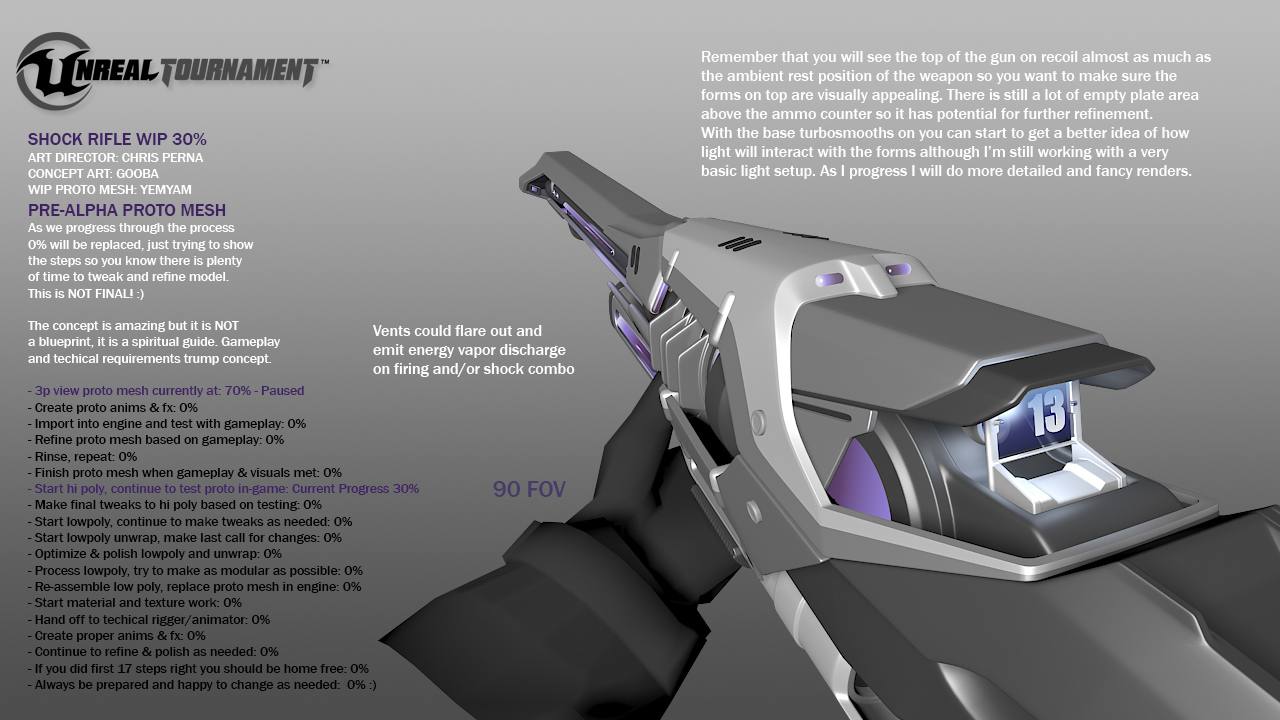
Once everybody is 90% sure the proto mesh is looking and functioning how everybody wants in game then I kick renders of the final (evolved through testing) proto mesh to Gooba and he will do the final concept paintover. Once that is done and we are still on track with the proto weapon in the game I will start the fun (and now easy) process of making the hi poly. By making sure the bulk of the design and functionality issues are worked out before hand there should be less churn and tweaks during the hi poly modeling phase. It's all about making it look cool and visually balanced with the other weapons in the game.
Base Modeling Refinement
After you have a prototype weapon in the game and start to get feedback I proceed to further refine the model so that people get a better idea of how it will look visually in addition to function.

Prototype Mesh v2
Once you refine the base model further I usually update the prototype mesh. This will allow you to identify if the visual progress is still synching with the functional progress and allow people to give updated feedback on the weapon. Since you have already set up your first pass proto mesh it should be very quick and easy to update it with a more refined mesh.
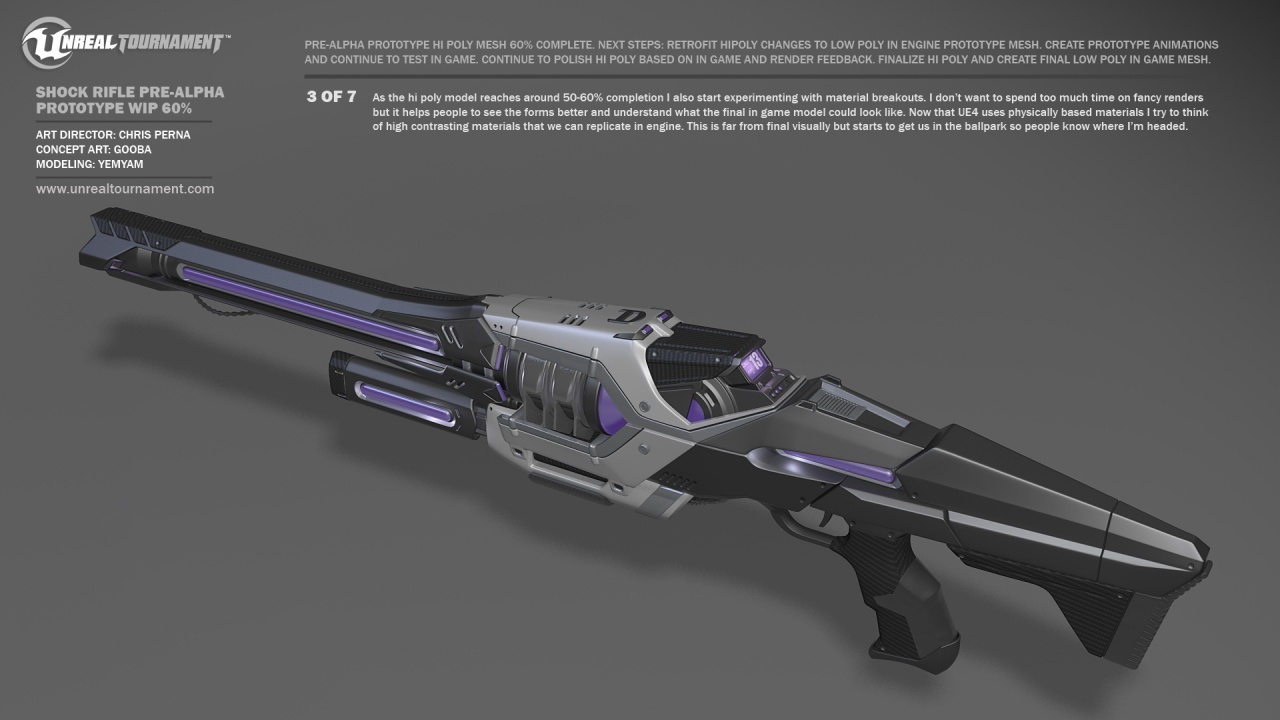
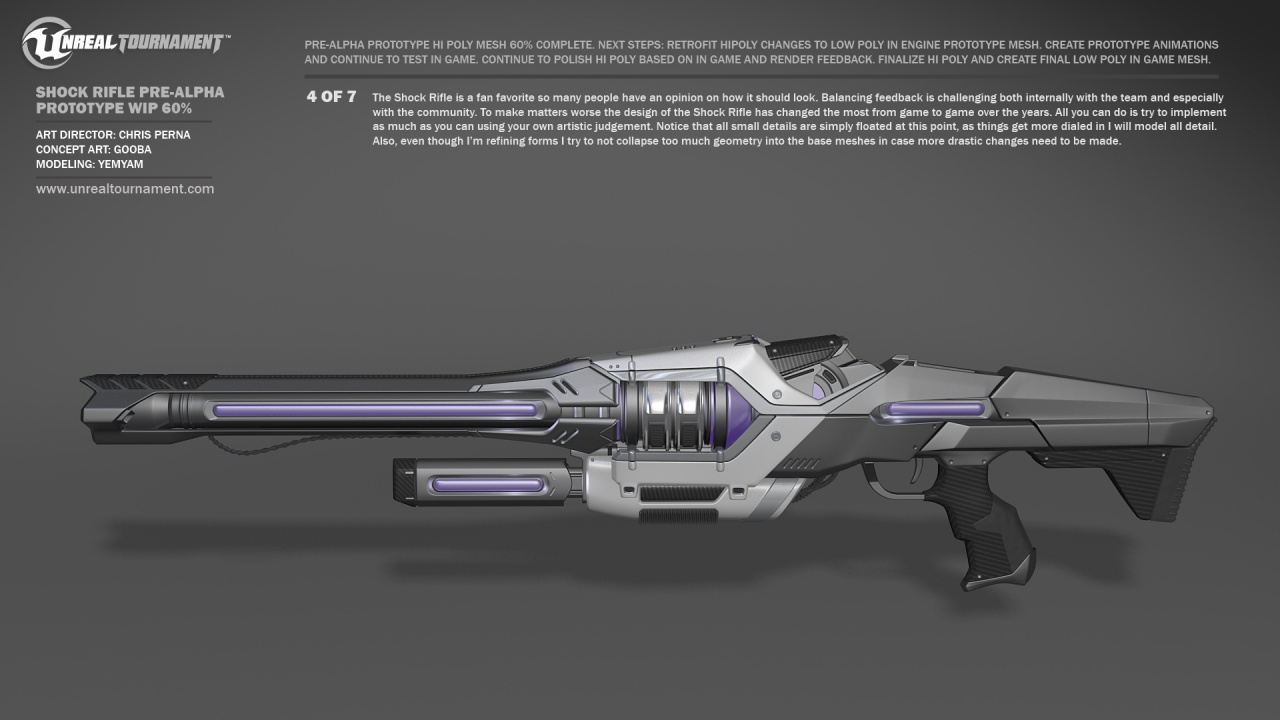
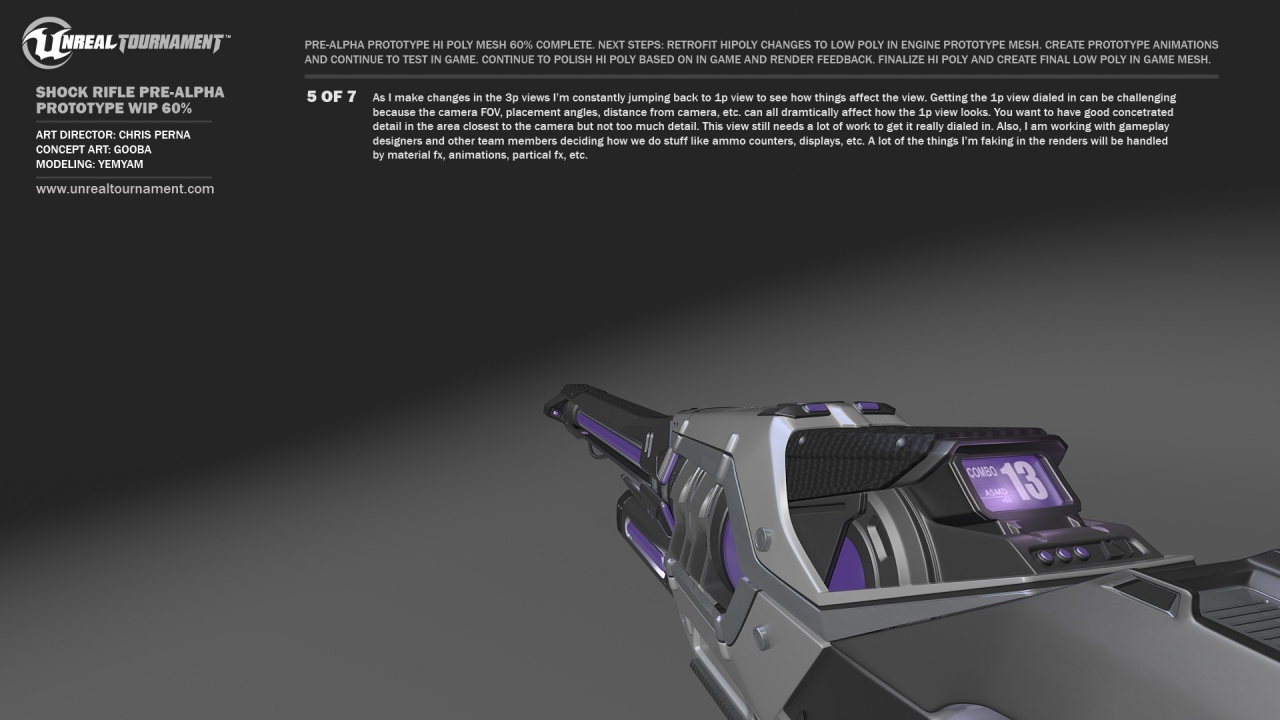
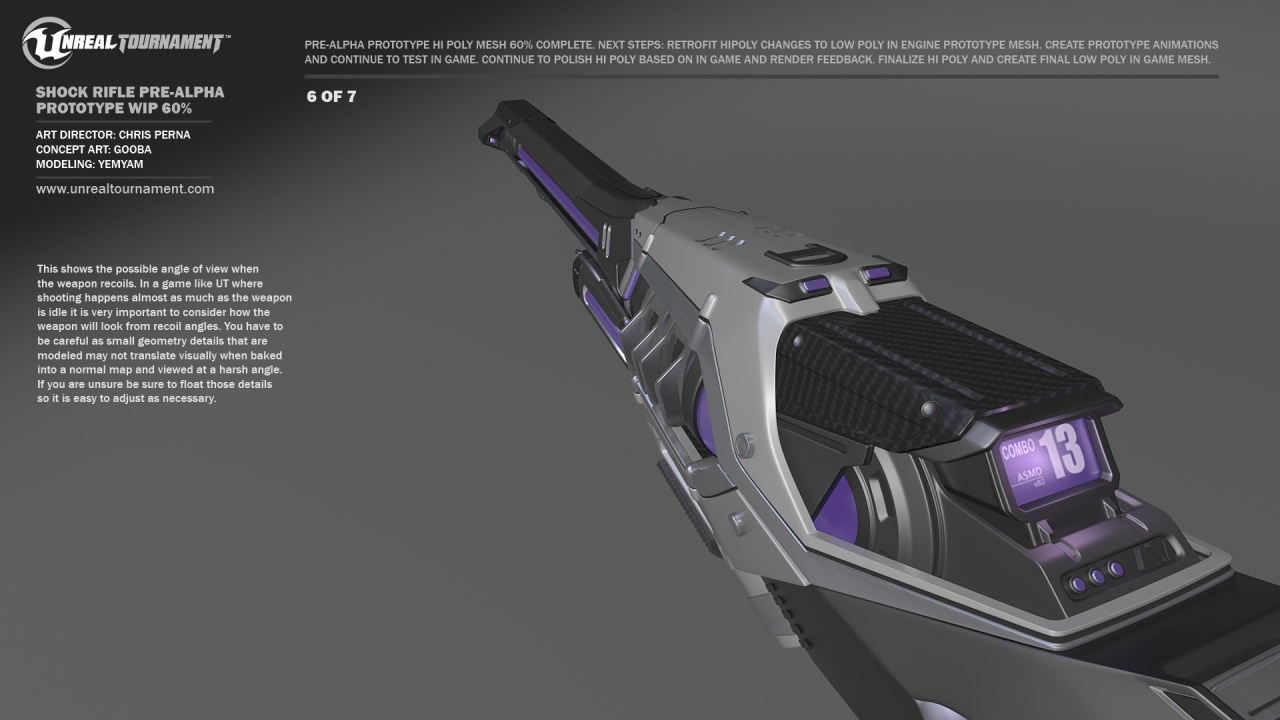
Hi Poly Refinement
Based on feedback of the updated proto mesh as well as feedback delivered on the latest renders you can take the hi poly further, refining the main forms without adding in too much detail.
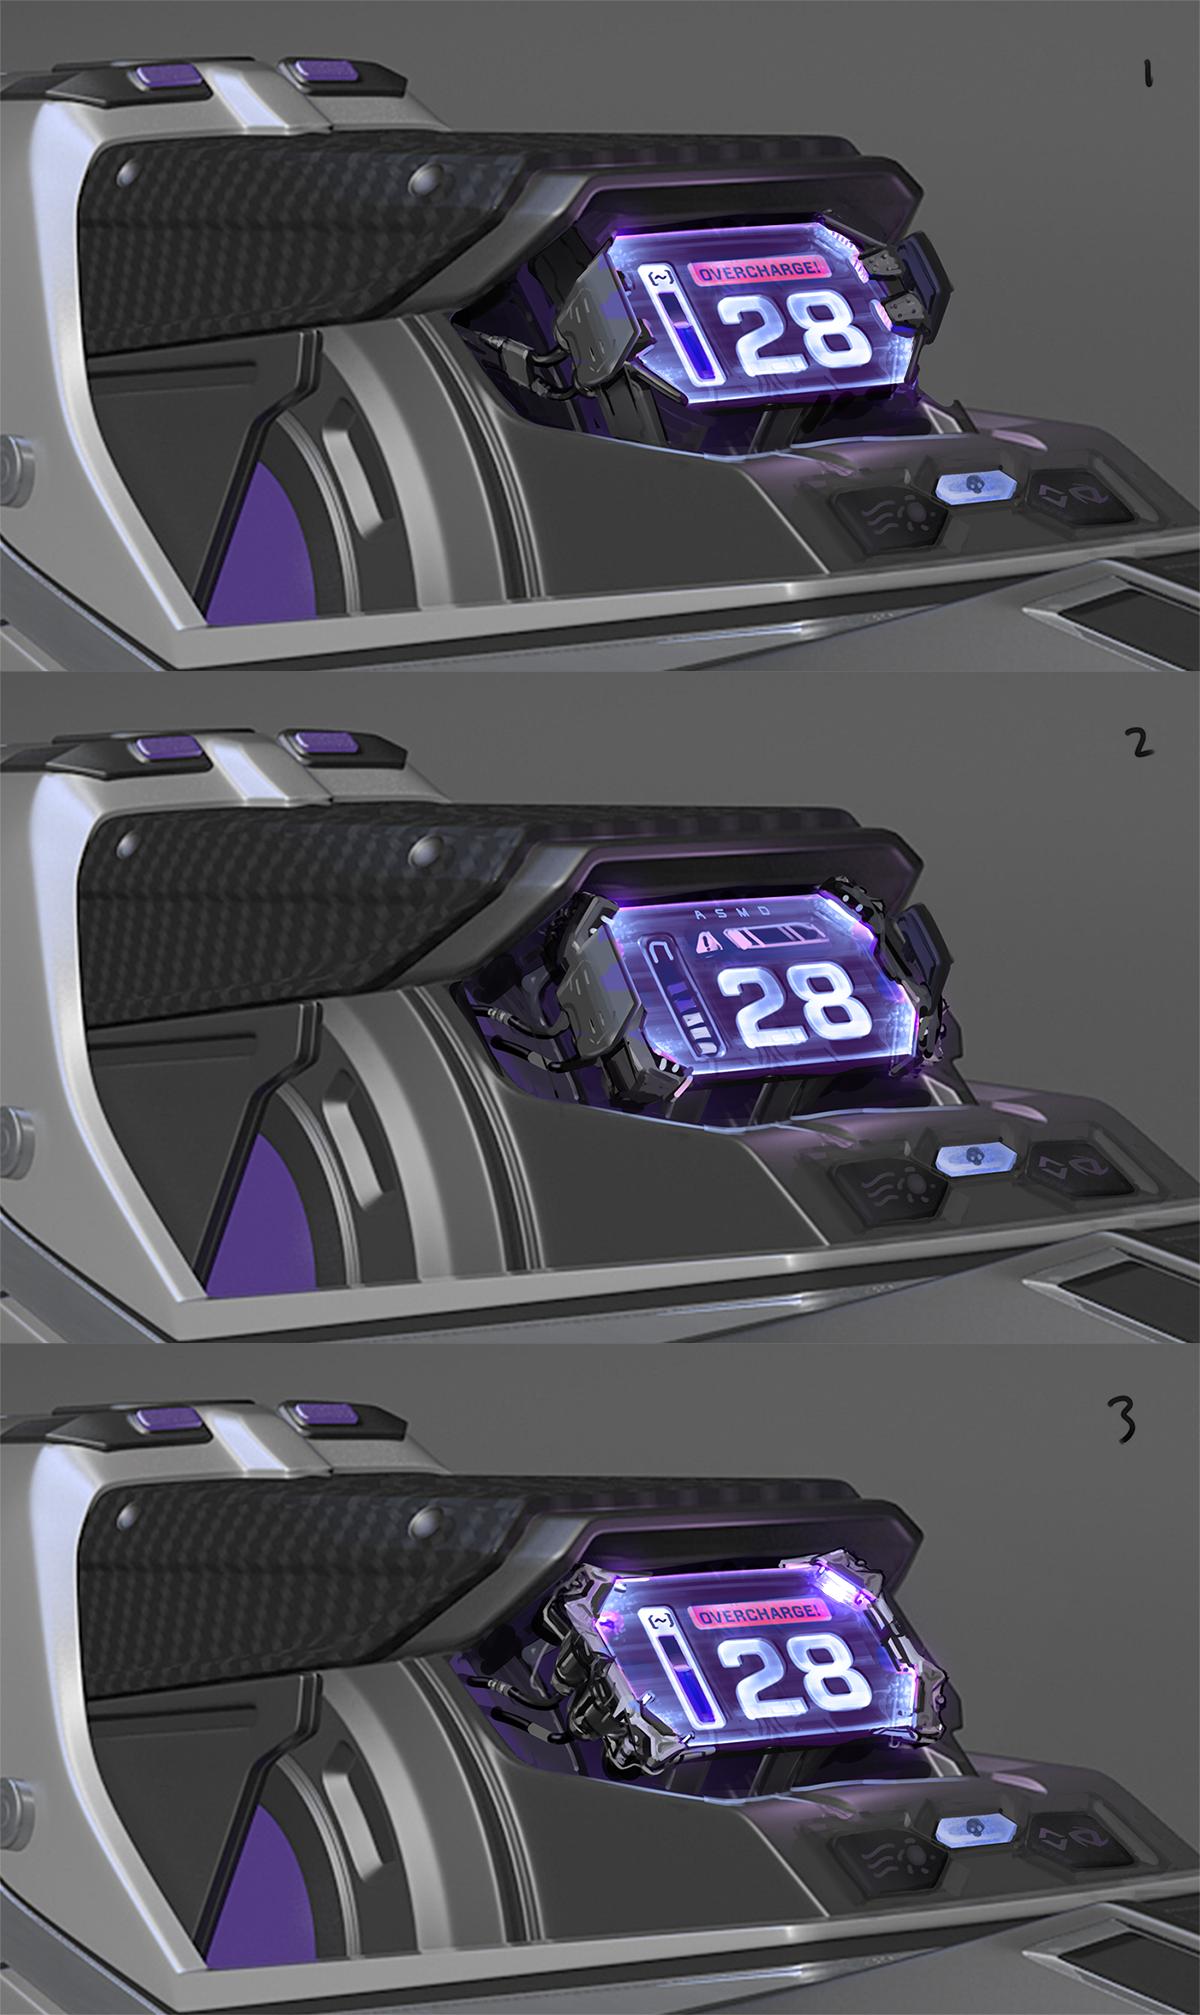
Refined Concept Paintover
Once you reach a certain point with the hi poly and proto meshes I think it's a great time to consult with the creative director and the concept artist to get a refreshed & polished view of your final destination. Sometimes you need fresh eyes on a model if you have been looking at it for too long you sometimes loose objective focus. After talking with Perna and Gooba he painted over my latest renders to help me refine the hi poly model further.
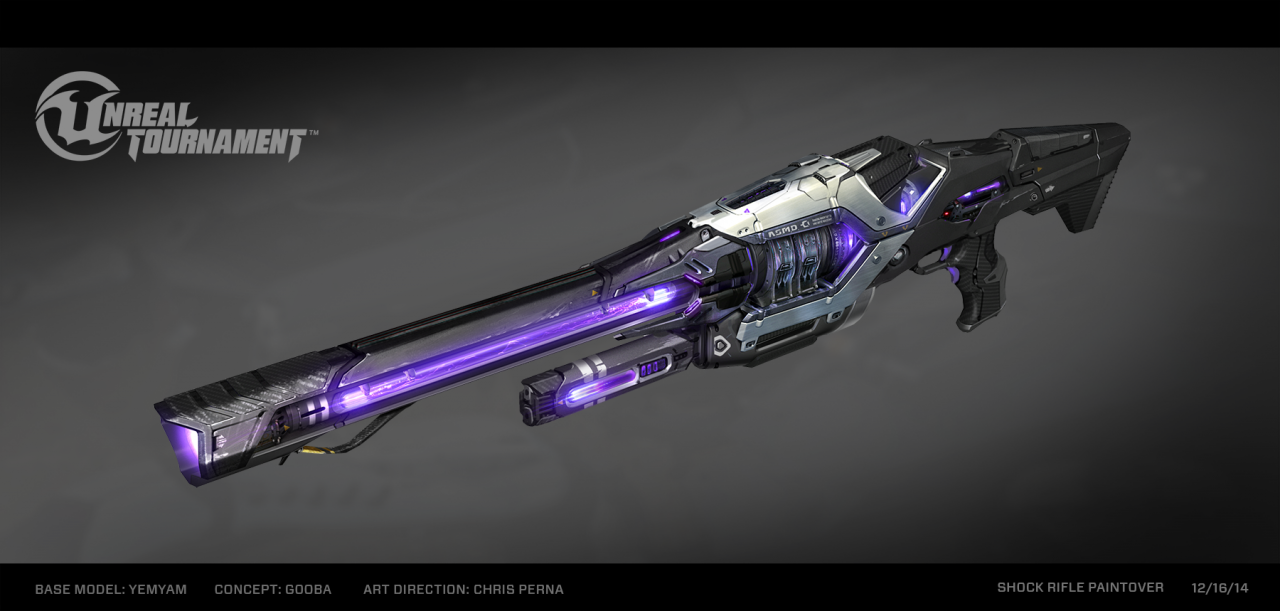
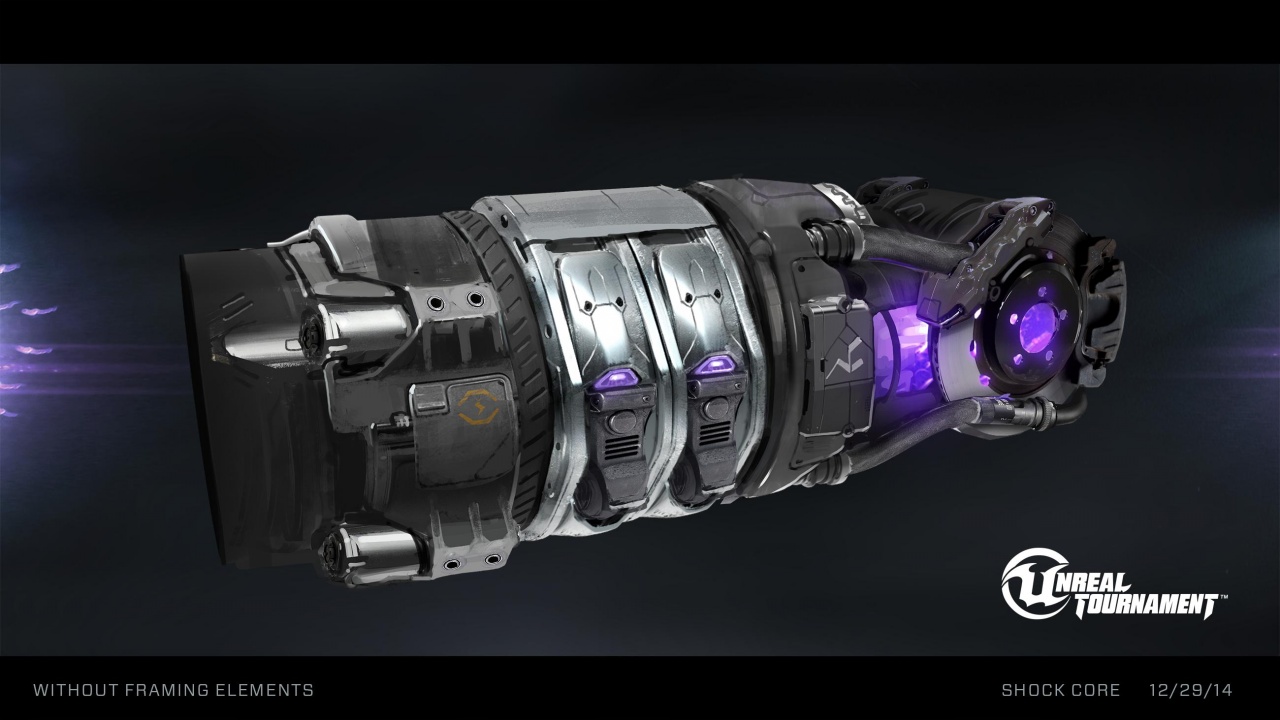
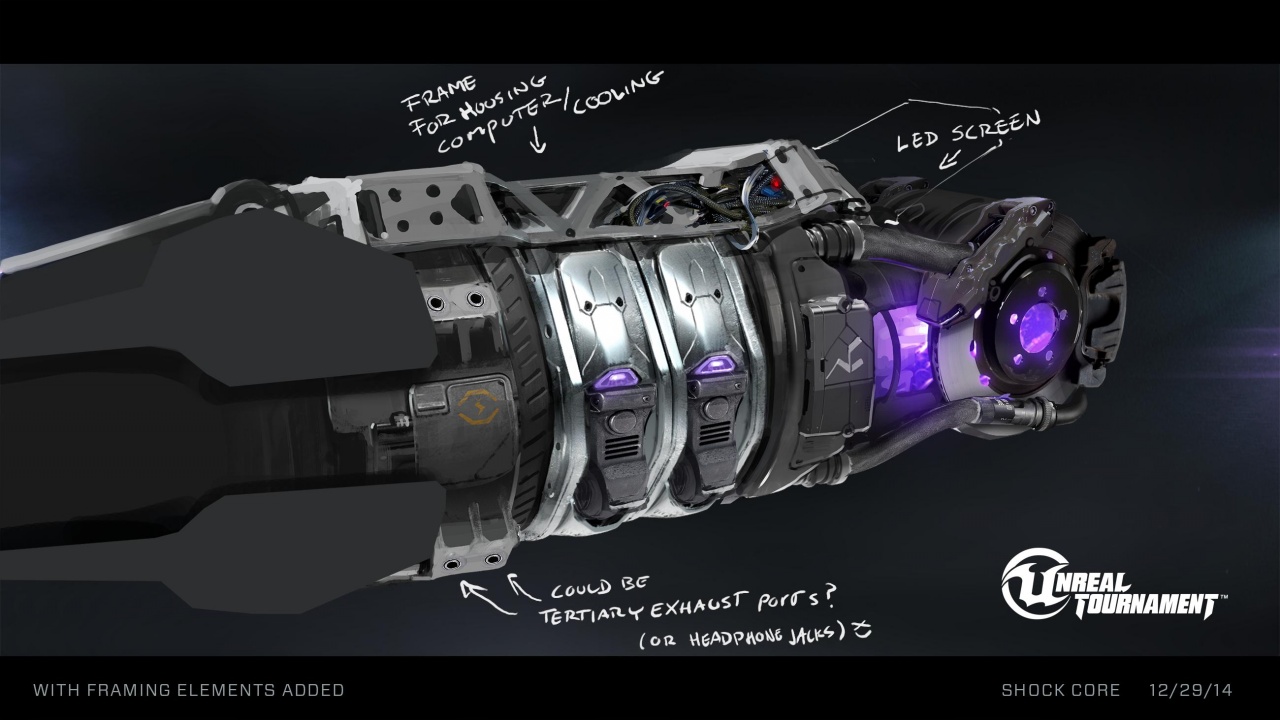
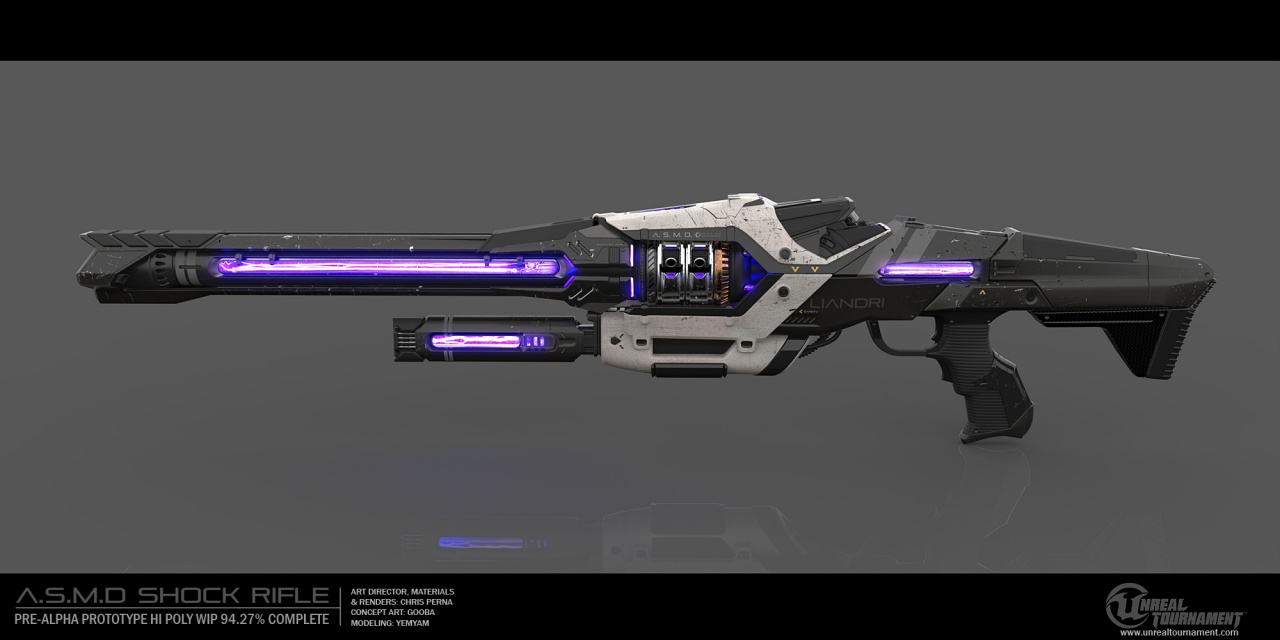
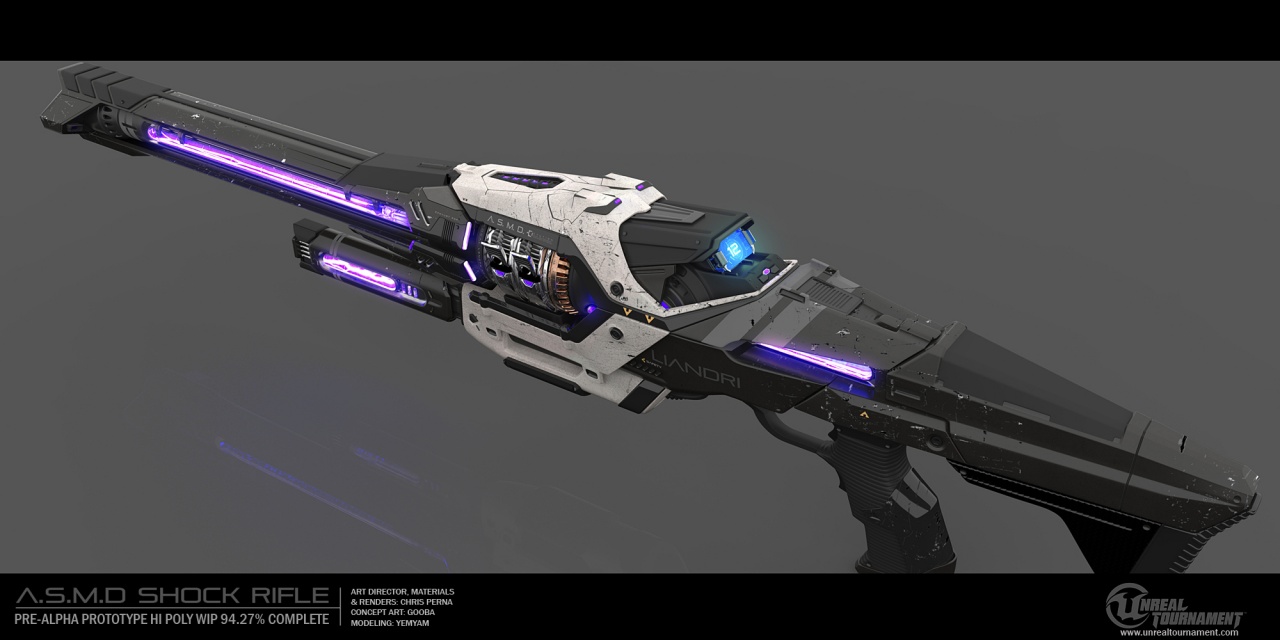
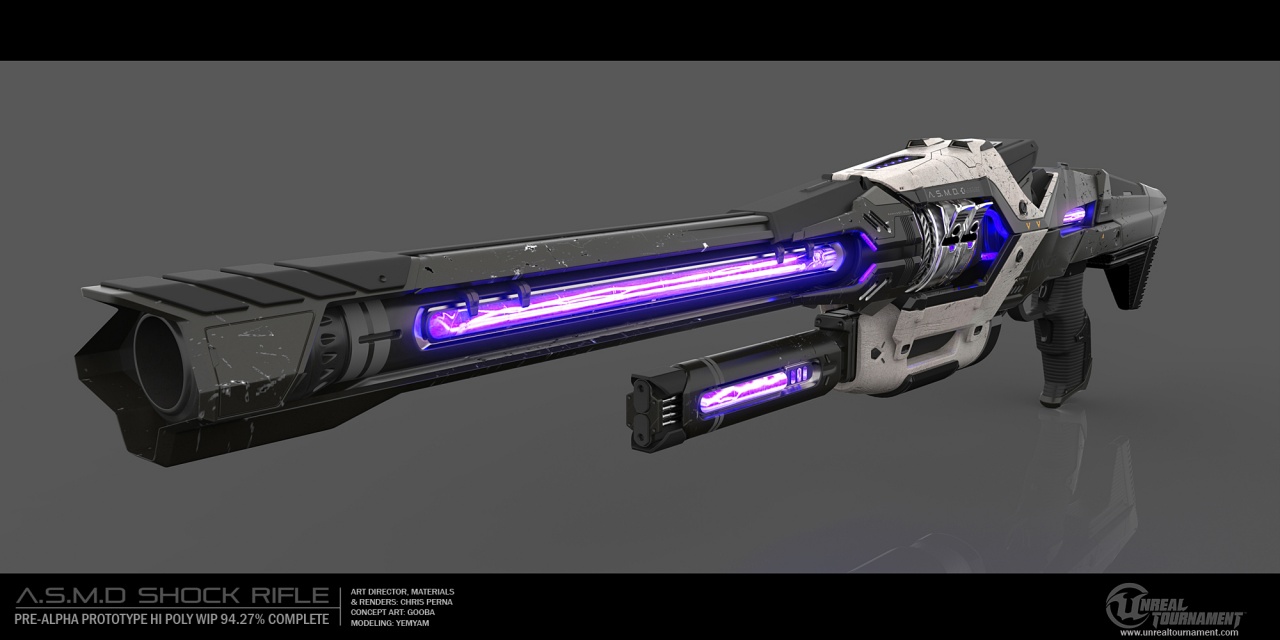
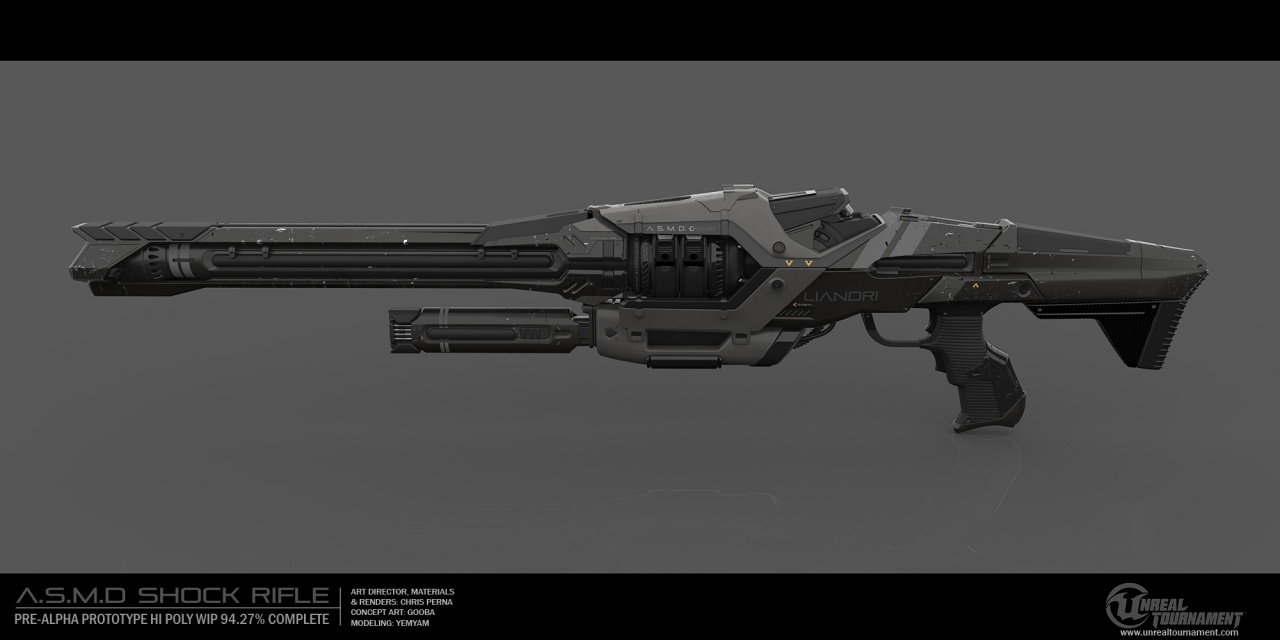
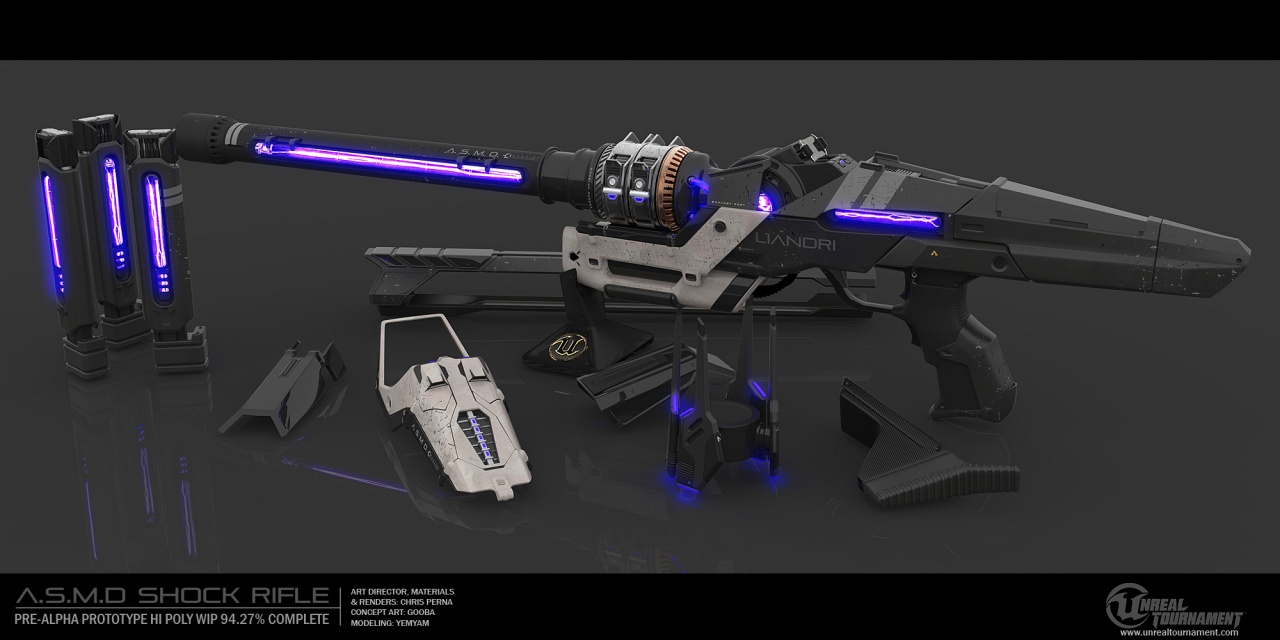
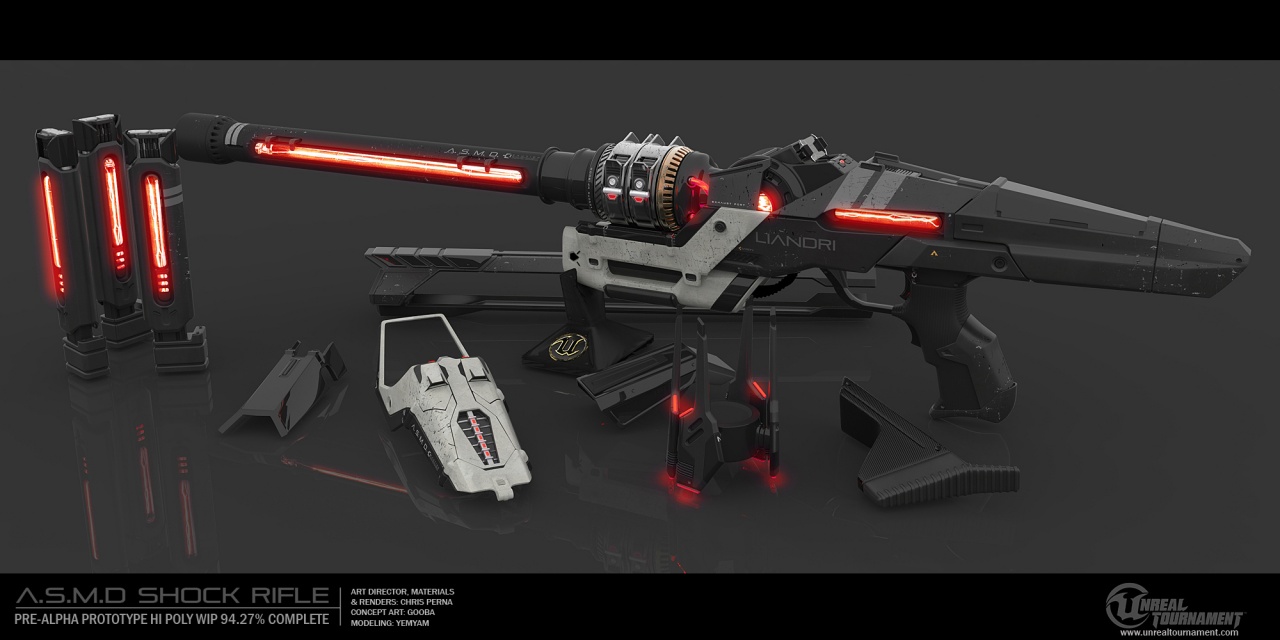
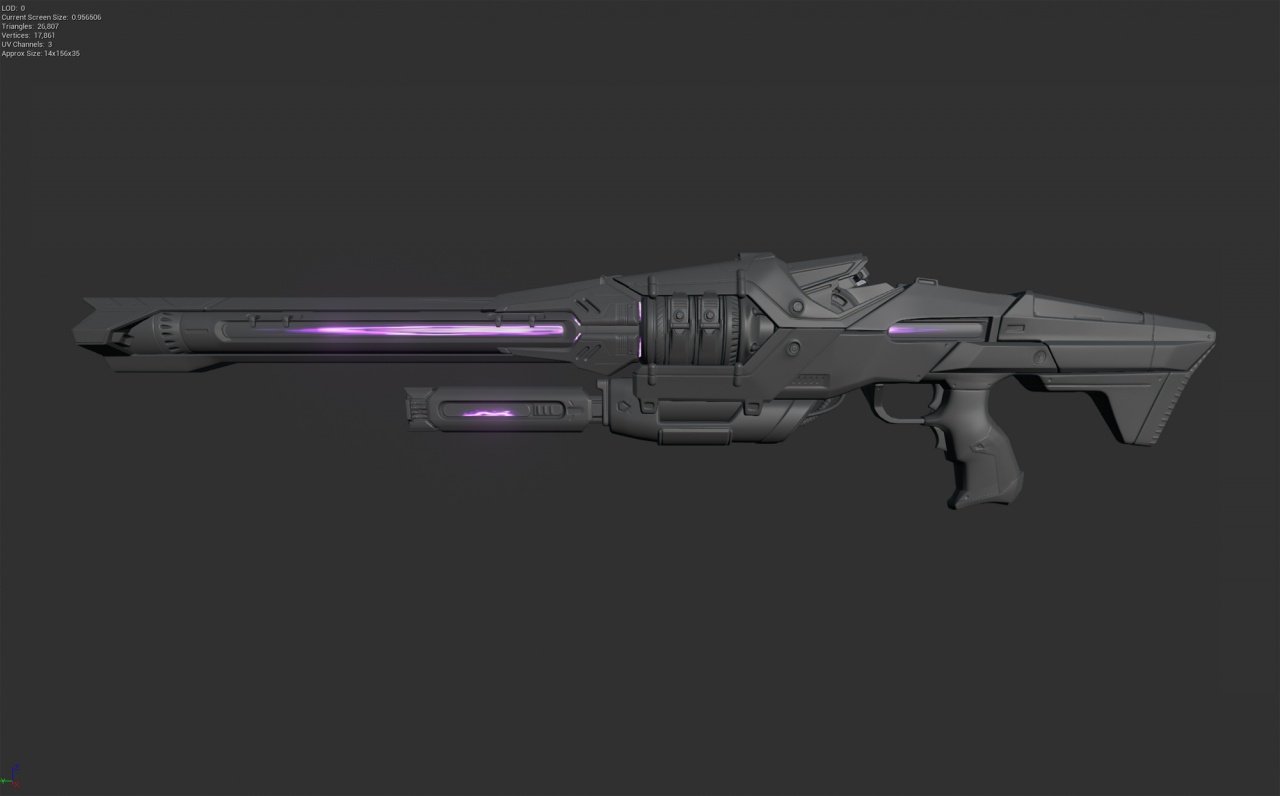
Polished Hi Poly
Using the paintover and latest batch of feedback from Perna, the development team and the community I could proceed to finalize the hi poly with more confidence and concrete direction. After I have added in details and got the weapon close to finished we create final hi poly renders to get feedback on the visual look before we proceed to the next step.
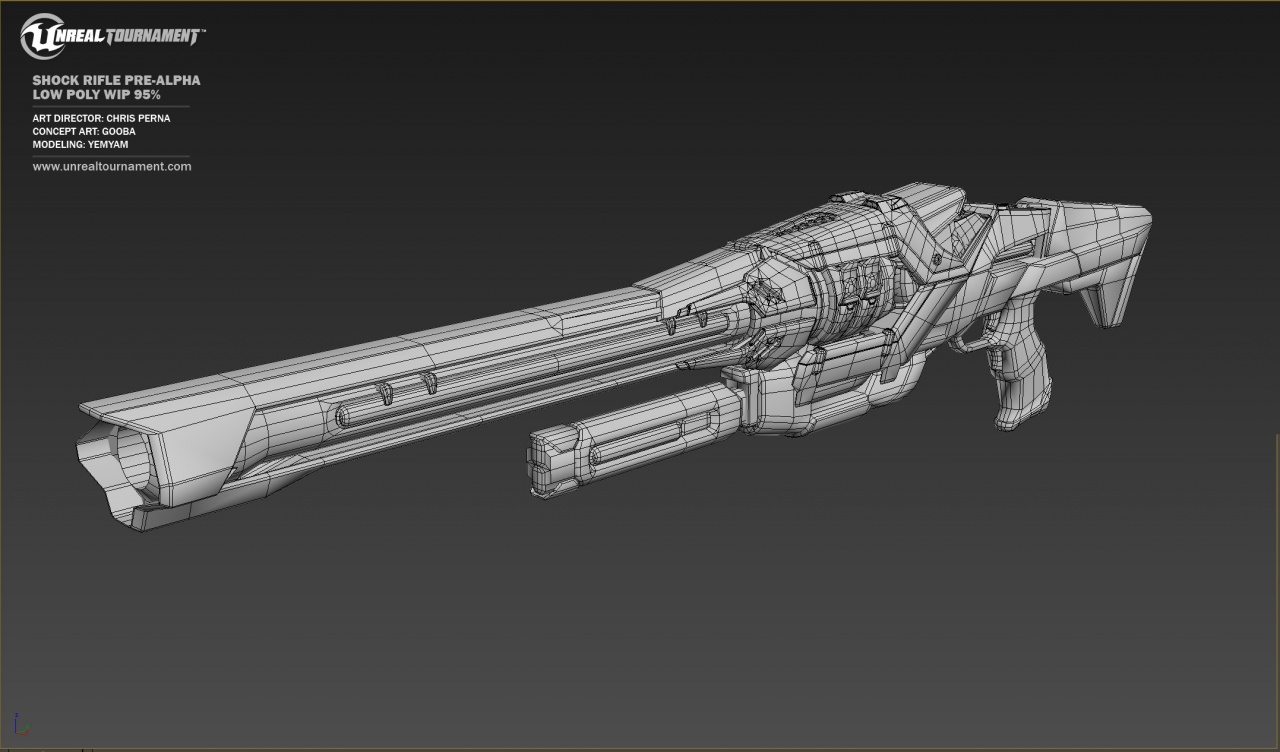
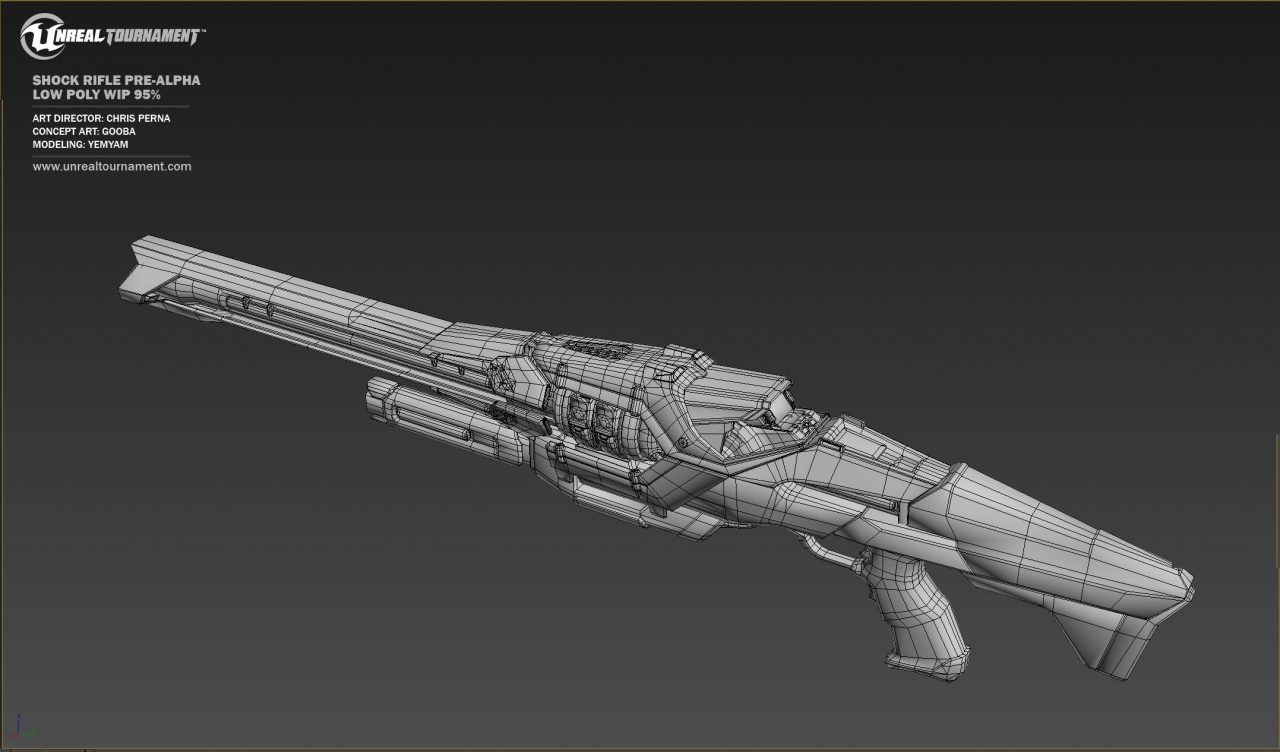
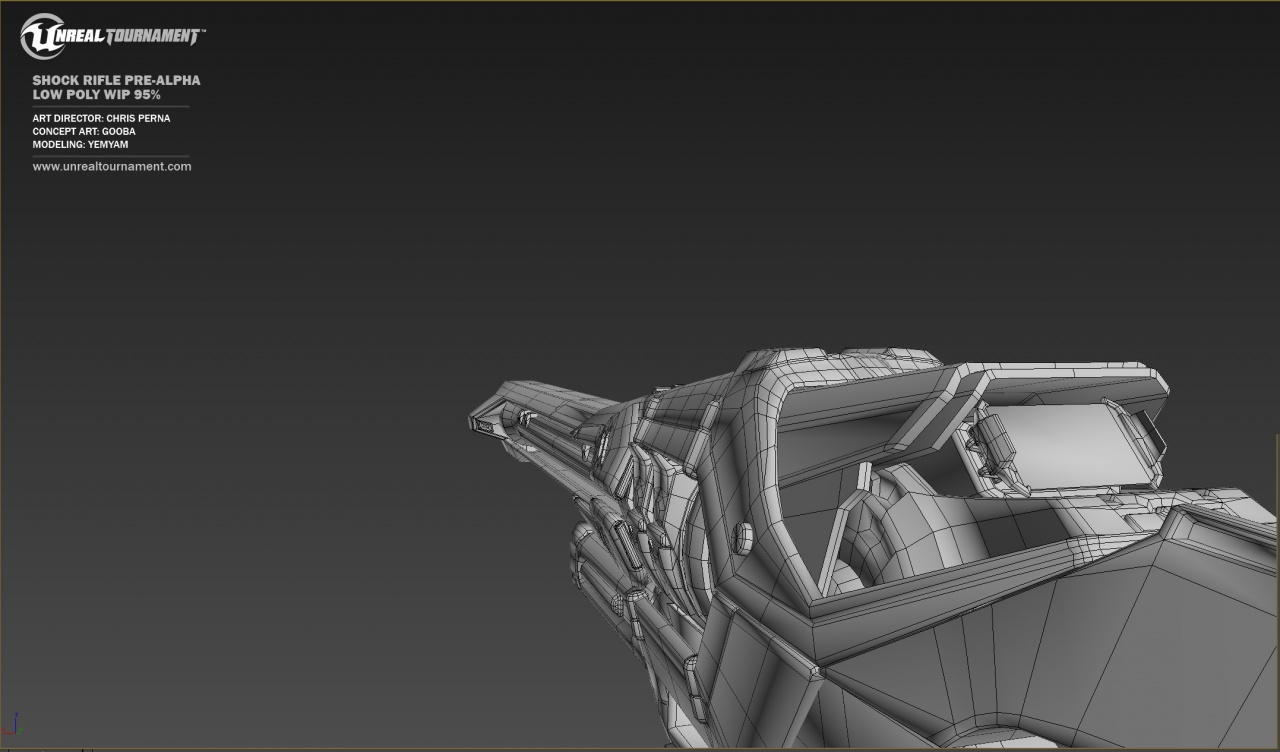
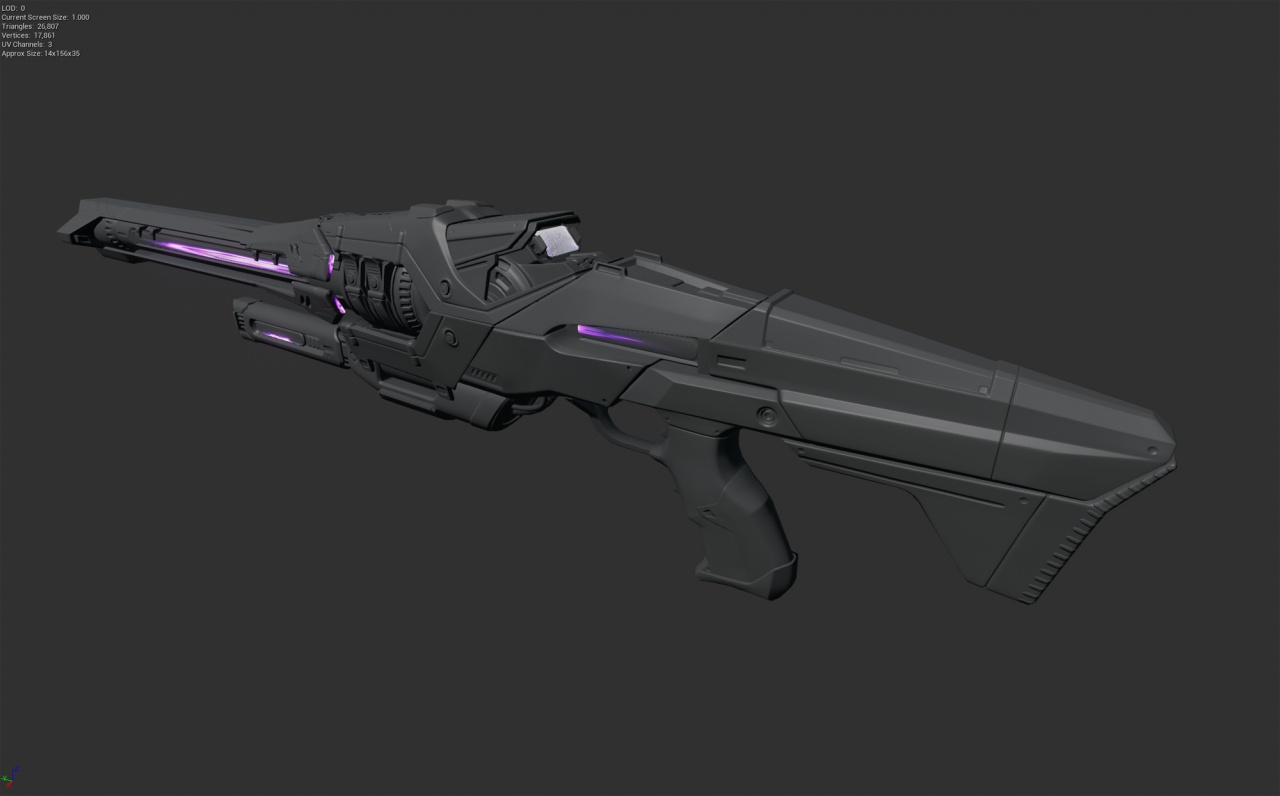
Low Poly
I'm targeting around 15-20k UE4 verts for 1p and around 5k verts for 3p. It's always hard to tell when I'm doing the low poly as max verts do not equal UE4 verts (you have to account for smoothing group and UV break double verts in engine). It is important to always talk about vert counts not tri counts as the vert count number is absolute and therefore the only number that matters.
I always go over for first pass just so I can see exactly where geometry is needed most. Also, once you do a first pass process you can see much clearer if geometry is being wasted or if you need more in certain areas. And of course you want to load most of your geometry closer to the camera.
First Person View: Triangles: 29698 Vertices: 19651
Third Person View: Triangles: 16311 Vertices: 14429

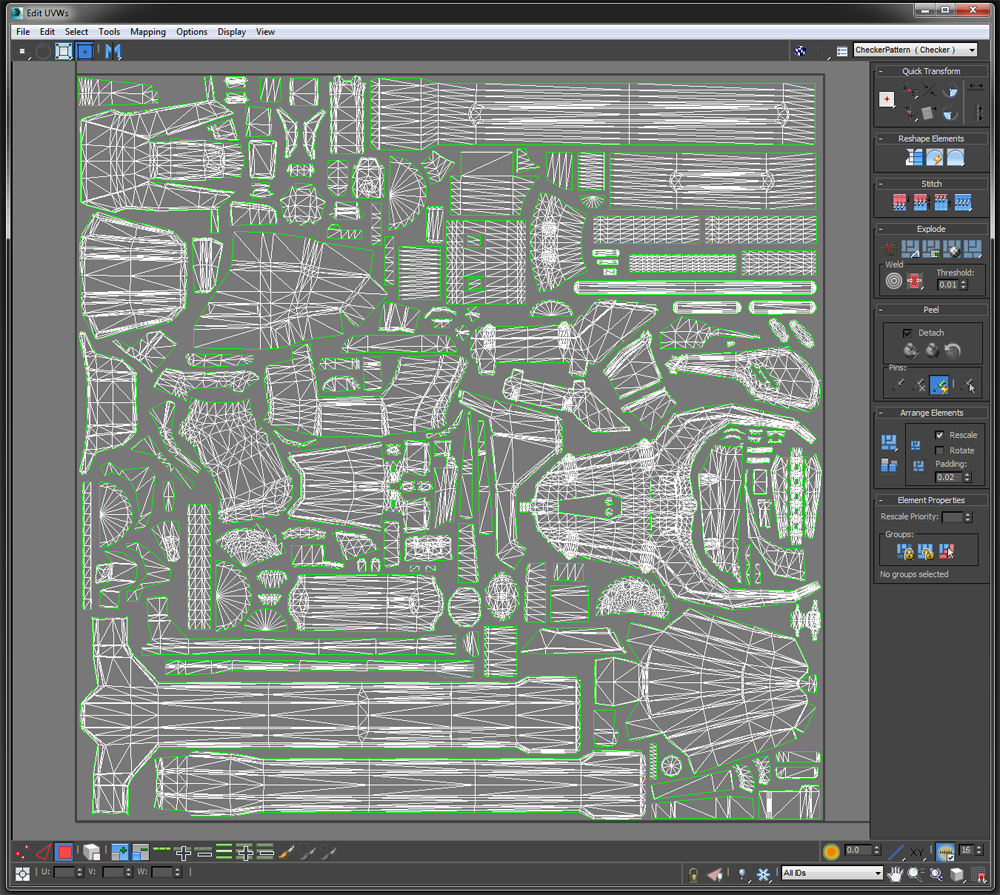
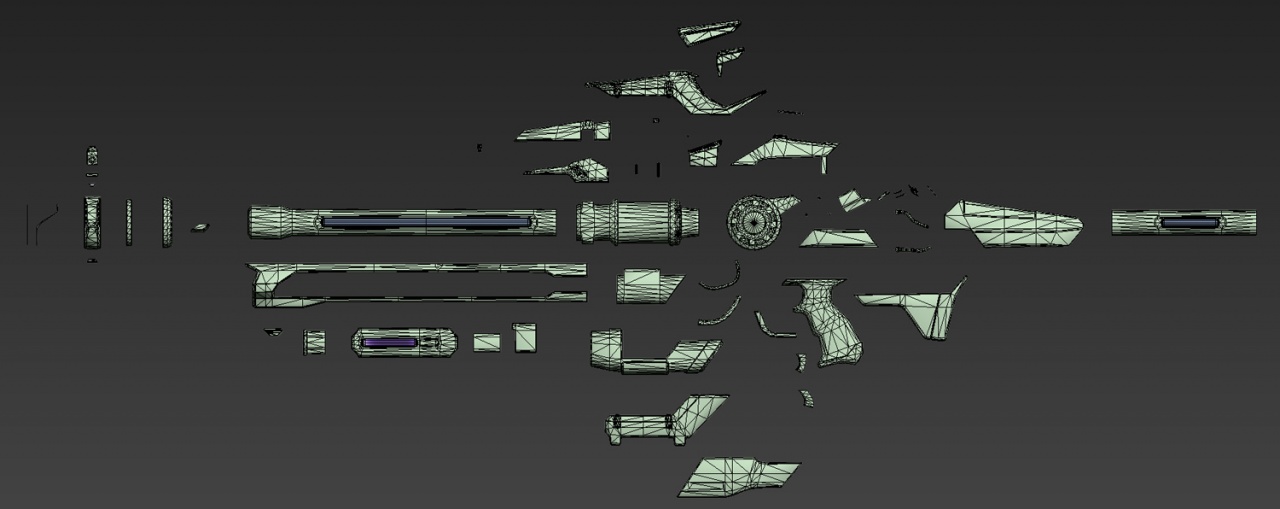
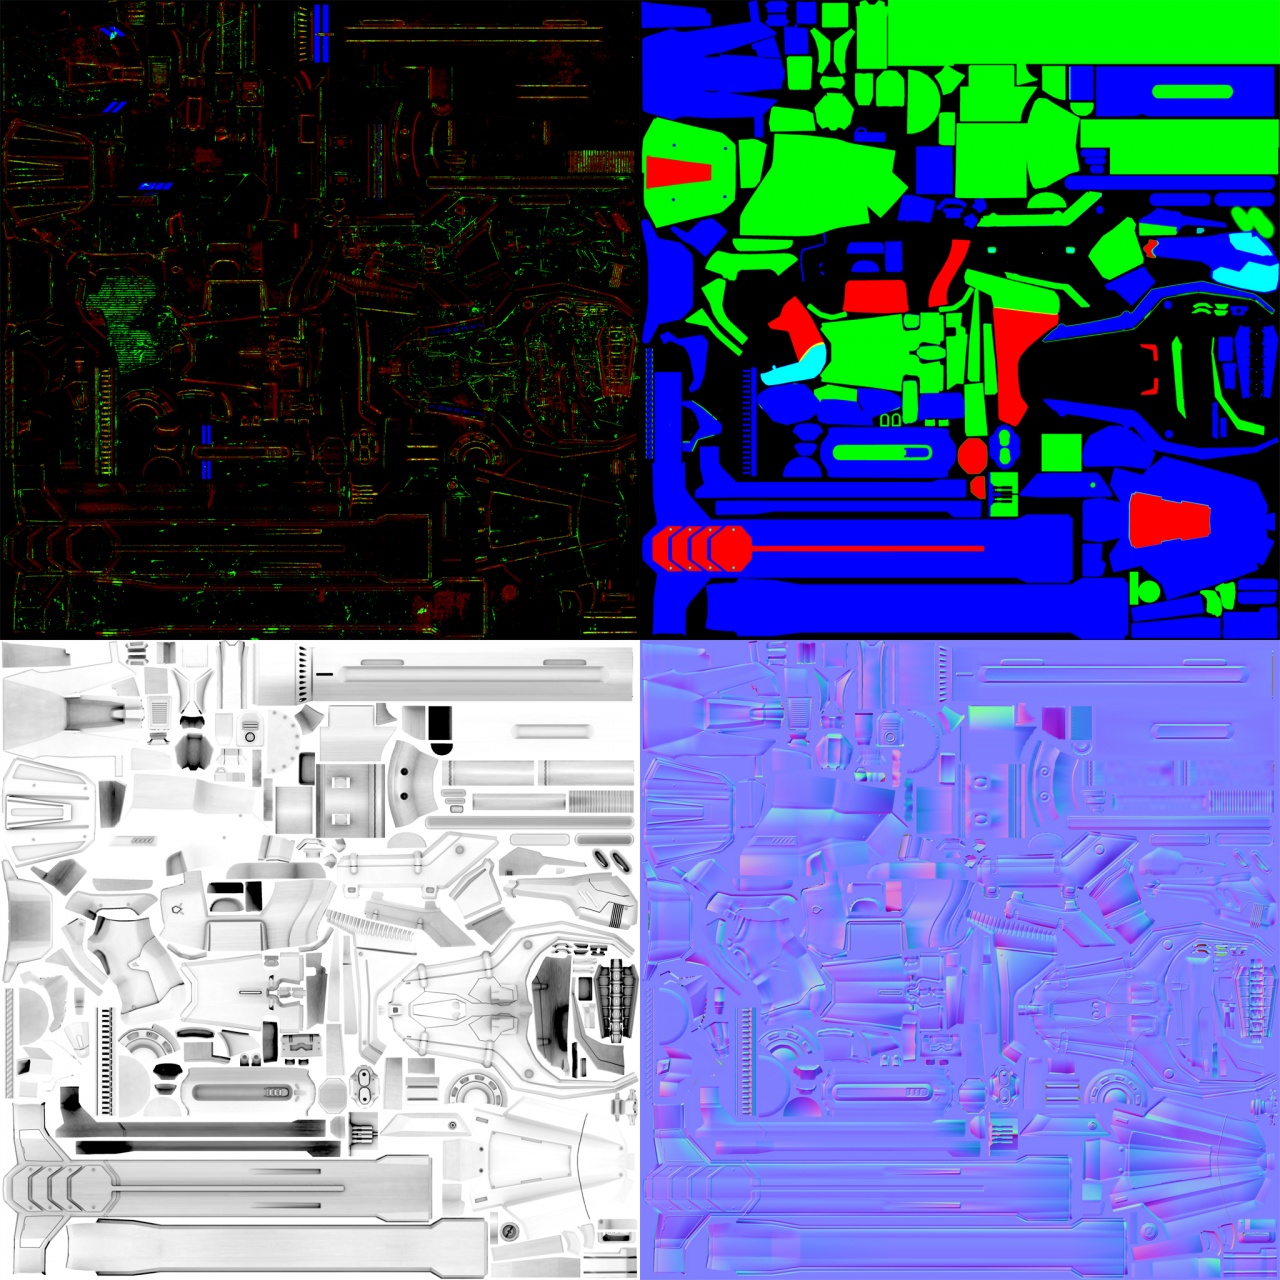
Unwrap and Process
I try to keep my unwraps as clean as possible. I used to mirror a lot of geometry but I tend to mirror less with UE4 as the material system shows seams a lot easier. Also, you can use more resolution in the past so squeezing every last pixel out of your unwraps is less necessary.
I process my maps at 4096x4096 but they are mipped down in the editor. The shock rifle has 1 main unwrap, 1 unwrap for the energy beam, 1 for the glowy bits, and 1 for the ammo counter screen. It is possible to put multiple special fx unwraps on the same sheet and use masks to control the different parts but for this weapon I made them separate.
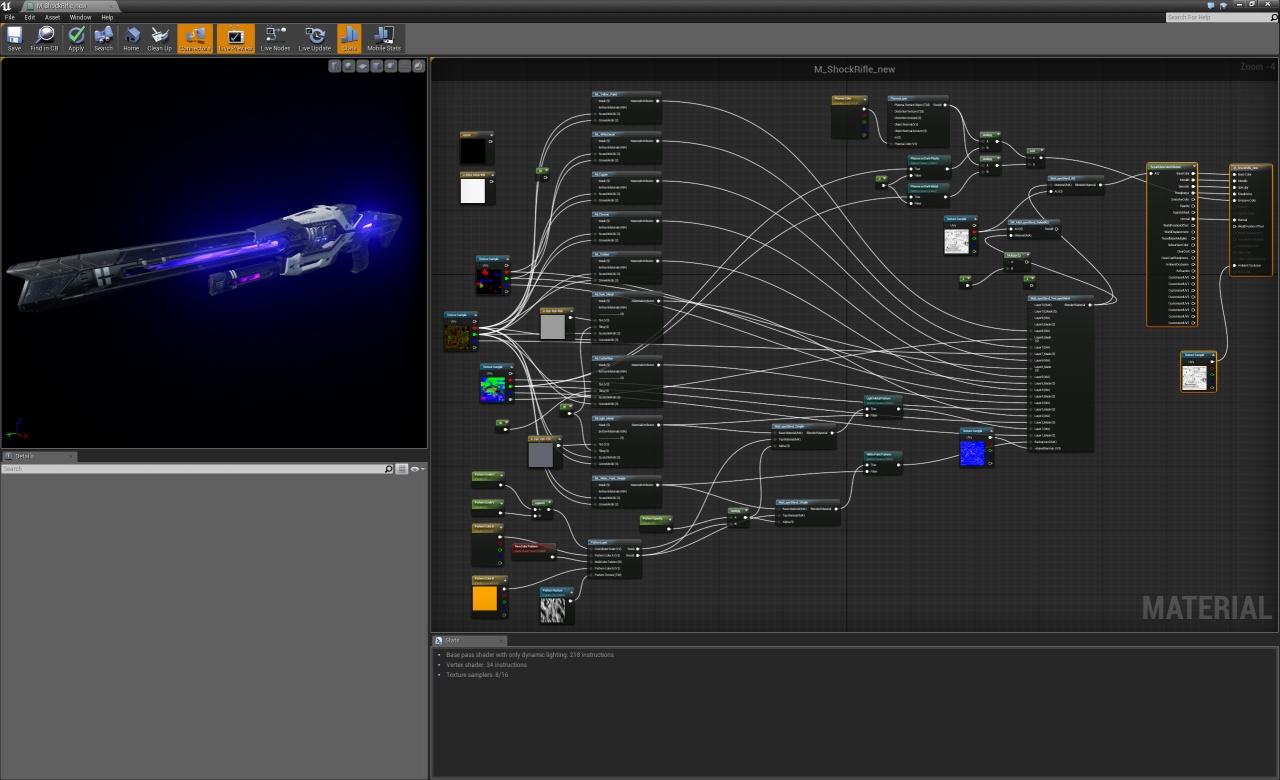
Assembling Mesh and Materials in UE4
Once you have your low poly and materials you import everything into the engine and assemble it.
For more detailed editor weapon tutorials view:
https://learn.unrealtournament.com/tutorials/custom-weapon
https://learn.unrealtournament.com/tutorials/weapon-cosmetics
https://learn.unrealtournament.com/tutorials/custom-impact-effect

Final Results