Visual Effects: Lesson 01: Material Particle Color
Creating Materials for use in Particle Effects in Unreal Engine 4.0
Beginner Level
Setting up your Material with Particle Color for use in Cascade.
This quick lesson covers some very basic concepts of material setup for use with particle systems in Unreal Engine 4, and is intended for new users, or those wishing to get an update on new methods used in UE4.
For this lesson we will use an unlit translucent material, and properly setup color and alpha blending.
First we will start by creating our material by right clicking in the Content Browser and choosing Basic Assets>Material.
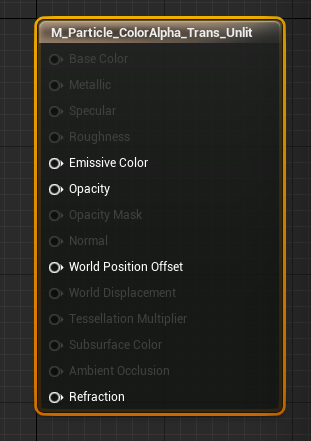
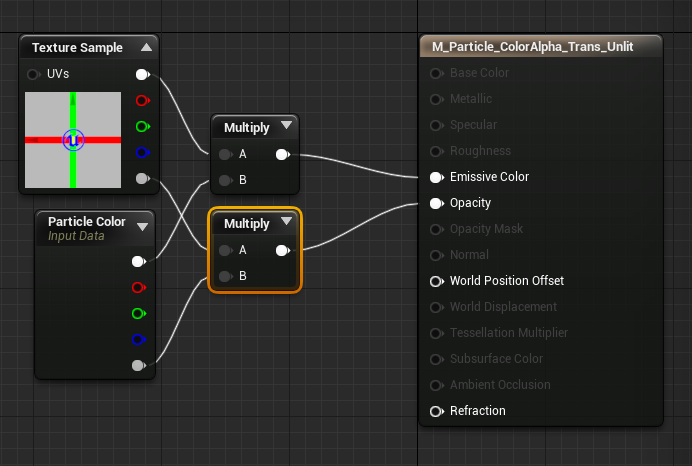
Name your material M_Particle_ColorAlpha_Trans_Unlit .
Sometimes I like to label my materials with the blend mode so it is easy for me to see at a glance what the materials blending/lighting is. It is always possible to get this information by holding your mouse over the material icon as well. You can make your names longer or shorter at your own discretion. It can be valuable to use keywords in your naming which are easily searchable by team members etc.
Open the material by double clicking on it in the Content Browser.
In the Material Editor select your material output node.
In the details panel set your Blend Mode to Translucent , and Lighting Model to Unlit
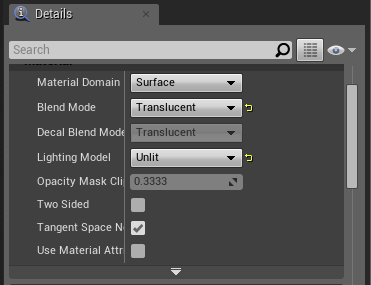
Leave the lighting settings to the defaults as we will not be using them for this example.
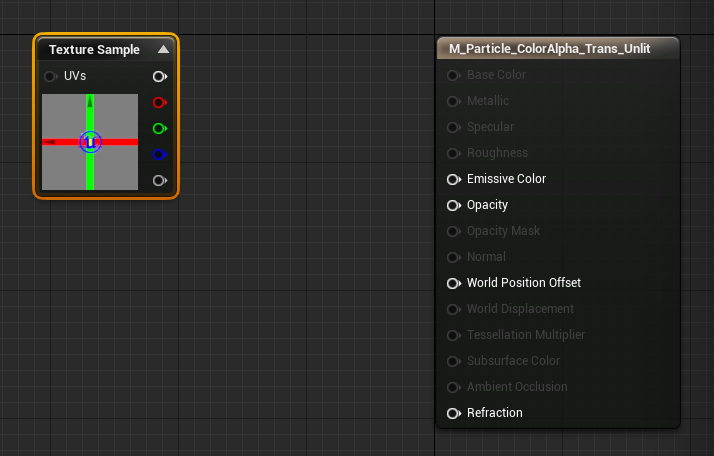
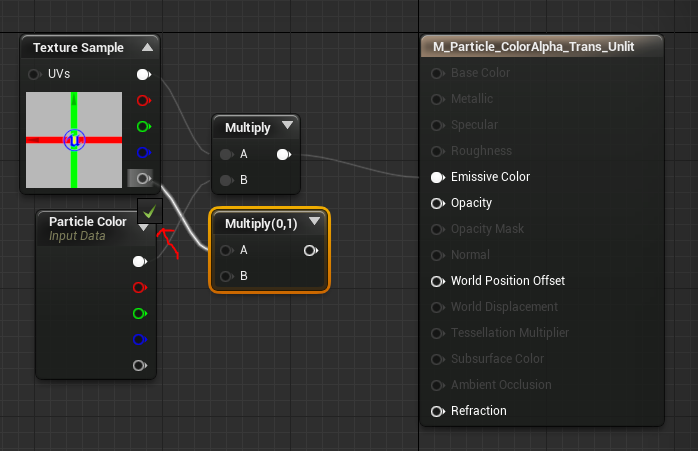
In the grid area of the Material Editor, add a Texture Sample by holding down T and left clicking in the space.
TIP! If you have your texture selected in the Content Browser it will automatically assign the texture when you add the node.
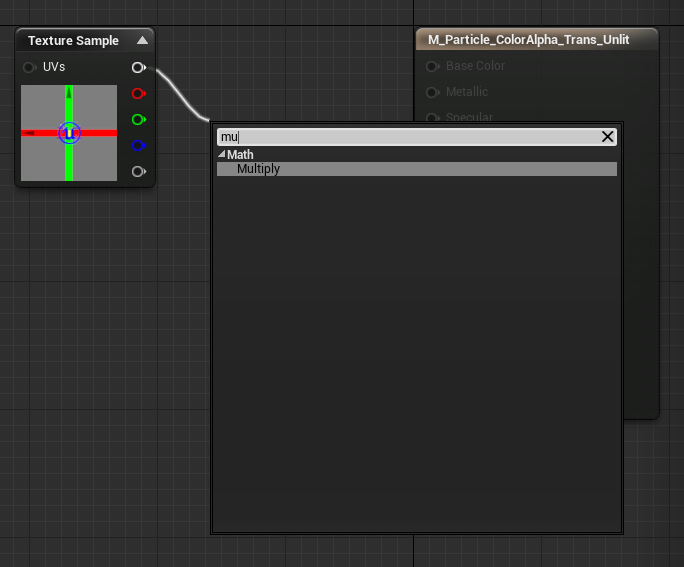
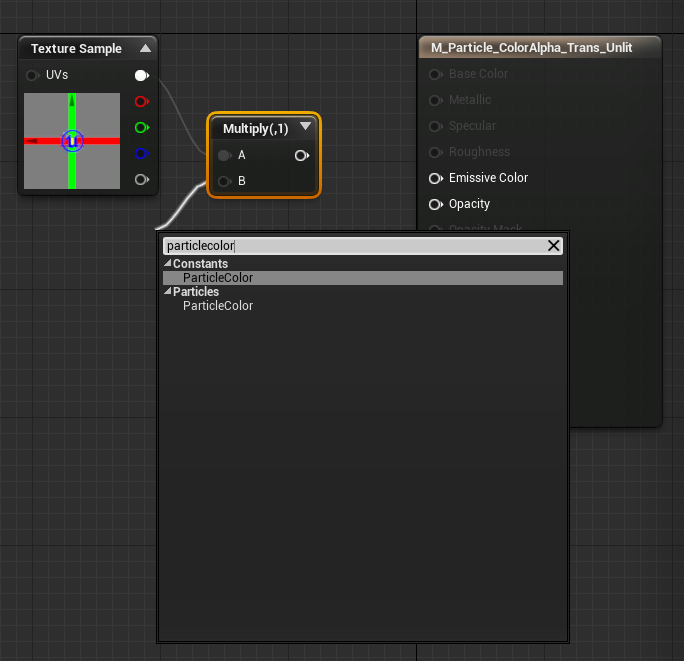
Now drag off of the color output of the Texture Sample expression, let go of the mouse and begin typing " multiply ". This will filter the list for you; click the multiply text in the drop down to add a multiply node.
TIP! You can also press M and left click in the space to quickly drop a multiply node on the graph.
In order for Particle Color to properly blend using the color control modules in Cascade we need to multiply our texture’s RGB color output by Particle Color . This essentially tells UE4 we are intending to modify this color in Cascade. Without this expression, you will be unable to modify your color in Cascade.
To add the Particle Color expression drag off of your multiply input and type particlecolor.
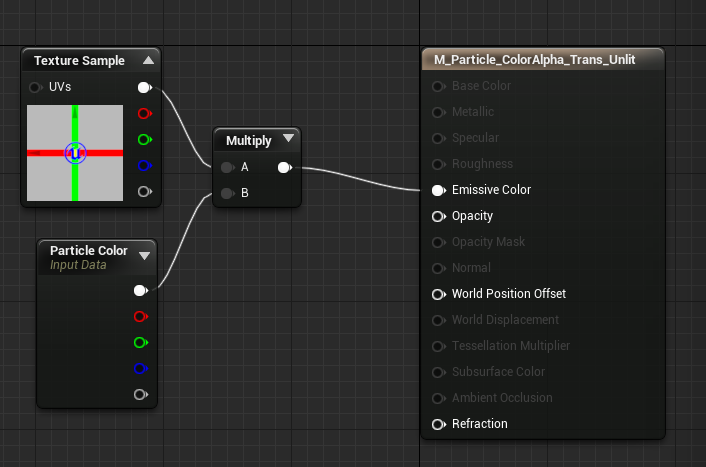
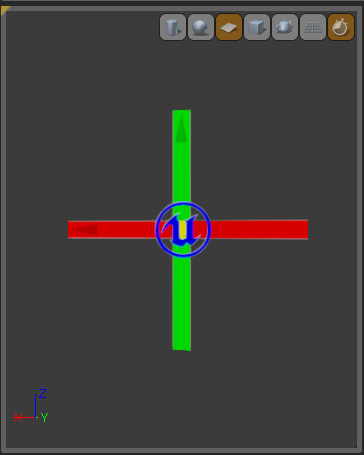
Next, plug the output of your multiply expression into the Emissive Color input of your material. Note your material preview window has updated. You can press the plane button to see the material as it will be visible on a sprite in Cascade. If the plane disappears try rotating around the Z axis in the preview window.
Compile your material using the green apply check icon.
Now, in your Content Browser create a new particle system by right clicking and choosing “particle system” from the list. Name it P_ColorAlpha_Blend_Test (something similar to your material name will help you find the asset again if you use this for reference later on).
Open the effect by double clicking the Particle System in the Content Browser.
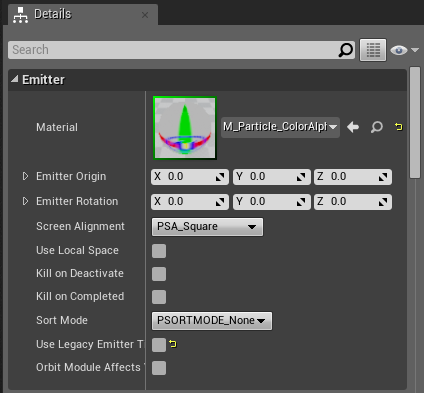
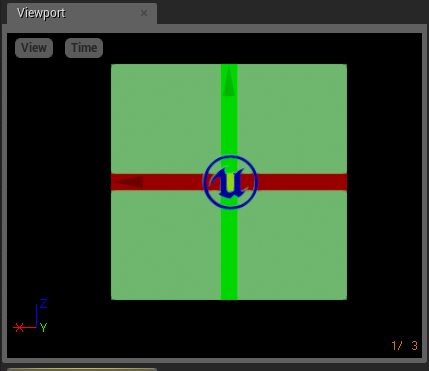
Click the required module (yellow) and assign your material in the material field, leave the rest of the options at the defaults for this example.
You will notice now, the sprites in your viewport have changed to match the new material assignment.
To make this example easier to view, lets change some settings in the particle system. First delete the initial velocity module and set your spawn rate to 1, to make it easier to visualize the changes we are going to setup.

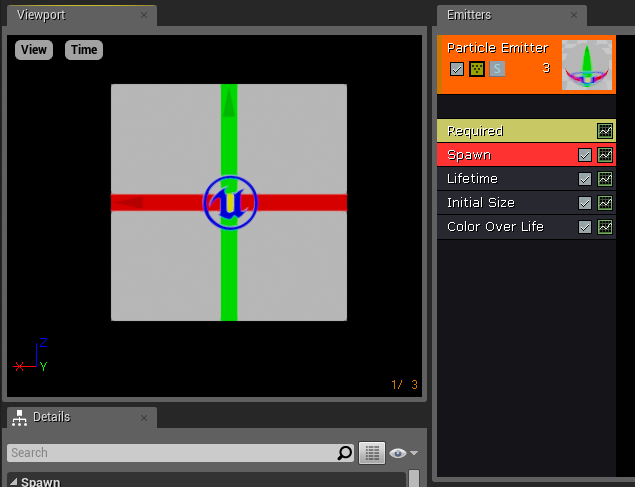
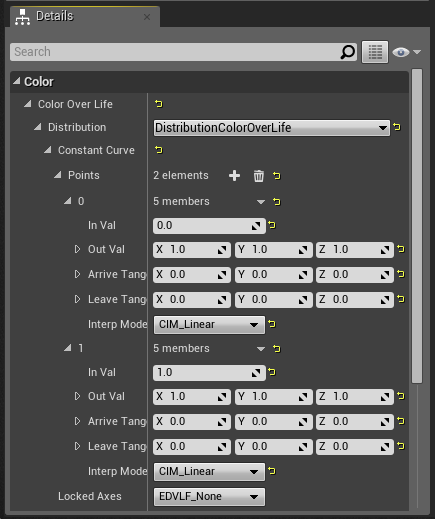
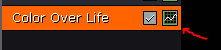
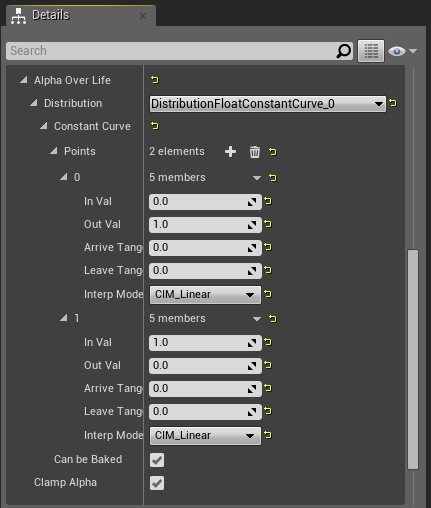
You will notice right now there isn’t much happening visually; to see a change we need to modify our Color Over Life module. Click the module and open up the color section by clicking the arrows in the Color Over Life section. Keep on clicking and open up all of the sub sections so we can see all of the curve controls.
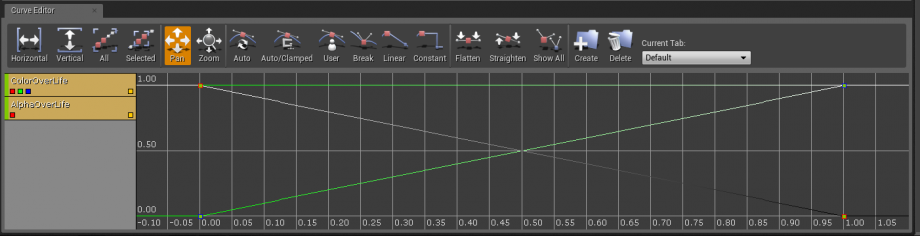
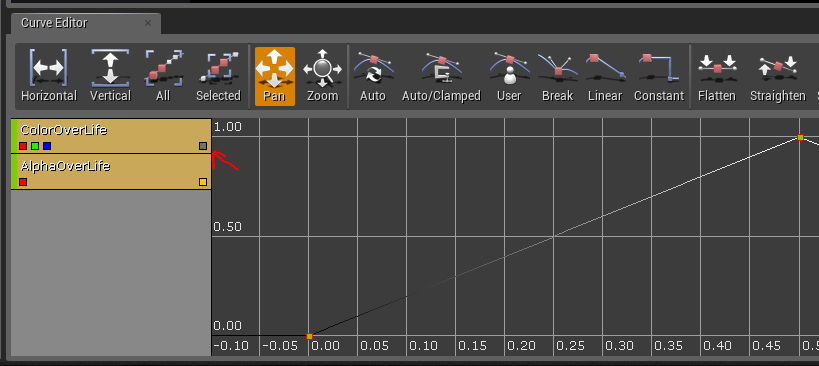
This curve can be visualized by mapping it to the timeline with the icon on the ColorOverLife module.
Map the curve to the Curve Editor view, and press the All icon.
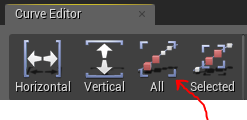
This will map your curve to the entire graph so it is easy to visualize.
In your Details panel, change the OutValue of the 0 point on your curve to 0,1,0. This will make your particle turn green, and fade to the original textures RGB color values over the lifespan of the particle.
Note that your curve in the Curve Editor has changed to reflect the color settings.
Now that we have our color working, let’s setup the alpha, so our sprite fades in and out nicely.
Go back to your material using the tabs along the top of your workspace.
This time, try holding down M in the graph area of the Material Editor and left click to place a multiply node. Note that this does not automatically hook up the expression to your alpha input. Drag off of the input of the multiply and connect it to the alpha of your texture sample.
The Material Editor will display a small green check box icon when you are over a pin to which you can connect. This makes it much easier to manipulate materials later on when you have complex graphs with the view zoomed out.
Connect the input of your multiply to the output of your particle color alpha, and connect the output of the multiply to the Opacity of your Material input.
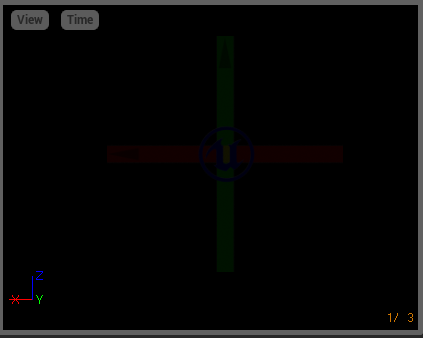
Note in the material preview view port, the background grey color has disappeared.
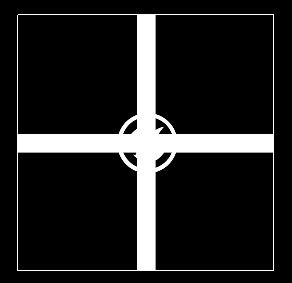
This is because the Alpha channel of this texture masks out the grey areas, leaving only the X,Y colored elements.
Return to Cascade, using the Tab on the top of your workspace. You can see now, with the default settings on the Color Over Life module, your particle is fading out over the life of the sprite. But for this example we want it to fade in and out.
Click the Color Over Life module and open up the alpha section.
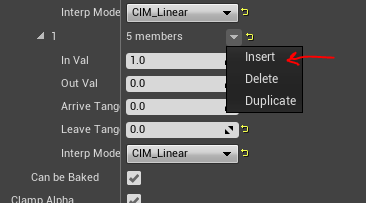
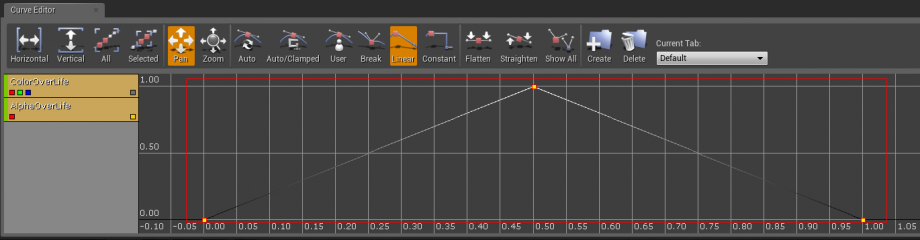
Note that we only have 2 points plotted along this curve and to fade this in and out we are going to need at least three.
Click the small arrow all the way to the right of the 1 in the detail panel. Choose “insert”; this will add a point to the array, between 0 and 1.
Set the In Val of this point to .5 and the Out Val to 1; note the changes to your alpha curve in the Curve Editor.
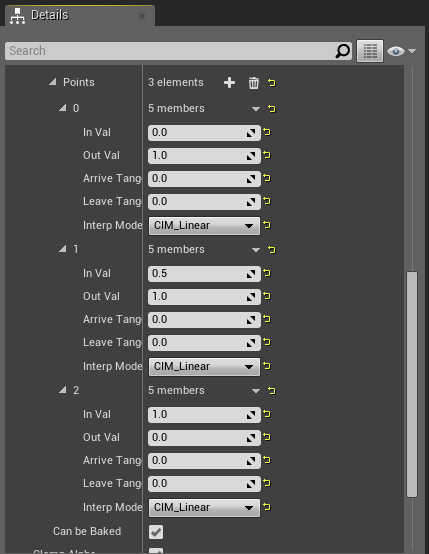
Now set the Out Val of the 0 point to 0, and your particle will linearly fade in and out over 1 second, because the lifespan of your particle is set to 1. It is important to note that this curve does exactly what the module name implies; it controls the color over the lifespan of each particle emitted by the emitter.
Fading in and out looks better, but it is a harsh linear fade in and out. Let’s set this particle fade in and out in a nicer fashion. Or as we may say at Epic, ease it in and out.
In the Curve Editor, you can see your ColorOverLife and AlphaOverLife both highlighted yellow. This is because you should currently have the ColorOverLifeModule selected. If you don’t, go ahead and select it now, and note the change in the Curve Editor.
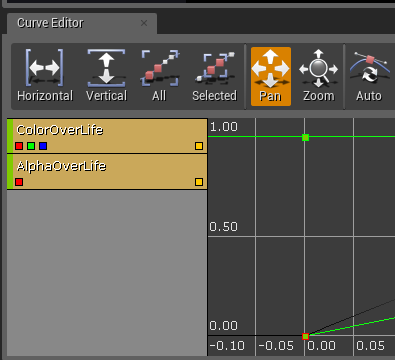
The view is a bit cluttered, because we have both color and alpha in view; let’s go ahead and filter this down to alpha only, by clicking the small yellow box to the right of the ColorOverLife selection.
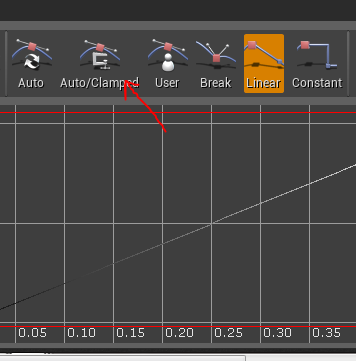
Note that the only curve we see now is the Alpha curve. To ease this in and out we can hold down Ctrl+Alt and create a marquee selection in the curve editor, grabbing all 3 points on the curve.
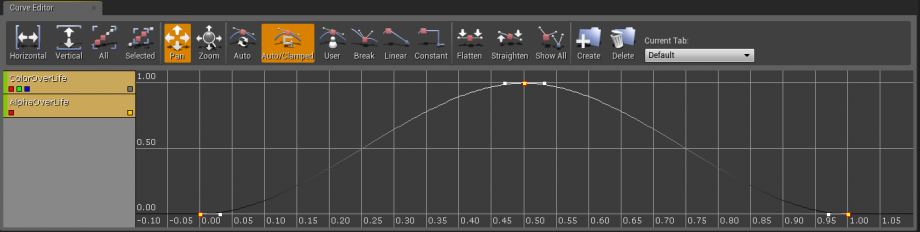
With all three points selected, we can smooth out the points along the curve by pressing the Auto/Clamped button.
This yields a much smoother fade in and fade out over the particle’s lifespan, making the effects feel more natural.
Try playing with the lifespan of your particles and try moving the points along the curve to different positions. Adjusting timing and alpha settings can mean the difference between an effect which feels like it has great force and power, and one which feels slightly sluggish and lazy.
I hope that gets you more comfortable with controlling color and alpha in Cascade. Feel free to post any questions regarding this topic in the forums!