Static Mesh from Blender
Contents
Overview
Blender 2.7x has a built-in FBX import/export addon which can be used to export models to UE4.
You can download the latest version here , but keep in mind this tutorial is based on the FBX addon included in Blender 2.70.
Background about the FBX export pipeline can be found in the official documentation at: https://docs.unrealengine.com/latest/INT/Engine/Content/FBX/StaticMeshes/index.html
In a twitch session broadcast on 3 May 2014 (
http://www.twitch.tv/unrealengine/c/4174458
) Lead Engine Programmer Matt Kuhlenschmidt stated that due to the need for better FBX workflow from Blender to Unreal Engine, Epic was working with the developers of the Blender FBX Export plugin to improve the already good quality.
He requested that Epic needed examples from the community of Blender models which were known to be broken when exported as FBX.
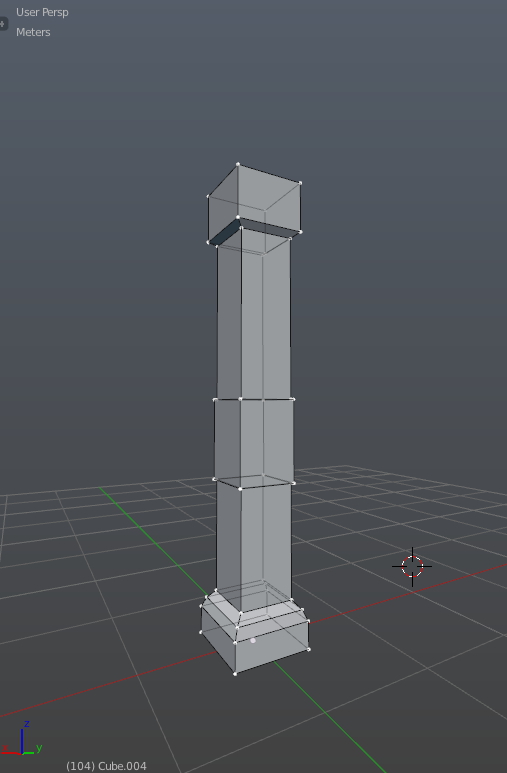
Modeling Objects
You can use any modeling technique such as Nurbs, Bezier, modifiers, etc. When you export, Blender will convert your object(s) to a mesh type. However, is recommended that you convert it inside Blender to unwrap its UVs appropriately.
Multiple Objects
Considering the nature of how the FBX exporter manages pivot points ( see "Pivot Points" ), working on several objects in one .blend file can cause clutter. If you are working on several objects in the same .blend file, you can store each object in a separate layer, so that they can each be placed at the center of the scene without making a mess.
See "Exporting" and "Exporting Batch" sections for more information on how to export many objects.
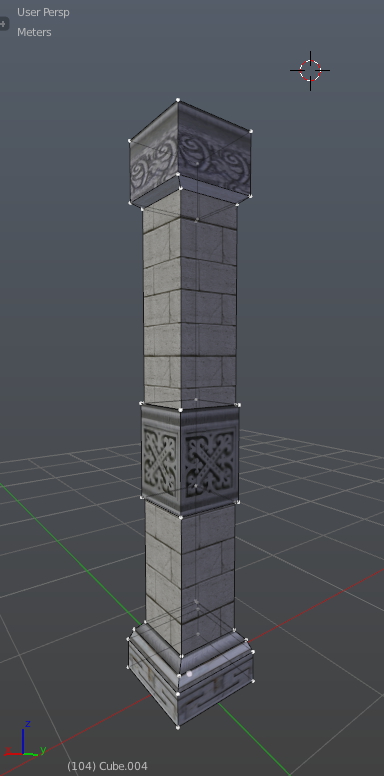
Texturing
Base UVs
You only need to use one UV channel for Base Color, Roughness, Normals, and other Material related properties.
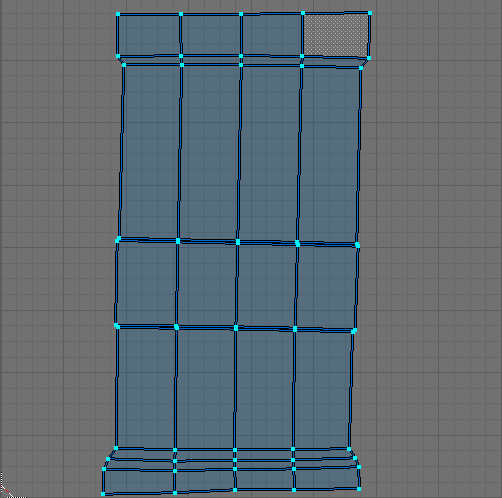
You can create your own UV map using the Mark Seams tool ( Ctrl + E ) and the Unwrap tool ( U key ), or you can make use of the automatic unwrapping functions such as Lightmap Pack or Smart UV Project . Keep in mind that the latter two will not always result in nice looking seams, which is most noticeable on organic objects.
The UV areas for all faces contained in your final FBX file should not overlap, i.e. not possess the same areas.
Lightmass UVs
For Lightmass to work with your static mesh, the mesh needs a set of UV coordinates that can be used to create the lightmap.
- Create a second UV channel to store the lightmap.
- I recommend unwrapping the UVs for the lightmap in Blender since the automatic UV mapper inside UE4 is too slow in some cases or doesn't work at all.
- Keep in mind that UV maps can't contain overlapping areas.
Pivot Points
The FBX import/export plugin will (in most cases) place the Pivot Point of your exported objects at the origin of the world, which is at the coordinates (0, 0, 0) , rather than using the Pivot Point of the objects in Blender.
This means that your objects must be positioned in such a way so that their Pivot Point is at the origin of the world, and will not be changed through exporting.
To ensure that your object is properly aligned to the World's origin (0, 0, 0), use
Alt + G
to clear its location.
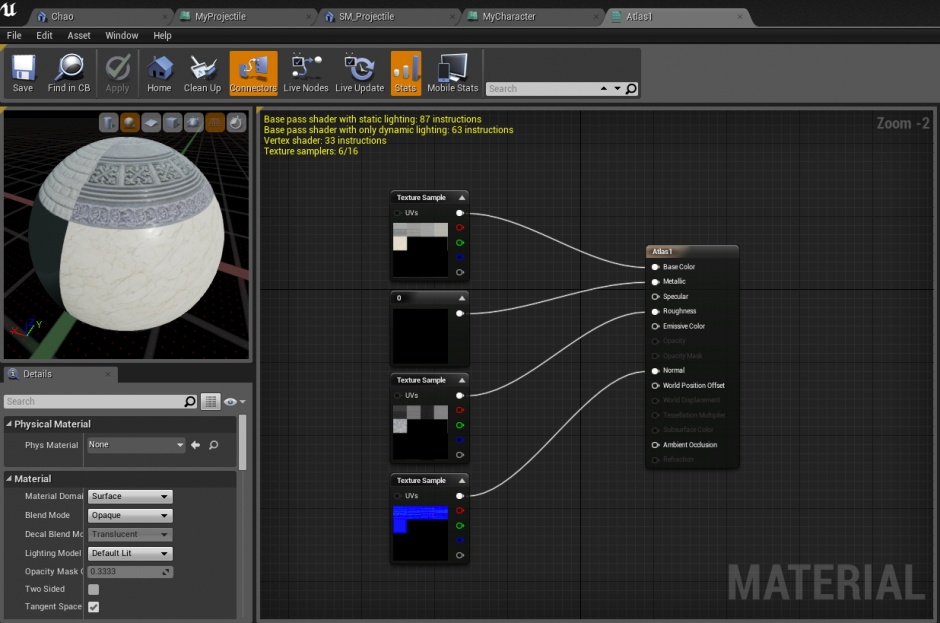
Materials
It's better to create your materials inside UE4 instead of importing them from Blender. This will give you more control of the asset organization in your Unreal project folder. However, if your static mesh has multiple parts that will have different materials applied to them, you must assign different placeholder materials in Blender before exporting to FBX. UE4 will divide the static mesh into different elements based on the materials assigned in Blender. These will appear in UE4 as Element 0, Element 1, etc. and cannot be renamed or re-ordered. UE4 will create these elements regardless of whether or not the "Import materials" option is enabled in the FBX importer.
There are several ways to find out which element corresponds to which part of the static mesh:
- Open the Static Mesh Editor and use the Highlight checkboxes for each element.
- Add the static mesh to a level as an actor. Then drag materials onto the desired parts of the mesh in the viewport, watching for changes to the materials in the list of elements on the right.
- Give meaningful names to the materials in Blender, then make sure "Import materials" is enable when importing the FBX into UE4. This only works as long as you keep those imported materials in your UE4 project and don't change the default materials for the static mesh.
LOD
Collision
By default, when you import your static mesh asset into the Unreal Engine there will be no collision mesh associated with it. This means that players and physical objects will be able to pass through it without colliding. There are two primary methods for creating collision meshes: Automatic inside of UE4, and Custom from another 3D application.
Custom Collision
This section still needs to be written. Full documentation on creating custom collision meshes for the FBX Content Pipeline can be found here .
This has been tested and works with Blender and the FBX export addon.
When creating custom collision geometry inside Blender, it can be very helpful to first select your model and turn on X-ray mode under the object's display mode.
Automatic Collision
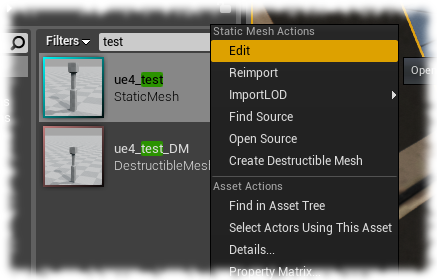
In the Unreal Editor, you can automatically generate a collision mesh for your static meshes. This automatic method is not extremely accurate, but for simple props, it can get the job done. For more complex props where collision matters, it is suggested to use the above Custom Collision method to create your own collision meshes.
Locate your asset in the content browser and right click on it. Select the edit option from the context menu which pops up (as shown below):
The window which pops up should look something like this:
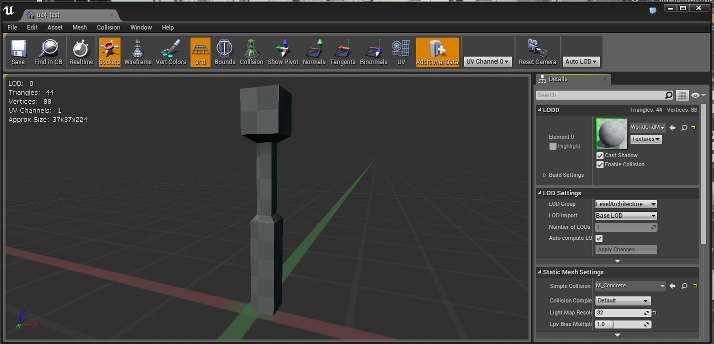
You will then need to click on the "Collision" menu at the top of the screen. This will present you with many options.
Experiment with the different collision options to find the right fit for your model. Try the 6DOF (6 Degrees of Freedom) option first. You should see a box now appear around your mesh. If the green box does not appear, then click the green
Collision
button above the window to turn that layer on.
Exporting
In the FBX Export menu, the value of the Scale parameter depends on how your viewport is set up in Blender. If you adjusted the Unit scale in your Scene settings, as described in the Scale Conversion: Unit Scale in Blender section, you can leave this Scale value set to 1.0 .
(see the "Scale Conversion" section for more information)
To export only the selected objects, enable the
Selected Objects
check box.
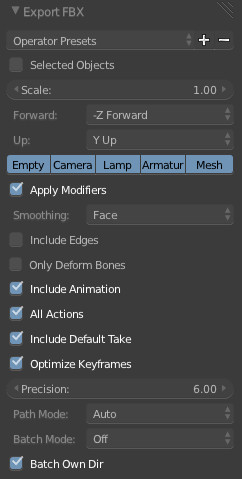
Batch Exporting
You can export many models at the same time in a Batch process, but you will need to create a group for each asset or separate it by Scene in "Batch mode". You can set this configuration for a Batch export. The Batch Own Dir option is useful if you want to separate it folders. Set a name and export it.
Importing in UE4
- Import your model.
- Open it in the Static Mesh Editor and configure the collision mesh (if necessary) and any other settings such as LOD. Save it.
- Insert the object into the scene.
- Create a material (in a folder with a descriptive name), and apply it to the object in your scene. (You may need to apply materials to specific material elements, if your object is set up for multiple materials.)
- Bake the Lightmass using the "Build" or "Build Lighting Only" command.