Randomize Meshes and Materials at runtime with Level Blueprints
Contents
Overview
Blueprints are a kind of Next Generation for Kismet from UE3. In this tutorial I would provide a way to Randomize Meshes and Materials through Blueprints at run-time. I am using 3 very basic Meshes and very basic Vector Colored Materials for this purpose.
Along the tutorial I'll also provide a few steps where the people very new to Unreal could easily learn to Animate meshes with Matinee. Lastly, it was made on the Rocket Beta version of UE4 that I was testing since a few months. Version: 1904627
Setting up Meshes
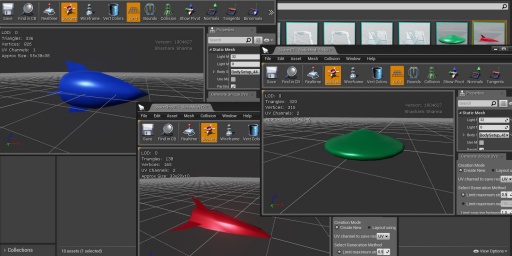
So firstly, import your Static Meshes and Textures with Content Browser. The 3 Meshes I imported are of a Rocket, Spaceship and a Saucer and applied very basic Materials on each of them.
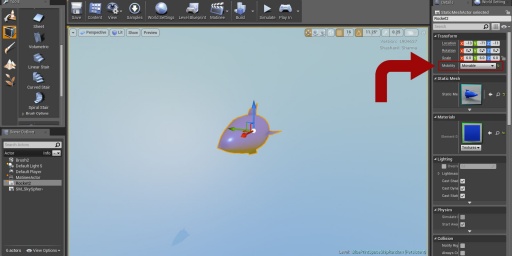
Now in your level, put in one of your meshes and change its Mobility to "Movable" . The reason behind this is that a Static Mesh only gets dynamically accessed or moved with Matinee, Code or Blueprints in-game when it is set to Movable. This is similar to "InterpActor" entity in UDK.
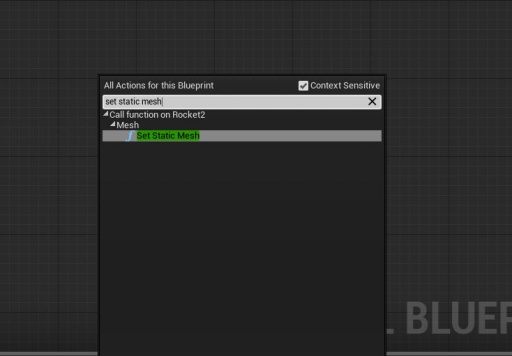
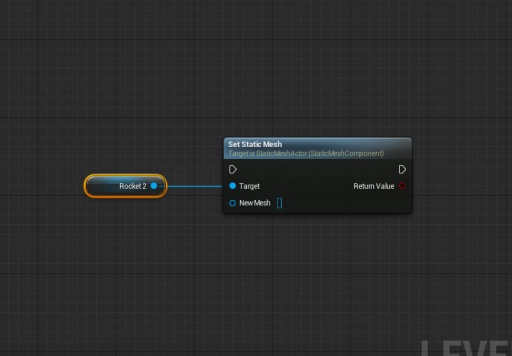
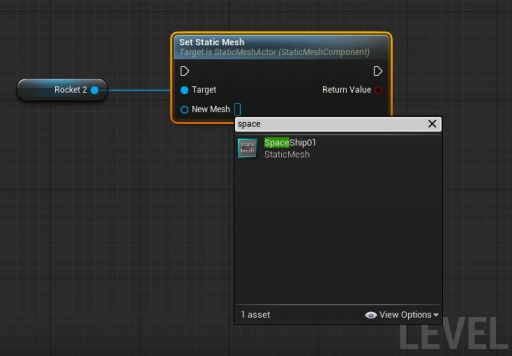
Open the Level Blueprints, which can be accessed from the top panel of the Editor. Select the Static Mesh Actor in the Level and go to the Blueprints Graph Editor. While the Actor still selected, Right-click on the Graph Workspace and do a search filter for "Set Static Mesh" . You will then get a "Set Static Mesh" node with the Actor variable already attached to it. Hover over the "New Mesh" option and click to the last Grid-like button which says "Pick" . In the search field, find the Mesh you want it to change with and click on it. In my case, I wanted to set it with the Spaceship mesh I imported.
Randomizing Mesh
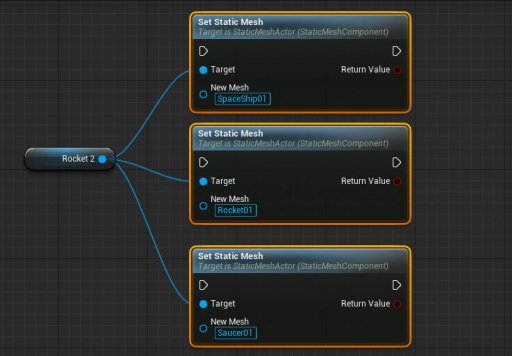
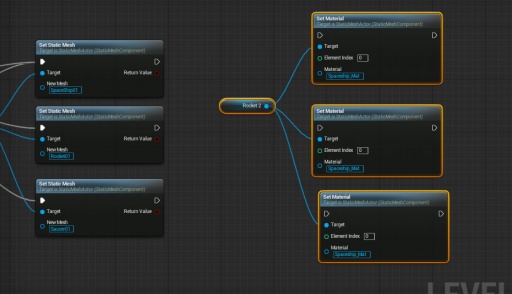
Now, before anything else, make 2 more copies of the "Set Static Mesh" node and in each node, pick a different New Mesh. You can do this simply with Ctrl+C and Ctrl+V. In my case, I kept one copy as the Rocket mesh itself and another as Saucer mesh I imported. Just make sure that you connect the variable node as Target in each "Set Static Mesh" node.
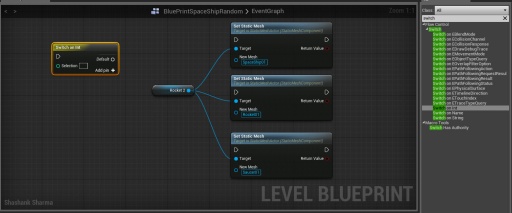
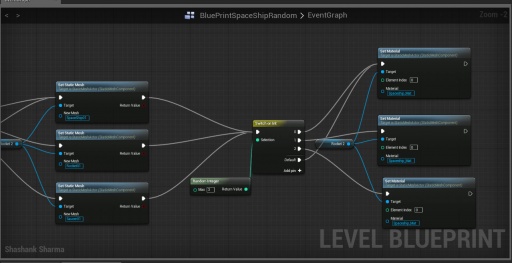
To the right of the Blueprints Editor, in the Palette column, or by Right-clicking on the empty Graph area, search and find a Function Node called "Switch on Int" and place it in the graph. This can be related to the Switch Cases in programming languages where you can give multiple switch cases and also declare a "Default" value which keeps you on the safe side by giving an output if something beyond the scope of the Switch Cases is called. We'll Understand this quickly here soon.
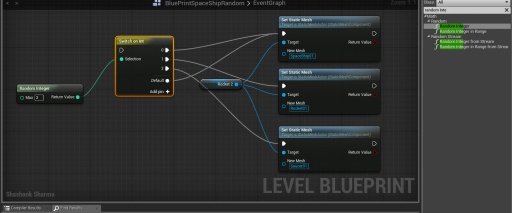
Now, add 3 output pins by clicking thrice on the "Add Pin" button on the node. This basically sets the output nodes for the Switch Cases. Also, on the left part of the Switch node, is an Input plug for Selection, which is Green in color, which means that it'll take an Integer for an input(the color coding of Unreal is pretty good even in UE3/UDK Kismet). Now you can give this Integer input value dynamically anyhow in your game levels. In this case here, we'll Randomize it. Go back to the Palette Search on the right and search "Random Integer" and place it in the graph. It also has a Max integer input plug, which can be declared internally by putting a value just besides it. I'll set it to 3 . This means that it'll output randomly between numbers 0-3. Output this Random node to the Integer Input of Switch Node. One thing to note here is that the Switch node, again, works like the Programming counterparts and starts with 0 being the first value and not 1. So if we are switching between random numbers 0-3, it will mean that whenever 3 is output from Random node, the Switch will select Default declaration because Switch legally toggles between numbers 0,1,2 . Since 3 is out of its scope, it will save us from a hazard by choosing Default. This can be very useful in the games as well as in usual Programming. Just take each output node from Switch and connect it to each "Set Static Mesh" node. I put Default as first Set Static Mesh node too.
Randomizing Materials/Textures
Being done with the part of setting Static Meshes dynamically, we move forward to setting the Materials dynamically. Make sure you still have the Static Mesh Actor Selected in the level and do the similar steps; Right-click on Graph, filter out and place "Set Material" node. In the Material input of the node, I picked Spaceship Material, made 2 more copies of it and in them picked Rocket and Saucer materials.
Now simply copy and paste the Switch and its connected Random Integer nodes and place them between the "Set Static Mesh" and "Set Material" nodes. Input each Static Mesh node into the Switch Input node and connect each Output of the Switch to each "Set Material"
Matinee Embellishment
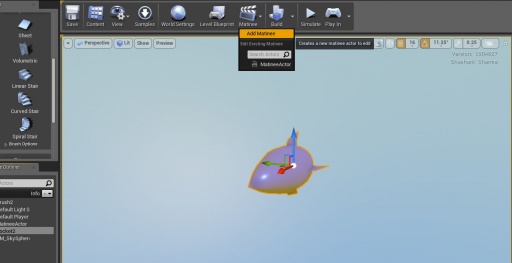
Firstly now, compile your Blueprint from the Top-left option on the Blueprint Editor and save the level just for the safety and close the Blueprint Editor. Go to the Rocket Editor and from the top Matinee option choose "Add Matinee" .
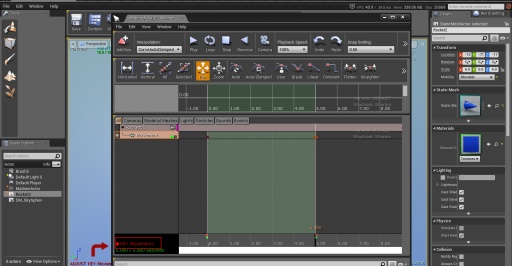
When the Matinee editor opens up, again, make sure your Static Mesh actor is selected. Right-click on the blank grey area of the editor and choose "Add New Empty Group" . When the naming box comes, we simply name it Rocket01 and we see a track is created in the Matinee Editor by the same name.

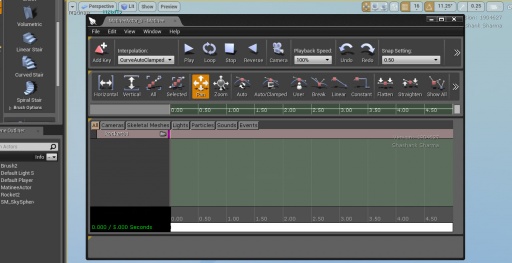
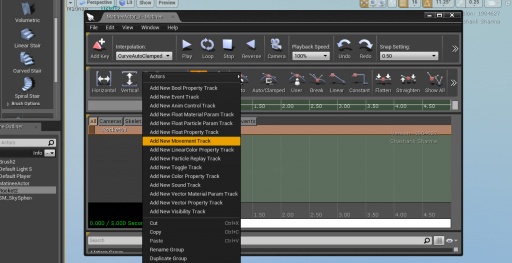
To test that the Static Mesh Actor in the level is connected to the Matinee track here, simply click on the track. If it's all well, it'll select the Actor in the level. Now, Right-click on the track and select "Add New Movement Track" .
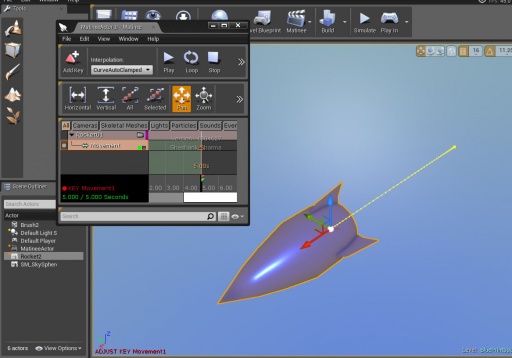
Just to show a simple straight line movement, we drag the black Time Bar to the end of the track, which by default is set to 5 Seconds. If you have to make it smaller or bigger, you can do so by moving the bar with the Red end on the Right side. So, at the end of the track, and with "Movement" track selected, either press Enter or click "Add Key" to the left top corner of the window. This will add a new Keyframe at the Timeline as well as activate the Matinee animation Input. You can see "Key Movement 1" visible at the left bottom corner. While the Matinee Editor still open, just minimize it and drag you Actor wherever you want; you can even rotate it in anyway. If its all going right, you should be able to see a yellow trajectory when you drag your actor. This trajectory is basically the path on which your Actor travels.(Pretty useful in Camera animations specifically, if you ask me).
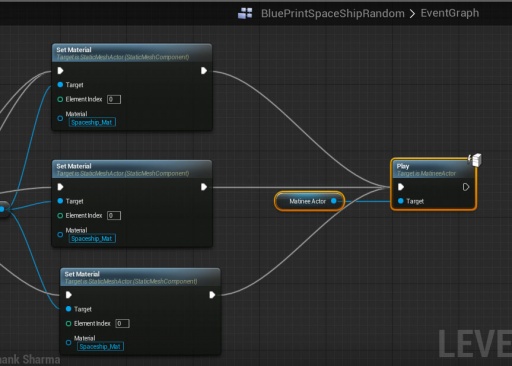
Now simply close your Matinee Editor and in the Outliner, select the Matinee Actor which got created and while its selected, open back your Level Blueprints Editor. Right-click on the graph and filter search "Matinee Play" . Select it and you should get a Play node with your Matinee Actor attached to it. Now simply connect all three "Set Material" nodes to the Play input of the Matinee node.
Ending it
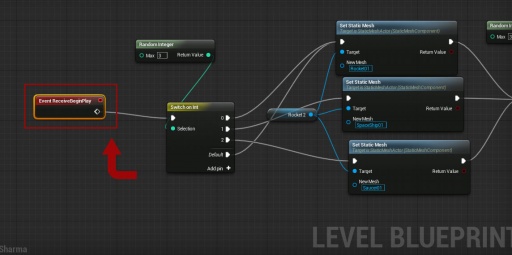
To end it, just plug the first node to an Event. In our case, I'll plug it to the "RecieveBeginPlay" event. So now if you compile the Blueprint and run the Simulation, every time you run it, a random Mesh and a Random Material will execute on the give Matinee path. You could even loop it if you require.
This could be multiplied for more Static Mesh actors generating more Random Meshes and Materials on their respective Matinee paths by just copy-pasting all the nodes and simply changing the Mesh, Material and Random Integer input values.
Hope you find it useful.