Particle Instance Parameters Tutorial
Contents
Overview
Instance Parameters are a very powerful part of the effects pipeline in UE4. Particle Parameters can be used to control a multitude of values, on a per instance basis. Particle Parameters are often used on placed level effects, though they can also be called by game code to control various modules.
Controlling Color Through Parameters
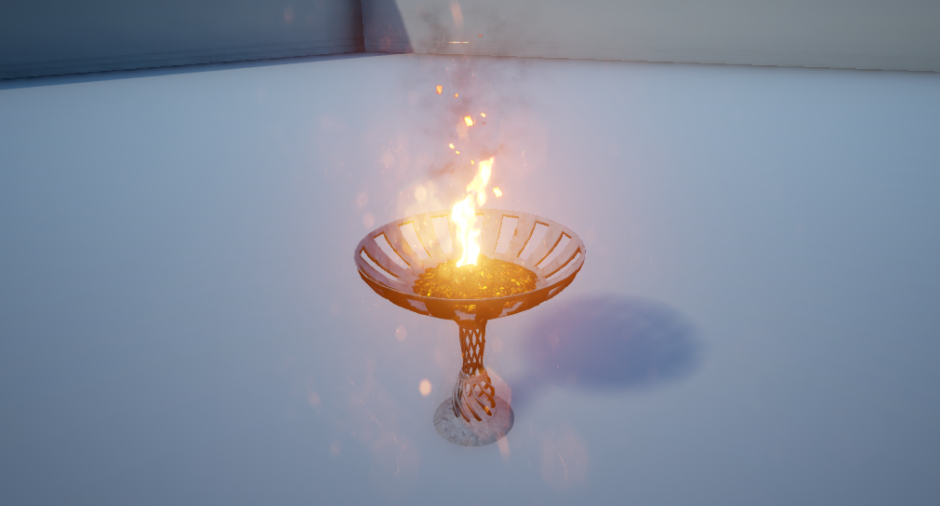
For this demonstration we will control the color of a fire particle system using the ScaleColorLife module, setup with a ParticleParameter . We have set up a simple level with a basic flickering torch (used in the Epic Citadel map) in the middle of a large test stage.
First open your effect in Cascade, and make certain you have an initialColor or ColorOverLife module in your particle system.
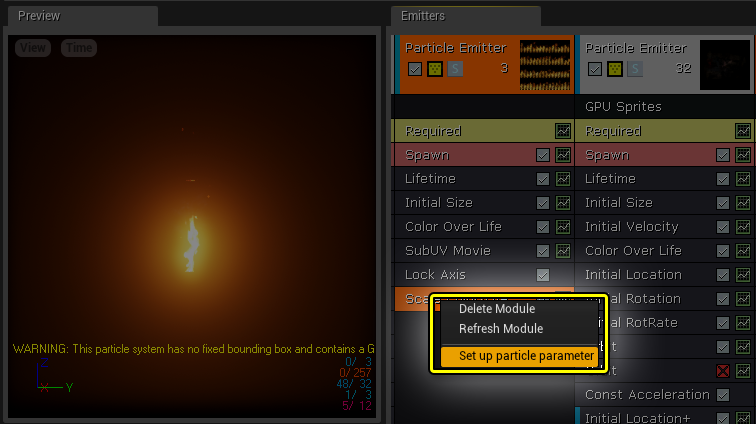
Next right-click on the flame emitter add the Color > ScaleColor/Life module to your system. In the case of ScaleColor/Life the parameter gets utilized very often so setup is as easy as right-clicking and choosing Set up particle parameter . Note: this is not the case with all particleParameters.
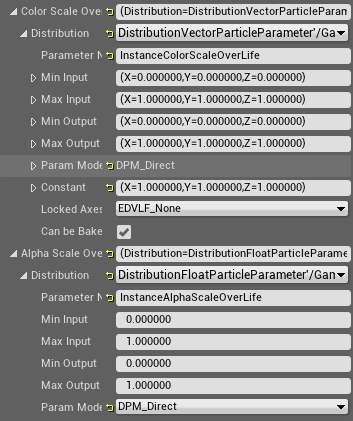
If you select the module and view it's properties you can see vector and constant values have been defined for this module. The Parameters have been automatically named InstanceColorScaleOverLife and InstanceAlphaScaleOverLife , though it is possible to modify these names and have multiple Parameter names in any particle system, placed on unique emitter stacks.
Setting up the Instance Parameter
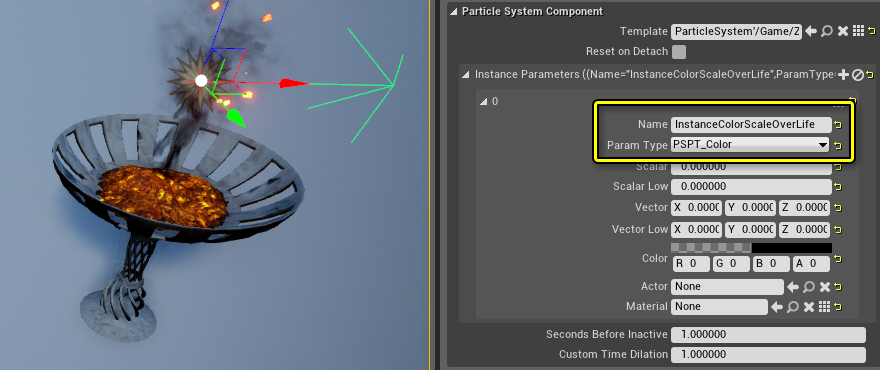
The next step involves the individual EmitterActor placed in the scene. Select the EmitterActor and look in the Details Pane. Locate the Instance Parameters section, located under the Particles .
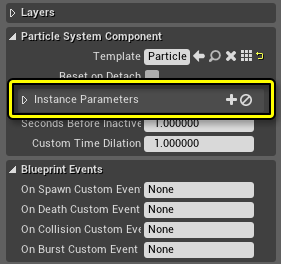
Press the +' button. This will add a new parameter slot into the emitter. You *could* do this twice if you wanted to control alpha, but for this example we are only going to use color.
Make sure the parameter name within the new parameter matches the parameter name given to the parameter in Cascade. If you left it at its default value, it will be InstanceColorScaleOverLife . Also set the Param Type property to Color . Your particle system will likely turn black. This is normal.
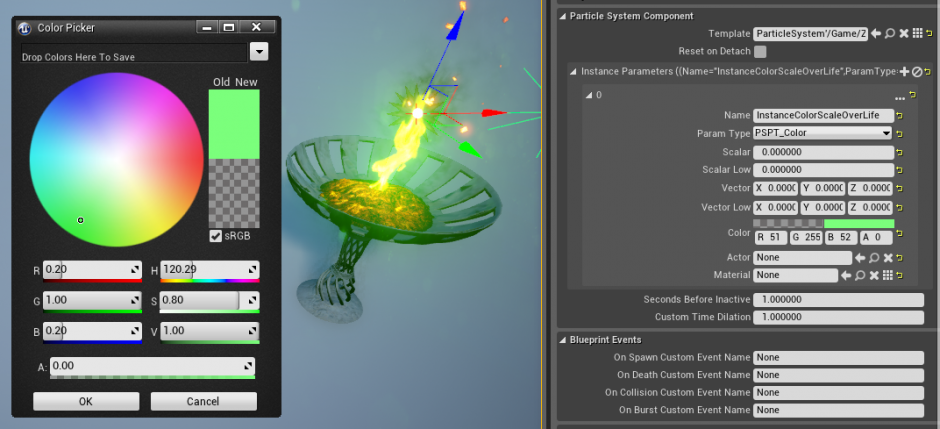
Set the color property to any color that you like. Experiment with different colors and see what you get!
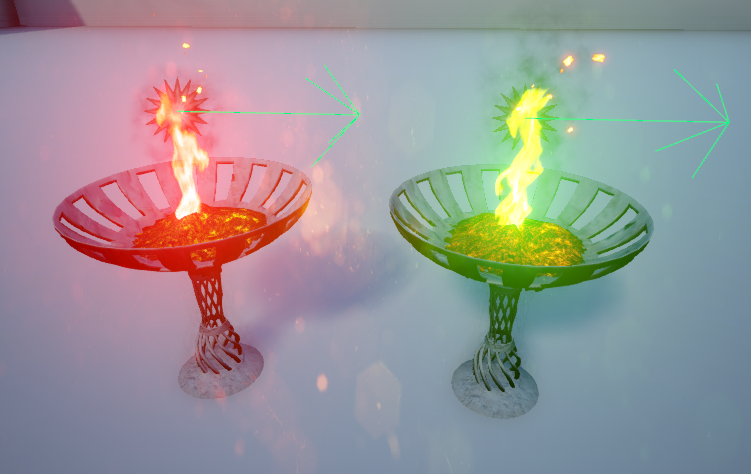
It is possible to use the color parameter to customize one particle effect as needed without having to copy/paste multiple effects into your packages for basic color variation across different levels. In the following image, the particle actor was duplicated and the color parameter was changed. Notice that the change does not affect the originally changed copy. This means you can use the same parameter to have different colors on each instance.
ParticleParameters can make organizing and finding effects much simpler, reduce memory, level load times, and reduce the amount of files required to be stored on disk.
Controlling Particle Parameters via Blueprint
Although parameters are useful in that they allow you to make alterations to an existing particle system without having to create an entirely new asset, one of the more useful aspects is that they expose particle control to external sources such as scripts, Matinee, and Blueprints. In this example, we're going to take the color-changing fire from above and drive its color change by way of a simple Blueprint script.
For simplicity's sake, we will use Level Scripting in this setup, though such systems would generally be more useful if set up with a Blueprint, which could then be easily deployed into other levels.
We will begin with a flame effect that has a parameter set up for color, as was done in the previous example.

Click the Level Script button to open the Level Blueprint window. To prevent this document from becoming a Blueprint tutorial, here is the network used:
-
- Click for larger view.**
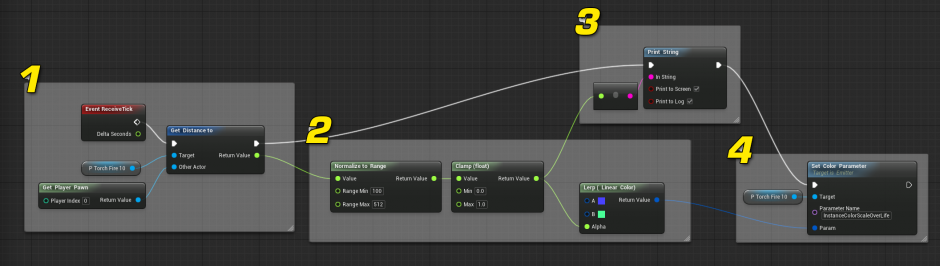
1. Every frame we get the distance from the player to the particle system. 1. We need to lerp, so normalize min and max ranges, clamp to 0-1. 1. Log the value out to the screen for good measure. 1. Set that color parameter using the results of our lerp.
The final result is that the flame will change color as the player moves toward and away from it.
1. When viewed at a range of 100 units, the flame has a blue tint added to it, causing it to be a faint purple. 2. When the player moves 512 units away and beyond, the flame has shifted over to a green color.
Setting Up the Particle Parameter
Using a single emitter we will move the position of our effect with a particle parameter. For this example, the system has but one emitter.

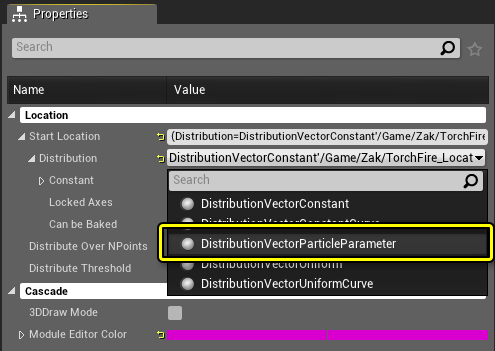
Right Click and add an Initial Position module to your Emitter in Cascade.
Select the Initial Location module and in the Distribution List choose DistributionVectorParticleParameter .
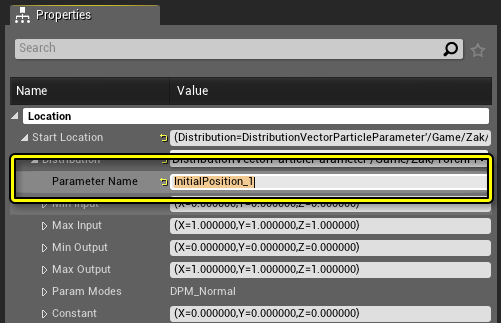
Change the Parameter Name to InitialPosition_1 or any parameter name you choose, just make it unique for this emitter, unless you wish to share position values across multiple emitters using a shared particle parameter.
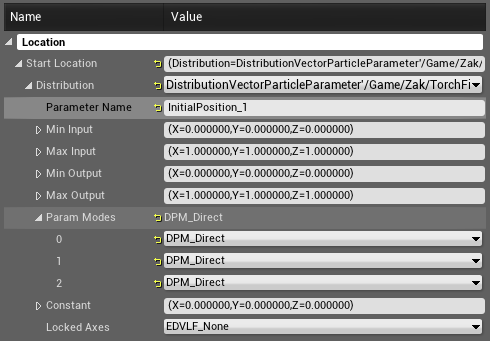
Open the Param Modes section and change the drop downs to DPM_Direct
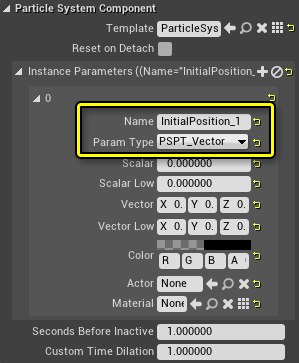
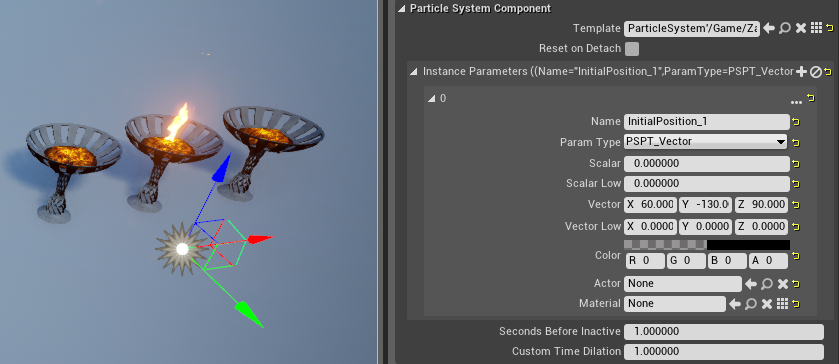
In the level, select the Emitter actor and look at the Properties Window. Expand the Instance Parameters section and click the Plus button and add a new entry into the list. Set the Parameter Name to InitialPosition_1 (or whatever name you selected earlier). Also set the Param Type property to PSPT_Vector .
Change the Vector values to match whatever the desired position.
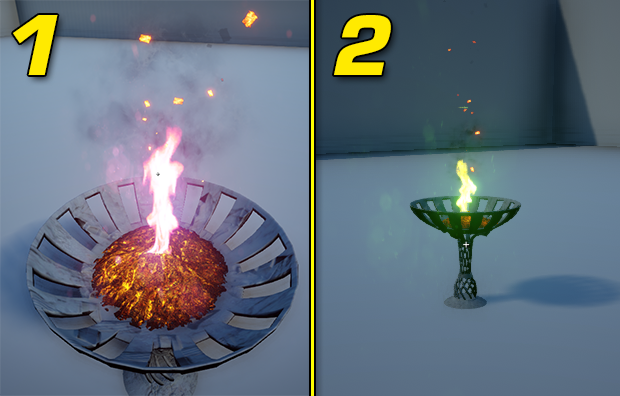
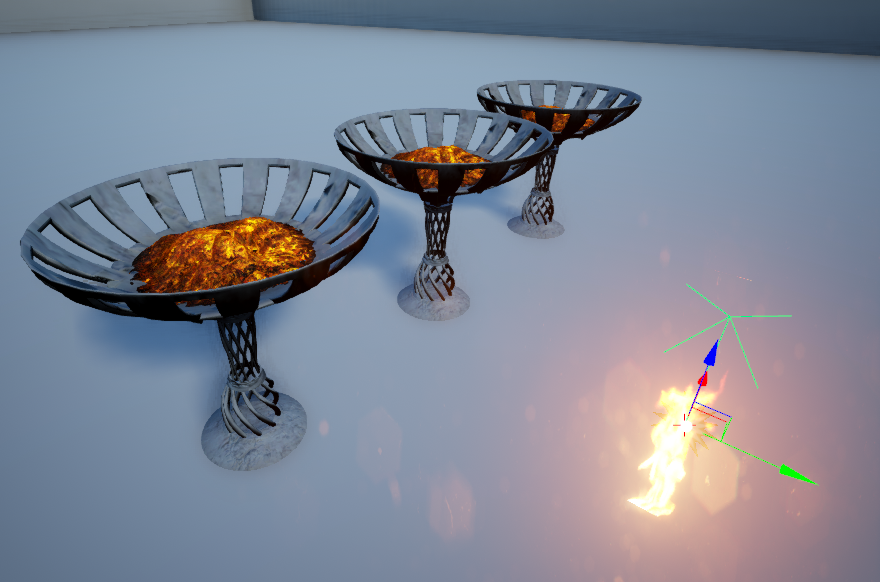
Before using a particle parameter to control position:
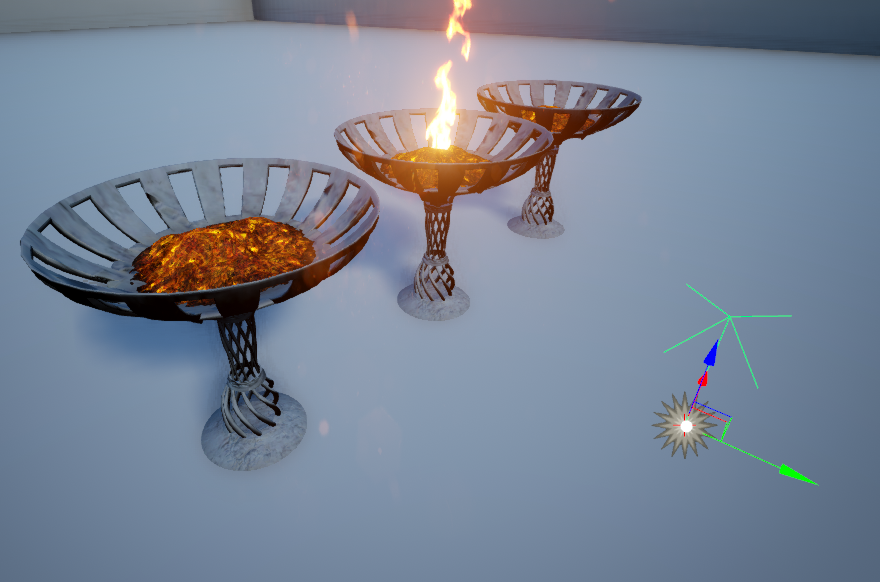
After using a particle parameter to control position:
This demonstration is a simplified example of using particle parameters, there are many uses for this feature which may prove to be a savings for your project.
Using one EmitterActor to place 3 fires using a particle parameter with a unique name on 3 unique emitters in Cascade:
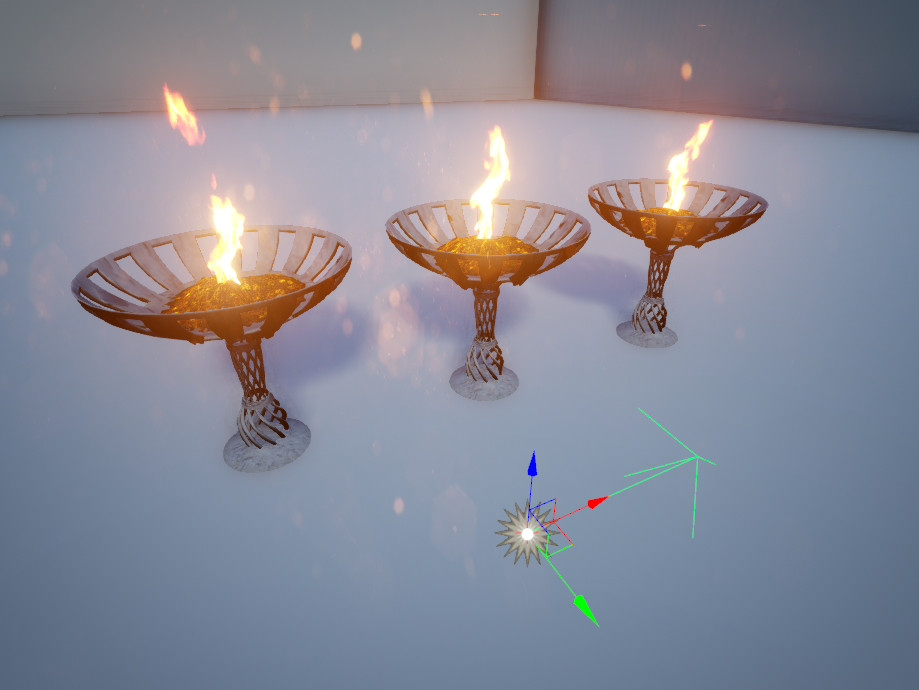
It is essential when working with complex effects to name your particle parameters clearly, returning to an older effect with poorly name parameters can be a confusing process which may waste time deducing how the parameters work. It is possible to use multiple particle parameters to control behavior across several modules in a single emitter or multiple emitters. Try editing color, position, scale, lifetime etc. It can prove beneficial to experiment with different settings to achieve the desired result.
In this particular case a particle parameter can be used to move the position of effect elements around in a scene, reducing emitterActor counts which in turn can help performance and load times. It is also possible to control particle parameters through matinee and game code.