GameBoy Post Process Effect in UE4
Authored by: Alan Noon

Inspired by the the recent Game Boy Jam , I thought it would be neat to experiment with some of Unreal 4′s post processing capabilities. Finally we have all of the power and flexibility we need to accurately recreate primitive LCD displays of the late 80′s!!!
The effect is pretty straight forward. First there’s there’s the iconic monochrome display, capable of a massive 4 different shades of sickly green. Second is the low res nature of the Game Boy’s screen. Third, I chose to add an outline effect in order to make things look more pixel art-y.
For the monochrome, olive toned display, we’ll use color grading in the Global Post Processing Volume.
The blocky, low res look and outline effects will be done by leveraging a couple of post process materials swiped from some of Epic’s Content Example projects.
As this tutorial assumes little to no prior UE4 experience, expect a boatload of screenshots.
OK, let’s walk through it together!
STEP 1: Create a New Project
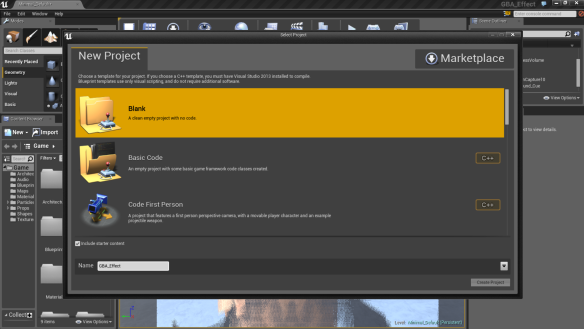
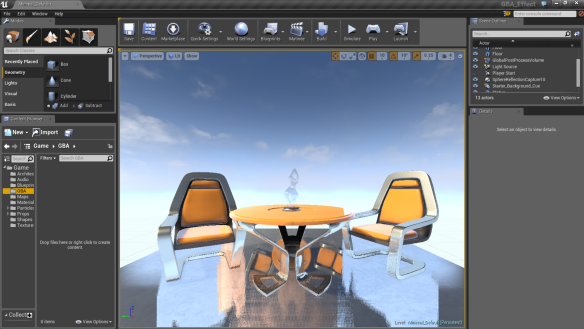
First up, create a new project, making sure to check “include starter content” so you have something interesting to look at. Name your project. You should now see a simple scene consisting of a couple of chairs and a table on a slab, floating in heaven.
Right click in the Asset Pane of the Content Browser and make a new folder to hold your content. I called mine “GBA” for some reason. (We’re actually going to mimic the GB.)
STEP 2: Color Grading
Color grading is an extremely powerful way to control the final look of your scene. Fortunately, it is EXTREMELY easy, (and fun!) to do in UE4.
First of all, we’ll grab a screen shot of our original scene. PRNT SCRN will do, as will the Snipping Tool. In the image editing tool of your choice, (mine is Photoshop,) paste the screen grab into a new file.
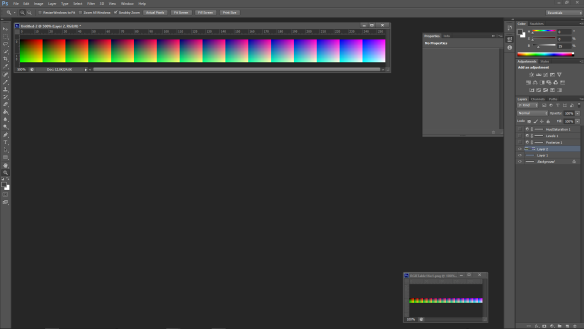
When we do color grading, we’re going to take the default range of colors in our rendered frame and remap them into a new palette. This is done by way of a LUT, or Look Up Table. In our case, it’s a Color Look Up Table. We’re going crush the beauty of UE4′s renderer down into 4 colors of ick. So download and save the image from the link: LUT Texture Example , which will represent the full color, unadulterated spectrum. Load that into Photoshop and then Copy/Paste it into our project’s screen shot image. Anywhere will do really; placement is not important.
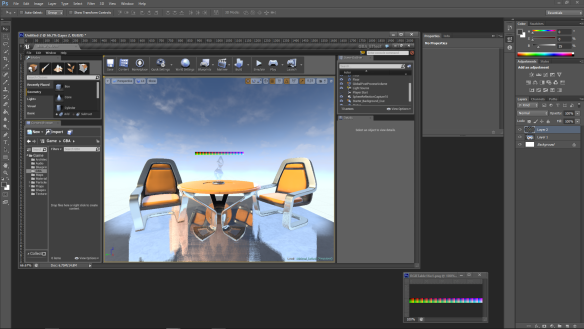
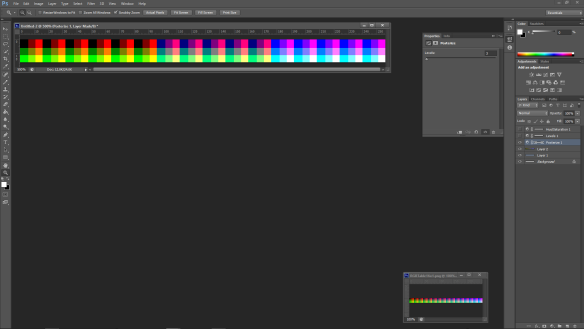
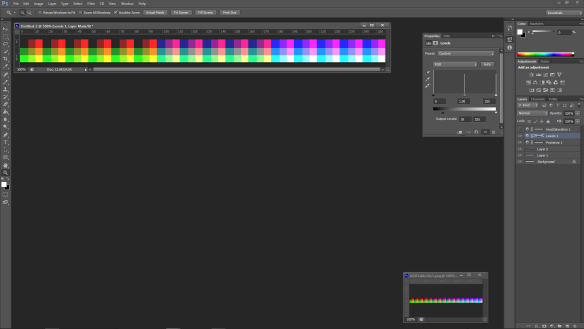
Now let’s mash down those colors! Using Photoshop’s Adjustment Layers, manipulate the image to your liking. I threw on a Posterize to bring the number of colors down, followed by Levels in order to make the blacks not so black, and then Hue/Saturation to impart that characteristic green hue, in that order.
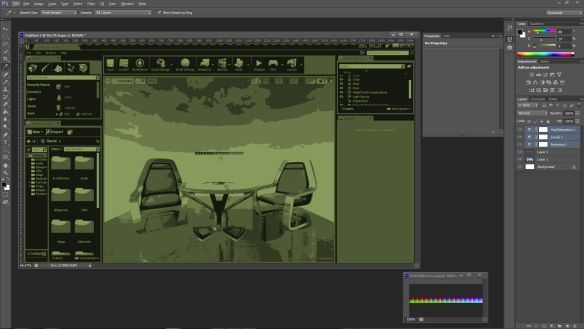
Once the screen shot of our table and chair scene looked suitably Game Boy-ey, I cropped the image to just the LUT portion of the image. Here are the Adjustment Layer settings I used and their effect, step by step:
Original:
Posterize:
Levels:
Hue/Saturation:
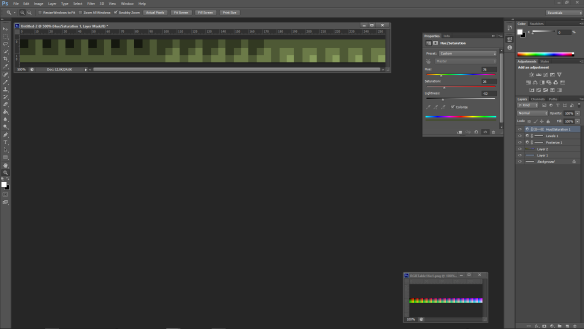
Save that LUT strip out into a format that Unreal likes, and we’re good to go. (I use PNG.)
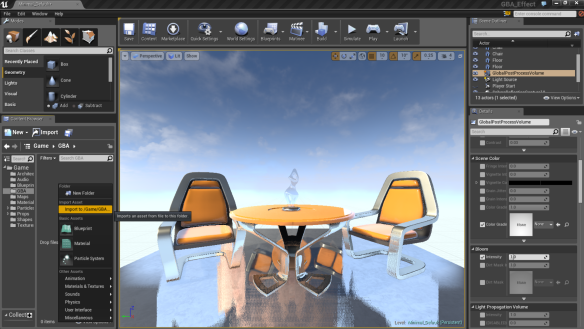
In UE4, select your GBA asset folder, then right click in the right hand pane of the Content Browser. Select “Import to /Game/GBA…” and browse to that LUT image we just saved.
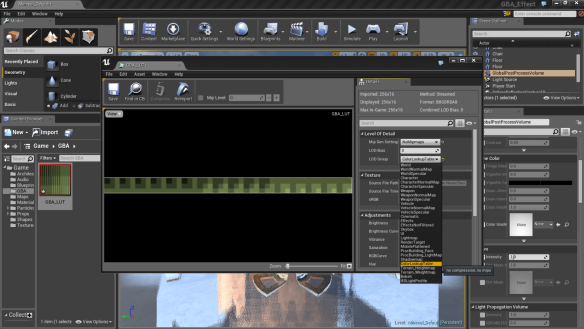
Double click the thumbnail that just appeared so we can edit one of the texture settings. From the LOD Group setting, choose “Color Lookup Table” and click the Save icon in the upper left.
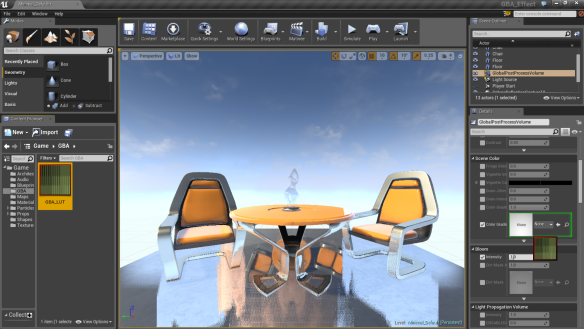
In the upper righthand portion of the UE4 UI, we see the Scene Outliner. Scroll through that list and select “GlobalPostProcessVolume” Guess what? This controls all the fancy post process effects happening in our scene.
Below the Scene Outliner is the Details Panel, which displays the particulars of whatever actor we’ve selected in the Scene Outliner. Scroll down a bit to find the Scene Color group and you should see the Color Grading setting. From the Content Browser, we click and drag our Game Boy LUT over and drop it on the thumbnail that currently reads “None”.
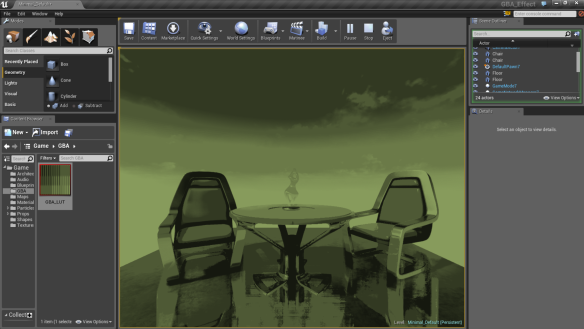
Press the Play button in the toolbar above the viewport, and BAM! We’re looking a lot more like 1998 portable gaming.
STEP 3: Low Res
The Game Boy’s screen res was a whopping 160×144, so let’s downgrade our image some more. From here, I am going to refer to Alan Willard’s great tutorial on how to do just that.
<youtube>
https://www.youtube.com/watch?v=GLJC1qG3oK4
Assuming you followed along as you watched the video, you should have a good understanding of what the shader does and have a material instance of the 8 Bit Pixellize Post Process Material to boot. If not, here’s a neat trick:
PROTIP: You can Select/Copy/Paste Material Graphs and share them via .txt files.
I’ve done just that for you, here: 8Bit Pixellize_Post_Process_Material . Save and then open that text file in a suitable text editor, CTRL+A to select all, and CTRL+C to copy. Now go back into UE4, right click in the Content Browser, create a new material and name it something logical such as “M_Pixellize_Post_Process”
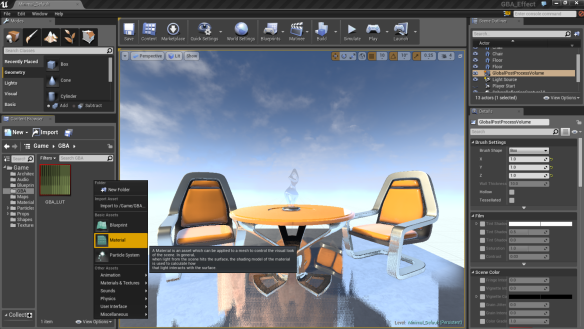
Double click the material icon and the Material Editor will appear. Select the lone material node sitting there and then change the Material Domain to “Post Process” in the Details Panel on the lefthand side of the dialog.
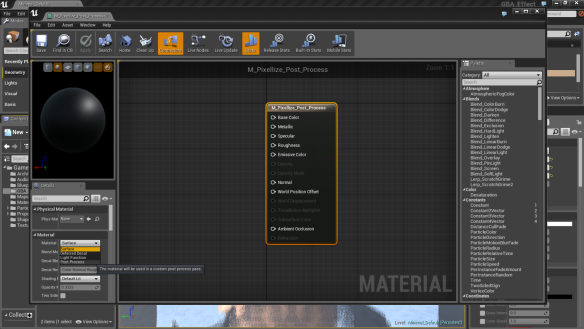
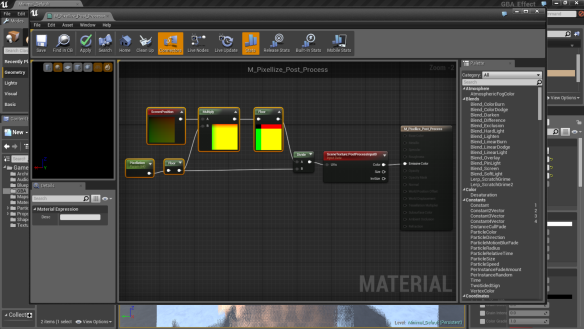
Now click anywhere in the graph view and CTRL+V to paste the contents of the pixellize text file from earlier. After a short pause, UE4 will rebuild the shader graph. Reposition nodes to taste. Now just wire the Color output of the Scene Texture node to the Emissive input of the master material node. Click the Save icon in the upper left of the Material Editor and close it.
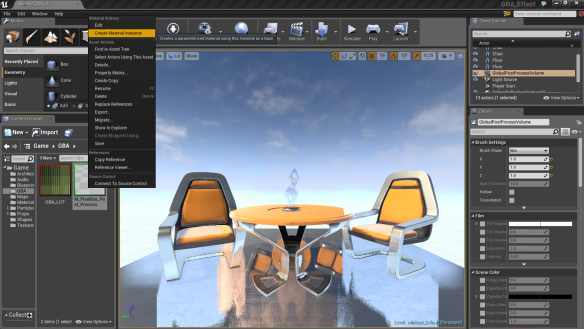
Right click the material we just created in the Content Browser, and choose “Create Material Instance” Press ENTER to accept the name UE4 supplies for you. Right click the material instance and select “Save” This will create a optimized version of our post process material that only exposes the pixellation parameter, which will save us from having to monkey around in the graph of the master material should we want to change the low res look.
With the GlobalPostProcess actor selected in the Scene Outliner, go back to the Details Panel and scroll down to the “Misc” group where you should find the “Blendables” array, currently containing zero members. This is where we can add however many post process effects we would like in order to manipulate our final output. Press the “+” button. Now from the Content Browser, we’ll drag the material instance of the post process shader into the slot that was created in the Blendables Array.
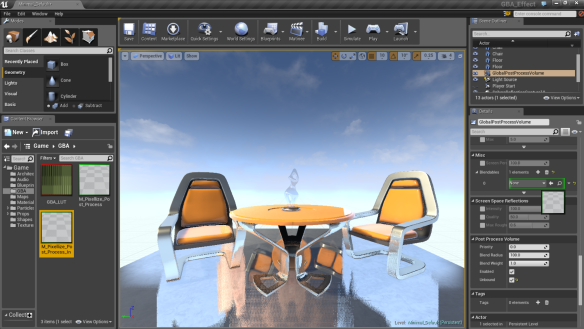
Press Play.
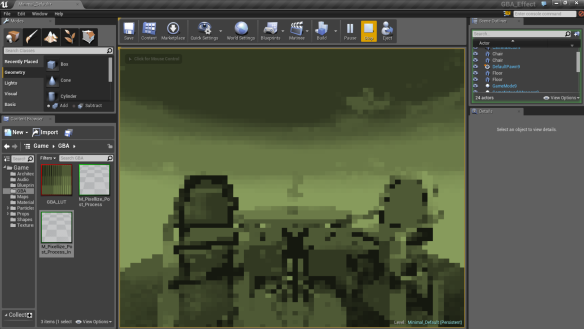
EEEK! A bit too low res. Double click the material instance in the Content Browser. Click the triangle next to “Scalar Parameter” and the Pixellation setting should unfold. Tick the checkbox to enable editing of the field and set the value as desired. I chose 256.
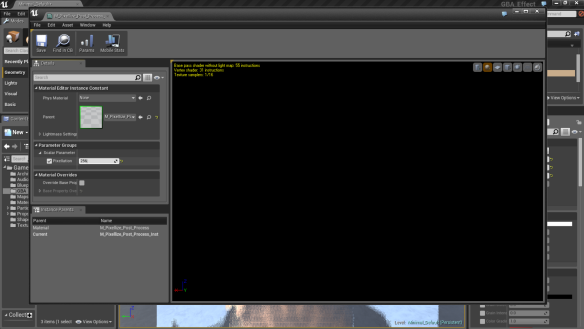
That’s better!
STEP 4: Outline
By now this tutorial is running long, so I am going to take another shortcut and borrow some work from Epic’s Stylized Rendering Content Example, (available on the Content Marketplace!) put together by Kendall Tucker. I am also going to forgo screenshotting redundant UI operations as you can reference the basics up above. Switching to Expert Mode…
In the Stylized Rendering Project there’s a post process material that does an outline effect similar to what we want, though it contains a couple of features that aren’t suitable for our purposes here. So I’ve gone ahead and circumvented that stuff and hijacked the bits we do need. It’s a fairly complex material that I myself do not fully understand, so let’s skip the pesky details regarding exactly how it works and jump to the final result: Outline_Post_Process_Material . You know the routine: Save/Open/CTRL+A/CTRL+C to grab the contents of the material.
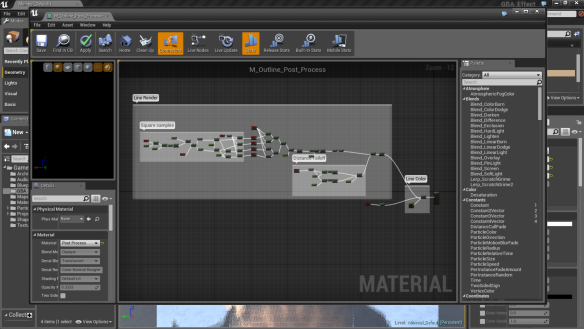
In UE4, right click the content browser and make a new material. Name it. Double click the icon. In the Material Editor Graph, select the material node. In the Details Panel of the Material Editor, change the Material Domain to “Post Process” Click anywhere in the graph view and CTRL+V to paste the contents of the text file in. Wait just a sec, and the graph will be recreated. Drag off of the pin on the right most Lerp node and connect it to “Emissive” on the head material node.
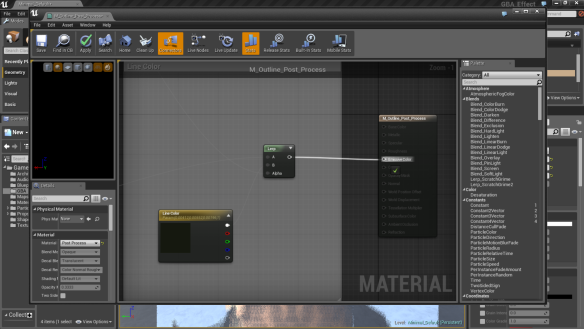
Click Save. Zoom out with the mouse wheel and you should have something that looks like this:
Close the Material Editor and right click the material we just made and create a material instance of it. Save it.
With GlobalPostProcess selected in the Scene Outliner, drop down to the Details Panel and scrolll back down to the Blendables Array in the Misc Group. Click the “+” to add another Blendable to the array, and drag M_Outline_Post_Process_Inst to the new slot. Press Play.
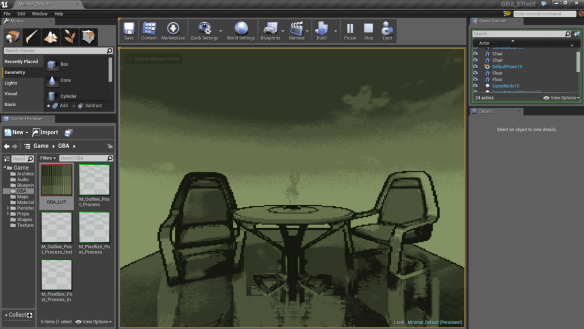
That’s it!
STEP 5: Tweaking
There are all sorts of goodies in the Detail Panel of the Global Post Process Volume, so I encourage you to experiment in there and find some settings you like. For example, I prefer a little more life in my scene so I turned on Grain. YMMV.
I felt our outline was probably too dark, so I went ahead and opened the outline post process material instance to tune the outline color. (I eyeballed 0.070811, 0.095, 0.033771) You can also play with the outline thickness.
Tweak out the LUT in Photoshop to tune the colors. I ended up desaturating mine beyond the initial values listed above. Try reducing the levels of Posterization to make the scene even harsher looking.
Further Work
-
Fixing reflections. You may notice that the outline is not working in the floor plane reflection. I’ll have to look into that.UPDATE!!! Outline reflection has been fixed - Dithering. It would be fun to come up with another post process material to dither the image, adding to that retro feel.
- Motion Blur. The Game Boy was notorious for the amount of blurring that occurred on moving objects. It would be worth trying to duplicate that effect for maximum authenticity.
- Wrap head around how the Outline Shader works.
Conclusion
I hope you enjoyed this tutorial as much as I did making it. With luck, you learned something new and saw how easy it is to dramatically alter the final look of your projects with the post processing features of UE4. Thanks!
UPDATE!!! Game Boy Post Process Effect in UE4 Outline Reflections Fixed
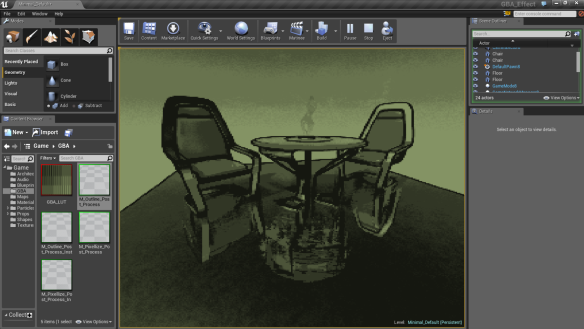
In attempting to recreate the look of the Game Boy, I added an outline effect, which looked pretty good, save for one very noticeable issue: the outline was not being rendered into the reflection on the floor. Turns out, the fix is super simple!
Basically, the outline effect was being applied to the scene AFTER reflections were being calculated. The reflection feature had no knowledge of the outline and therefore did not know to render it. We just need to change the order in which the effect is applied to the scene and everything should be happy. This is done at the material level. Let’s check it out…
Open up the project you created previously, and in the Content Browser, double click the master outline post process material we created in order to open it in the material editor.
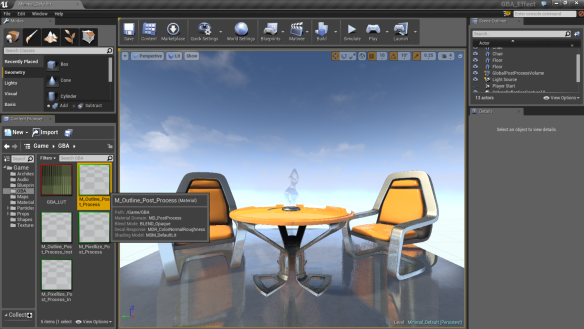
Select the head node in the graph view, and scroll down in the details panel on the left hand side of the Material Editor dialog. Find the Post Process Material group and we see the setting for “Blendable Location” This is where we control at which point in the post process chain this effect will be applied.
There are three options here: After Tonemapping, Before Tonemapping, After Translucency.
The Tonemapping process determines the final color of the scene. Reflections are calculated after that. (Makes sense, right? You want your reflections to match the rest of the scene, don’t ya?) So what we want to do is pick “Before Tonemapping” for our outline material, so that by the time the reflection system does its thing, it sees the outline.
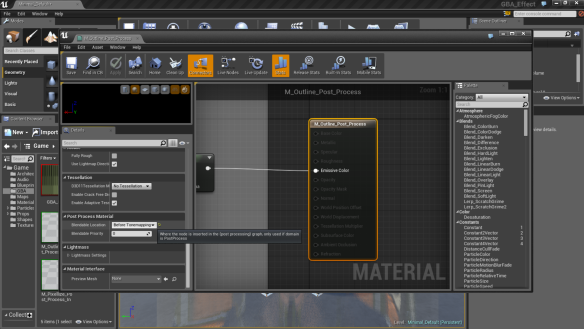
So make that change, save the material with the button in the upper left, and close the Material Editor.
Press Play, and Viola! Outlined reflections!