Extend UserWidget for UMG Widgets
Contents
- 1 Overview
- 2 1: We start of by creating a new Blank Project from the launcher.
- 3 2: After compiling
- 4 3: In your new project
- 5 4: Add new class
- 6 5: Add the Dependency Module
- 7 6: Extending the User Widget
- 8 7: Re-compile your project
- 9 8: Set Parent Class
- 10 9: Compiling Widget and Notes
- 11 Conclusion
- 12 Project Download
- 13 Related Tutorials
Overview
Author: ( )
Some months back i did a tutorial on how to extend a User Widget for UMG Widgets. Now that UMG is more mature and have gotten scientifically better. I realize that the process of extending the User Widget class is much simpler.
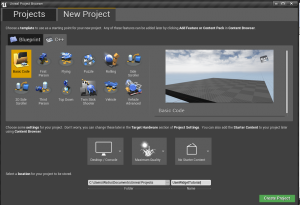
1: We start of by creating a new Blank Project from the launcher.
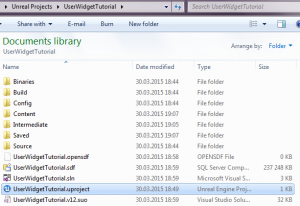
2: After compiling
After compiling the new project and launching your new project you should have something like this in your new project folder.
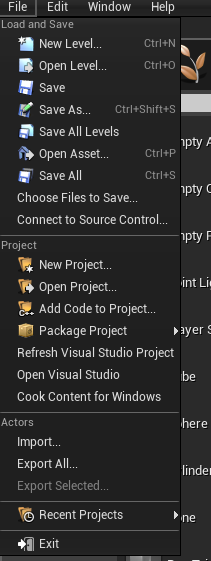
3: In your new project
In your new project in the top left corner Press on the Option «File» File >Add Code to Project
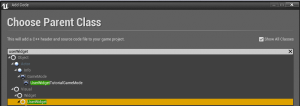
4: Add new class
In the new Window that opens up check «Show All Classes» in the top right corner. And enter UserWidget in the search field at the top of the class list. And Select UserWidget.
Note: I got a «Error» when making this tutorial related to the editor was unable to hot-reload. Closing the Editor and compiling manualy was the solution.
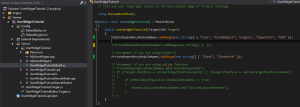
5: Add the Dependency Module
Now in you IDE (I am using MS Visual Studio) you need to edit your Build file for your project. You need to add the Dependency Module «UMG» to the project.
The edited line in you ProjectName.Build.cs file should be.
PublicDependencyModuleNames.AddRange(new string[] { "Core", "CoreUObject", "Engine", "InputCore", "UMG" });
Also you need to uncomment the modules for Slate as shown.
// Uncomment if you are using Slate UI
PrivateDependencyModuleNames.AddRange(new string[] { "Slate", "SlateCore" });
Here is a image showing the edited Build file.
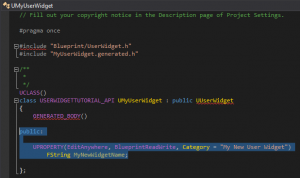
6: Extending the User Widget
In order to see the difference and for the sake of this tutorial we now open the MyUserWidget.h file in your IDE. And we add the following member to our new UserWidget class.
public:
	UPROPERTY(EditAnywhere, BlueprintReadWrite, Category = "My New User Widget")
		FString MyNewWidgetName;
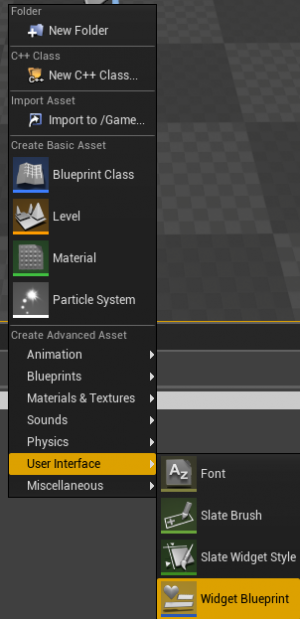
7: Re-compile your project
Now re-compile your project and open up your project in the editor. And create a new Widget Blueprint.
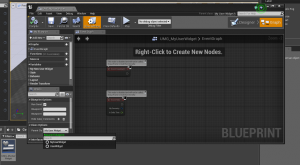
8: Set Parent Class
Open up the new Widget Blueprint and select the Graph in the top right corner. And press on the Class Settings button at the top left. (To the right of the compile button.) In the Details panel (To the bottom left in my Editor) find the category «Class Options» Press on the dropdown menu for Parent Class and select your new User Widget class. (MyUserWidget in this case).
9: Compiling Widget and Notes
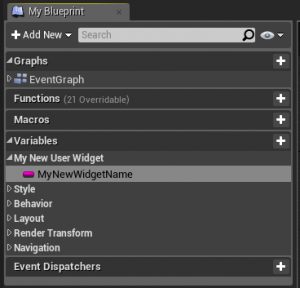
Compile the Widget and you are done. If you can not see the new member we added earlier make sure you have checked. «Show Inherited Variabels»
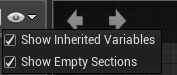
And you will see the new member in your Blueprint Tab.
Notes: That is it this is got alot simpler then before. But i like to list some headers that may come in handy down the road.
	"Runtime/UMG/Public/UMG.h"
	"Runtime/UMG/Public/UMGStyle.h"
	"Runtime/UMG/Public/Slate/SObjectWidget.h"
	"Runtime/UMG/Public/IUMGModule.h"
	"Runtime/UMG/Public/Blueprint/UserWidget.h"
Conclusion
You are done, now you have a simple and fast way to extend the user widget. From everything from Data Storage to picking up "events" delegates and so on.
Hope this was helpfull.
WCode
Project Download
Here is a link to a Project Download it contains all the information displayed here.
As well as a copy of the finished tutorial.
https://drive.google.com/file/d/0B7MMiQc2raPVZmxBYVFqWGpoOGs/view?usp=sharing
Related Tutorials
[Tutorial/ Snippet] Creating a UMG Widget in C++, and delegate example by WCode.
[Tutorial] UMG, How to extend a UUserWidget:: for UMG in C++.