Blueprint Fundamentals
Prerequisites
: Know how to start Unreal Engine 4 Editor and open a blueprint in blueprint editor. If not please follow Epic's YouTube tutorial.
Skill Level : Newbie, scrub, noob, just downloaded UE4 to build my dream game. This tutorial assumes you have no prior knowledge in blueprint.
IMPORTANT : This tutorial is not a Howto for everything you want, it is only here to help you understand blueprint's concept and how it works.
Contents
Introduction
Due to Epic releasing a massive(11 videos) Blueprint Essential video tutorial series , I will just publish this wiki article as is. Feel free to PM me on forum or post a question thread if you'd like to have more specific things explained.
Now that you have downloaded Unreal Engine 4, possibly with the hopes of becoming the next [insert high profit game here] creator, you want to get the most out of Unreal Engine 4.
Unfortunately, this will be a ongoing process since UE4 will continue to evolve and you have to keep up to date. Even this tutorial might be obsolete someday, but maybe not anytime soon.
I believe you see all those node based wonders in Epic's or other YouTubers' tutorials, if you are checking this out, congratulations, you are one of those people who don't just want people to provide answers for you to then hit a major wall later and then abandon your game saying "because UE4 sucks at doing what I wanted".
This tutorial assumes you have no previous programming/scripting knowledge as well, and tries to explain them in a ELI5 manner at the best of my ability.
With that being said, experimenting and starting from simple stuff is the best way to learn, if you encounter something new, or don't know where to find a node you need, there are forums and answerhubs for asking questions. Please be nice and polite when you ask questions, provide what's not working with a screenshot, be specific about your problem, and be willing to try new things or new approaches.
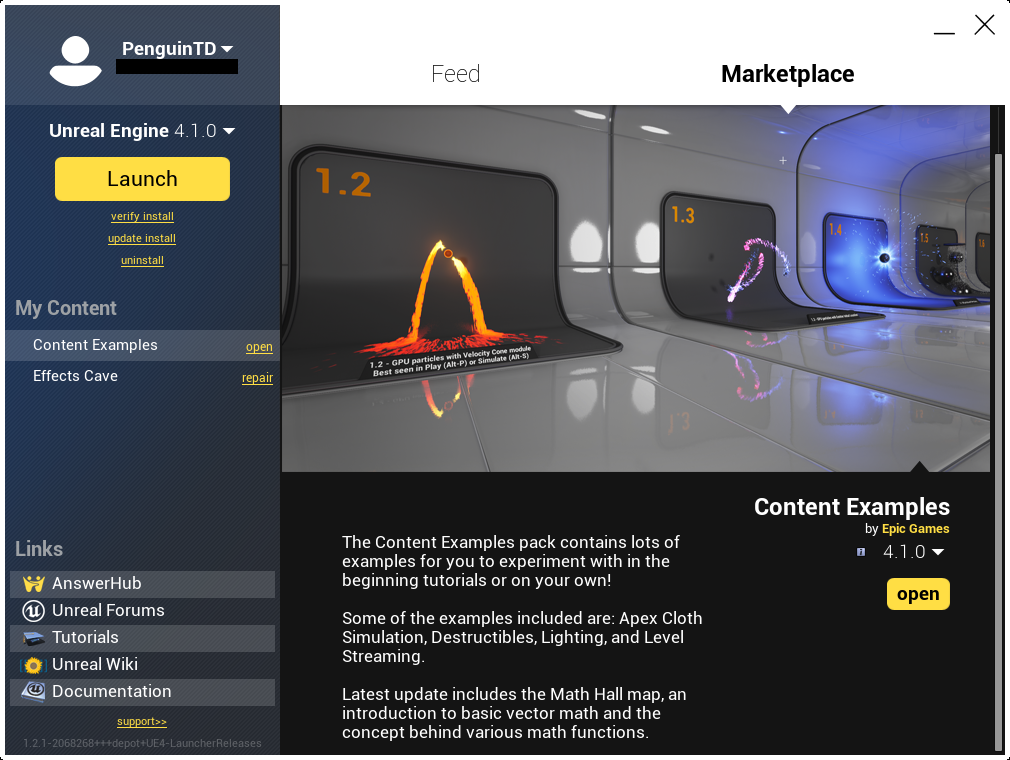
We will be using Content Examples from Epic's Marketplace for all screenshots and explanations. Make sure you download the Marketplace if it doesn't show up in your launcher. Almost all screenshots are captured with Blueprints_Overview.umap, and mostly from the PlayerCharacter blueprint.
Blueprint Editor Components
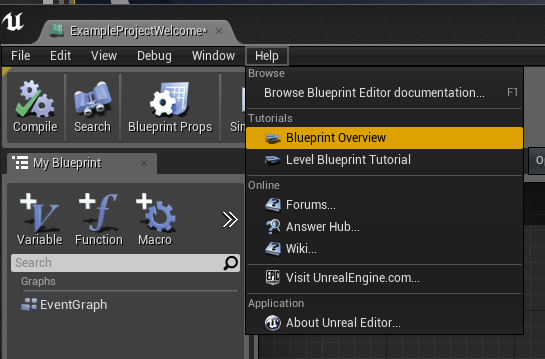
First things first, if you just opened up the editor, and followed any of the video tutorials, you might have noticed some annoying pop-up tutorial that you just closed right away. That pop-up actually contains really useful information. Now that you want to start from the basics, here is how you look at them again.
Editor Layout
Here is a basic layout you'll see most of time when you first open a blueprint for changes. There could be other specific types of blueprints that don't look like this one, but they are generally just laid out differently.
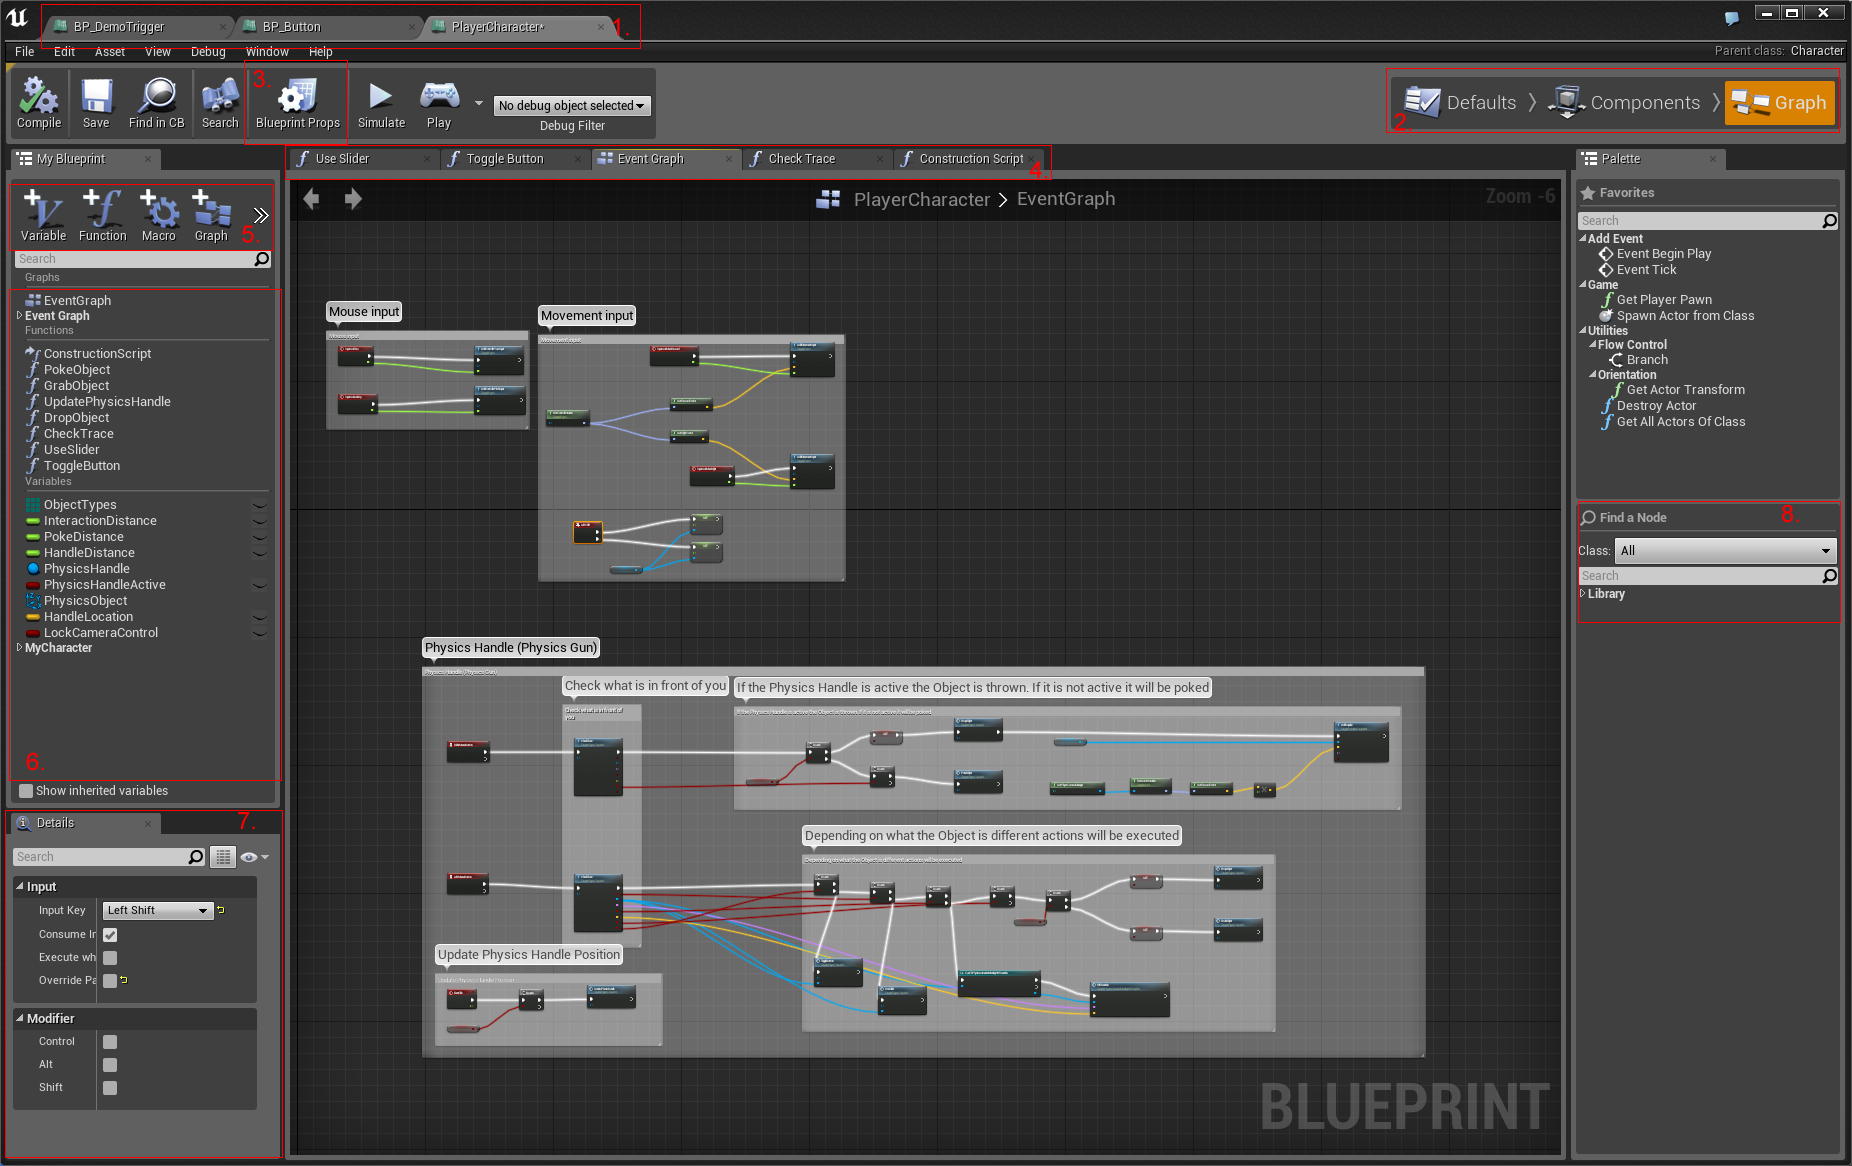
- Blueprint tab: If you have multiple blueprints open, this is where you can switch between different blueprints that are currently open. Take note for the * character at the end of name, because it indicates this blueprint has changes and has not been saved yet.
- Modes of a blueprint: Where you can choose to change default values, add/remove components, and edit blueprint graphs.
- This button only appears when in the Components/Graph mode. It will let you modify some important things about this blueprint in the details tab(7). But most importantly, it'll let you add interfaces.(Interfaces will NOT be discussed in this tutorial, but knowing where to add them is basic knowledge.)
- Graph tab: Functions, macros, the event graph, and the construction script that are in this blueprint can be opened and switched here.
- Where you create new stuff (variables/functions/macros/graphs/event dispatchers), except components and custom events.
- Where you can rename/delete stuff, or pick them and edit their content.
- Where you can change selected item's options or values.
- Here you can search for a node when you can't find it with the context sensitive menu.
Node and Graph
Node color, node type
Blueprints have distinctive color coded nodes. It is consistent for variables, functions, etc.
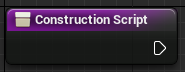
- A purple node means you can not delete it, you get at least one of this type of node in the construction script or a function.
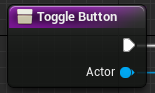
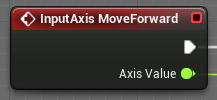
- A red node means the starting point of a execution event, where events could start running simultaneously with other events (with some exceptions).
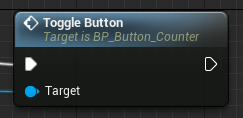
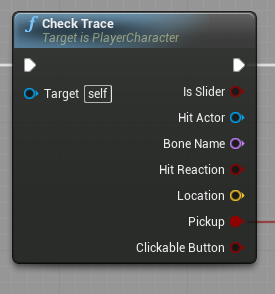
- A blue node is usually a function/event (see different icon used) node where you do something with one or more inputs, and then it could have no output (Destroy Actor), or many outputs. In the screenshot below, ToggleButton is an event, while CheckTrace is a function.
- A gray node is a macro, collapsed, or flow control node.

- A green node is usually associated with Get[Something].
- A cyan node (with dot and arrow icon) is trying to convert objects from one type of object to another.
There are other colored nodes that do different things, but the ones above should cover pretty much 90% of the cases when you start using Unreal Engine 4.
Execution pin/line
Here is a simple graph.
An execution pin is a pin on the side(s) of a node, it's usually wedge shaped that indicates the execution direction (to the right). Most of the nodes have one input and one output.
When you connect execution pins, they form white lines. When starting from a red event node or a purple function start point, they run with the white line in the order you connected them. Any nodes with input execution pins disconnected will not be executed.
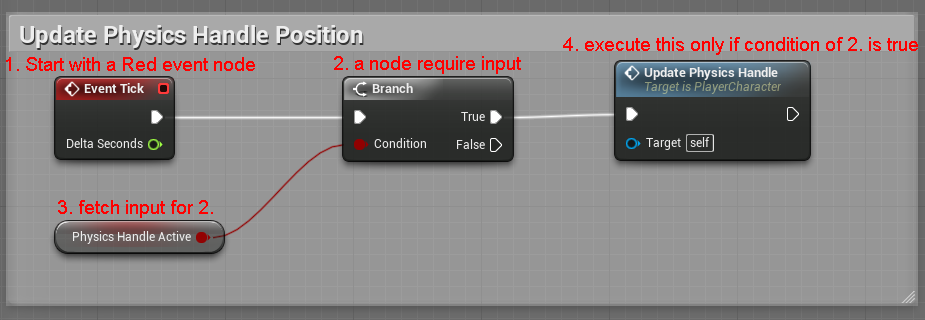
With the above graph, we read it from left to right following execution pins and white execution lines.
- We start with EventTick, which updates every frame.
- We then want to check if PhysicsHandleActive is true or false.
- Since 2. requires input data, we fetch the data from data pin input, thus we cause the GetPhysicsHandleActive node to execute.(Note that 'Get' in name will automatically be trimmed by the editor, but when you search for it in context menu, you can still type in GetPhysics to narrow down your search result.
- If the result of 2. is True, we then want to Call the event UpdatePhysicsHandle.(Note: Target data pin is left to default value "self", we will explain this later.)
Data pin/line
Data pins provides inputs and outputs. Unlike the execution pin, their type must be matched to connect. Ie. an integer input can only connect to an integer output. And they are colored with its data type.(Explained in the next section.)
Data pins do not necessary belong to a node with execution pins. Something like multiply 2 vectors, or a Green reference/value getter does not have execution pins. But those nodes are only executed when their outputs are eventually connected to a node that does have execution pins.
Below is a simple example:
Construction graph
Construction script/graph are a special graph the only runs once when an object is created. That includes dragging into the editor, or being dynamically spawned using the SpawnActorByClass node. Please note that you should NOT spawn anything in a construction script because every time you drag or change values of an object already in the editor, the construction script will be run again to reinitialize the object. It is a special condition while using the editor, so take extra care when you are using construction script/graph.
Difference between Macro/Collapsed Graphs/Function/Events
Epic has this really nice blog post explaining things in detail, maybe not ELI5, but certainly check it first.
https://www.unrealengine.com/blog/managing-complexity-in-blueprints
So my ELI20+ description would be as following:
- Collapsed graphs: This is the most simple one, as it serves no other purpose than making your graph cleaner and easier to read. You can adjust the amount of input and output to reflect actual usage. It's limitation depends on what context you are in. If it's in a function graph, then that function graph's limitation applies to this collapsed graph as well.
- Macro: It is pretty much like collapsed graphs, but with some differences. A macro could be shared to different BP. It might not be guaranteed to run in everyone of them, so there are some limitations to boost compatibility. Right now you can't create a timeline or add component nodes in a macro, but Epic seems to want to solve that. And a Macro can not have another Event inside it's graph, because there could be more than one of the Macro in your graph and you can only have one event node of that specific event at any given time.( ie. you can only have one "BeginPlay" event in all the graphs of a single BP and this is true for all events. )
- Functions: In 4.2 you can create libraries and share them like Macros. They are called instantly and are expected to return really quickly, so although you can have multiple inputs and outputs, slower nodes are prohibited. It's a design limitation to prevent people from abusing the function's instant call property.
- Events: To quote my own explanation in this forum thread : "In a much simplified sense(from my understanding, Epic guys feel free to correct me if I'm wrong), events like its name are a starting point of any independent tasks in a task queue system, that's why it was given Red color(most easily spotted even zoom out of graph). And call event node will have no return values, which means you can't and not allowed to depend on this event call's result, you fire it and it will do it's thing, just wait and profit."
variable and data type
A game is essentially a data processing program, so you will need to store data like speed, ammo amount, who controls this character, etc. There are simple data types that save values only (like integer, float, string/text, vector), and also more complicated data (like array of values, reference to class or object, and array of references).
What is variable and reference
In short, variables are what we use to save anything we would like to reuse later on. For example, what is our current speed when we get hit by a car? Or, who is the guy that just headshot your team mate? Or which primary and secondary weapon do I currently carry? We need to save them somewhere in order to make judgement calls later, so we can keep some of previous momentum and use it in impact ragdoll animation, or print kill messages that pop on your HUD, or what kind of weapons can I fire.
However, there is a big difference when we encounter a type of variable, which needs special care. That is when we store something complicated (with light Blue icon for variable type names for objects), we don't make a copy of them and their values to save with our BP's object variable. Instead, we only keep a "reference" pointing to where in memory we can find it so we can fetch its data without using double the amount of memory. So next time if someone mentions that you can keep a "reference" of an instance/object of your BP or native class, it means to create a variable (or array) when you choose the variable type in the "object" section.
But, use by reference has its toll, which is an object is not truly destroyed when there is still someone else keep a reference to it. Because the game engine knows that someone might try to fetch data at any time. So if you only want to temporarily keep a reference to an object, remember to set the reference variable to none (default behavior when you set object variable with no input) after you finish using it.
make array variable
There will be a time when you need to save a bunch of things in one place, say an inventory system. You would need to create an object array. How do you do this? When you create a variable, after choosing the variable type, simply click the array icon on the side. It will make your variable an array of the same type.

native or blueprint class/object
There is a distinctive difference when you want to know if a certain object or class is a Blueprint or a native C++ one. They are important because of the following:
- A blueprint related node will cause your graph the need to recompile if that blueprint is updated. Say you have BP_Player use a CastTo node that cast to BP_Item. If BP_Item is from a blueprint and you modify it, BP_Player will be flagged to require recompile. It is possible to have a situation that you created circular dependency, it would work in the PlayInEditor mode, but would sooner or later cause a problem.
- A native C++ class will certainly run faster, but you won't be able to change it unless you have the source code environment setup.
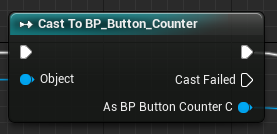
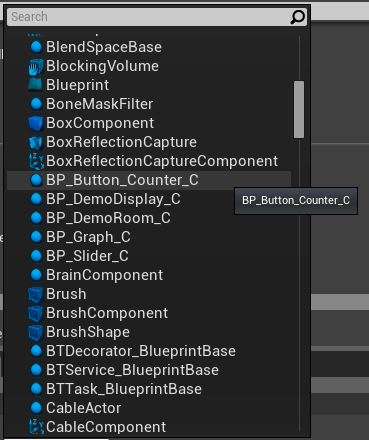
- When you try to choose an object type or class type, their name will be different. Where blueprint ones will have "_C" postfix in their name, just like the image below.
"self" explained
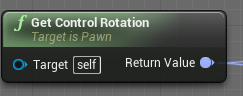
Ok, this is an important topic. Most folks that do not have a programming background will be really confused by this. For example, in this node, target's default value is "self".

What does it mean then? For every blueprint class, it doesn't matter what kind of blueprint, it doesn't matter if it's in a function or a macro or construction script, "self" means whatever object in the game that is currently running this blueprint node. Not every node will automatically translate and guess the target. In our screenshot above, it says "Target is Pawn". It's only half true, because what this node resides in is a PlayerCharacter blueprint that inherits Pawn. Every time this node is run, it will only be run from a PlayerCharacter object. There could be player1 and player2 in the same game, what "self" means depends on which player received that event. If it's player1, then at that moment, "self" means player1's controlled PlayerCharacter object.
flow control explained
Flow control for scripting newbies can be hard, it's common sense for programmer, but might not be obvious for beginner. For an ELI5 explanation, flow control in visual script can be refer to how you control the execution line mentioned above. Remember that execution line only goes in one direction? What happen if you need two of the same event(say OnBeginPlay) to do things like equip different starting weapon for different player class in class based shooter? For situation like this, you can always branch execution base on player's class choice. So literally, you can make execution lines branching out like tree branches but still using the same event. We still only go in one direction, but may now go down different path base on conditions of your game/player status.
There are many nodes in this category, for beginner, I choose several fundamental ones to talk about. Once you get a hang of them, the rest of flow control nodes are used in similar if not identical ways.
branch(and switch)
First, branch, this is probably most used flow control node you will ever run into, like its name, branch makes execution branch into two different execution flows based on an boolean(only True or False) condition. I've seen people manually checked the condition checkbox on the forum, or does not connect anything to it. Make sure you do NOT do that, repeat after me, "I will always connect a boolean variable or function output to a branch node." The reason being if this condition pin is manually checked or left not connected, it will only go to one of the output flow, you might as well delete the other execution flow branch and remove that branch node entirely.
This node is so useful that any design decision when you run into "if some condition is true, do this, otherwise to that" , this is the node you want. Be it health lower than 10% of max health to start walking slow and limpy, or if you are within a AOE spell range, to things like can a player respawn, all of those will use this branch node. You just have to use node that generates a boolean output, say a ">" or "SingleLineTraceByChannel", and then do what you would like things to happen down the lines on True/False execution pins base on the condition you checked.
There will be times that you run into a status checking, where the status are mutually exclusive, you will want to use a switch node(mostly on an Enum variable). Ie, your character will only be in one of walking/inAir/swimming state, and never 2 of those at the same time. Consider it a branch node that have more then 2 branches, and usually have a clearer execution pin name to tell what to do down the line.
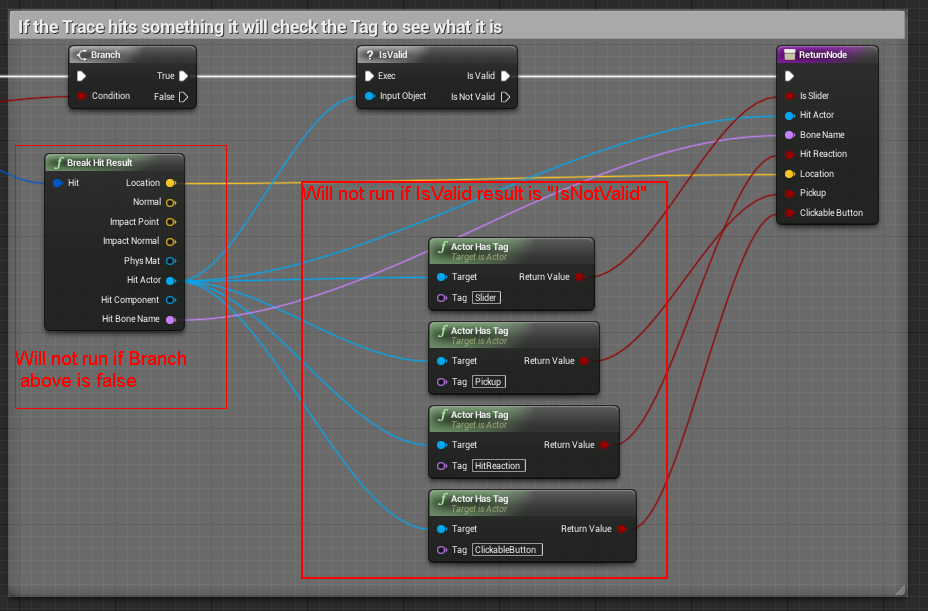
isValid
isValid is probably the second most used node. Any time you call a function that returns objects, but that function do not have a boolean output(say a getController node), you have to check if the function returns an object reference that is actually valid and exists. Why? Because when you call some of the functions, the returning object might actually be destroyed right before you call the function. So you can not and should not assume an returned object exists if it is not "self", that's also why you need to always check return value, and only do casting or call object relevant functions after a isValid check, even those object references you save for later use.
There are, a few exceptions that you can safely assume object will exists.
- When a blueprint object running its own events/functions, root component will always exist. And most of the time, unless your game have component destroying mechanism, other components you manually put in component mode will also exists.
- A Player controller can always get a HUD object.
- server side event can always get a valid GameMode object.(Limit only to exposed events in blueprint to date, this might change in the future.)
If you are not sure, just check, this node is pretty light to run.
forloop
A forloop node is a node that lets you do repeated things for all items in the array you feed to it. The most simple example would be showing score board, where you need to go through all players' state and show how many of their kills and deaths so far. So the execution flow will keep coming back to this current node until all the elements in your input array gone through the same path down LoopBody pin.(So that you don't have to wire the same thing 10 or 1000 times for each of them.) When a forloop finished all the elements, it will run the execution line that connected to it's "completed" execution pin.
select
Select does NOT affect execution flow, does not belong to Flow Control category, why mention it here? Because it's useful. A switch node branch into different execution flows, while a select choose one of the data pin inputs that you feed to it. A novel example would be, ' "I can already set the character to exhausted state, how do I set the max movement speed on top of existing walking/running state?" . Usually you will just use branch and do multiple of them to narrow your path and then have multiple set max speed nodes for different possible conditions. If you have a proper Enum setup, combined with this select node, you can easily set max speed with a much simplified graph. It's under Utilities category, and have opposite icon of a switch node.
gate
Gate node is usefully for toggling operations, in official blueprint video tutorials, it was used to decide if a text component will show up when approach a lamp as on screen prompt. This node could be a bit confusing in beginning, since it has 4 input execution pin and one output execution pin. So imagine this is like a door with 3 buttons, where one will open it, one close it, and one will invert( toggle ) that door's current status, say if this door is currently open, this button will close it. Any execution line connected to enter pin, will trigger a check to see if this door is open or not. If it's open, execution flow will continue to run from exit pin, otherwise, it will stop and finish here because door is closed.
Be careful though, this node has a embed variable that persists with whatever blueprint object that owns it. If you want to create a event that should only do once and not repeatable, do not use this node.
Good practices
These are only recommendations. The conditions may change when UE4 gets some major update later down the road, but in some sense these are pretty version independent practices to follow.
Limit what you do with OnTick
Remember, OnTick fires between every frame, so anything that is slow to run, usually has a better way to do it. For example, instead of constantly scanning with OnTick, try using player interaction or BP communication to trigger an event. When you need to use OnTick, make sure it's something quick to do. If there are results you don't have to depend on, make that part of graph an custom event.
Bind input action/axis and not key stroke
This is no brainer. Everyone wants custom binding to be available. If you go on Steam and check some indie game's forum there will most certainly be complaints if the control keys are fixed and the game does not allow custom bindings. UE4 has this build in for you, so make sure you use this well, or suffer later on to search through all your BP graphs to try to locate and replace key stroke events. Custom binding is in LevelEditor->Edit menu->Project Settings(Pops a dialog)->Engine section->Input.
comment your node/graph block
This is also no brainer. Use comment blocks (select a bunch of nodes and press C) to explain what you try to do. Saves a lot of time later trying to understand your own "clever" solution. Also, in a collaboration environment, you would want other people to clearly explain their graph just like other people would want you to do the same.
CastTo dependency and workaround
This is a tricky issue, sometimes when you cast around in blueprint, you will run into circular dependencies. Ie, compile one blueprint and editor mark another blueprint requires to be recompiled. If you have this happening, it will likely break when you want to run a standalone game. There are usually a few methods to work around, here is 2.
- Before sent events with object reference to another blueprint, if you only want to access basic info(like location), then only cast to native class(ie Actor), it will still have function available to you and will not cause dependency. That being said, if your blueprint is being castto a lot, you might want to consider making it a native class.
- Make sure you understand the hierarchy of Unreal Engine 4's classes, it's out of scope of this wiki but when you pass object reference, try always pass up to possible owner of this current blueprint. Say, pass Pawn reference to GameMode, HUD to PlayerController. When you maintain a more strict relationship of how reference can be used, it will actually help you to understand how Unreal Engine 4 works.